Ashmodan
Member
 I have too much free time.
Posts: 46
|
Post by Ashmodan on Jan 19, 2019 16:32:14 GMT -5
I tried making a maxis match hair from scratch (it's the first thing i made from scratch btw). everything was fine until came the part when i had to uv unwrap. in fact, everytime i try to unwrap the result is very weird and i have no idea how to unwrap properly. i looked for tutorials but nothing really helped. here's the blend |
|
|
|
Post by inabadromance on Jan 19, 2019 17:22:52 GMT -5
Hi hi! Firstly, i want to congratulate you on your BEAUTIFUL hair! I'm really impressed since you mention this is your first creation from scratch. It's pretty great AND LOW POLY which is a-ma-zing. Most users have a really hard time doing this the first time, so you nailed it! :D Secondly, you should set up your workspace: - I would clone a base game hair that looks similar to your hair (it's going to make it easier to map depending on how the texture has been laid out). I personally cloned the "long straight", but you can pick any other you want later, this is just to have a general idea where to place and how it's going to look. - After cloning, export the texture. Go to blender and insert the image in blender going into "image / OPEN IMAGE" - Luckily you have all the parts in different groups and that makes it a little more easy to do! Now you need to select each part, apply the texture and create/position the UV: A) Select the first piece (either from the list) or by right clicking it on the 3D view in object mode. Go to MATERIALS , and select from the drop down menu "Base texture". B) Go to the next tab ("Texture"), Scroll down to the second drop down menu and select the new texture image. NOTE: In the image the texture is displaying correctly because i mapped that part already prior to this. But it'll look like this once mapped. If it's not mapped, it will remain white, don't worry about it. C) Unselect all these three to see the texture (once mapped) more clearer.  Now, you need to actually map the piece. Go into EDIT MODE, press A to select all and position the camera so that the piece you're working on is fully in front of you (not on the side). If i were to map the next piece to the one shown in the picture i would rotate the camera so it is position just in front of me. Then go to UV tab, unwrap and pick "cylinder projection". This is the way i suggest by testing it all the UV mapping methods. - Once you apply the method, you'll see the piece mapped in the UV screen. From there, position the piece accordingly inside the texture. You'll see it update it live on the 3D view. Additional notes: I recommend using the PROPORTIONAL EDIT tool to mold each piece if needed if you need any of them having more curves. You can check out THIS VIDEO to learn how it works. It shows on how to apply this on your mesh but the mechanics are exactly the same for UV editing. I'd do all pieces and ONCE i'm happy which how the mapping is done, join them all. I suggest doing back up of this just in case.D |
|
Ashmodan
Member
I have too much free time.
Posts: 46
|
Post by Ashmodan on Jan 19, 2019 20:36:05 GMT -5
well, thanks! so i followed what you said and i could create decent mapping. 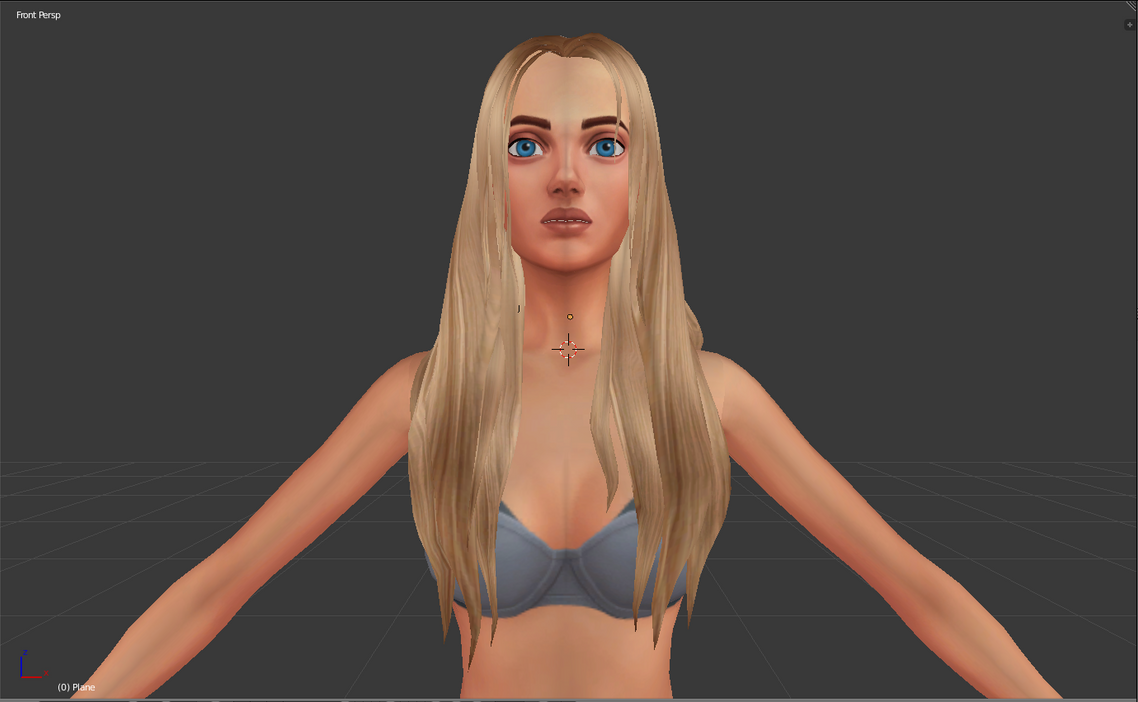 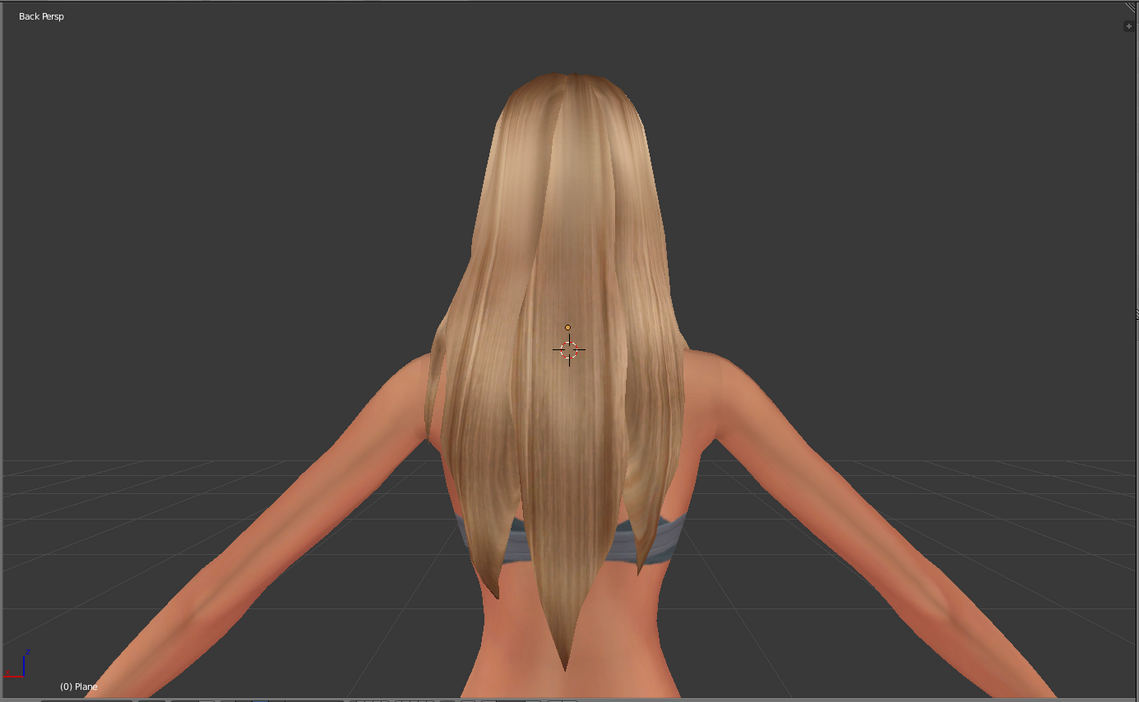 it's not perfect but it's the best i could do. i'll just have to rig and vertex paint it and it'll be done! |
|
|
|
Post by Mathcope on Jan 19, 2019 20:51:17 GMT -5
I'm with Inabadromance here, this is pretty impresive for your first hair mesh  . I think it looks awesome! |
|
Ashmodan
Member
I have too much free time.
Posts: 46
|
Post by Ashmodan on Jan 19, 2019 21:33:47 GMT -5
thanks  i'll probably open a studio or a simblr for my ts4 stuff. what i originally planned to post on it is conversions, but because i'm currently waiting for a specific game to come out and i was bored and had nothing in mind so i decided to try something new and actually creative. and i'm myself pretty proud of how it turned out. so, original meshes probably won't be my main things, but i'll definitely make more in the future. |
|
|
|
Post by Metalfenix_Raf on Jan 19, 2019 21:39:08 GMT -5
hair meshing must be one of the most complicated things to do on this game (the first one would be doing objects with animations/complex animations). I don't have the patience to tackle a project like that.
|
|
Ashmodan
Member
I have too much free time.
Posts: 46
|
Post by Ashmodan on Jan 19, 2019 22:14:30 GMT -5
well i just followed one tutorial to find out how to make hair in blender and this took me 2 days to be done (mainly because i made rather long pauses between, but otherwise it would probably took me 10 hours to be done, so it's not that much imo)
|
|
|
|
Post by inabadromance on Jan 19, 2019 22:55:09 GMT -5
yay! that's pretty nice. you've learned the basics and that's going to help you out a lot. uv might be tricky depending on each mesh. I suggest playing with propositional edit, and flipping the directions of some strands to make it look different. but you're good to go, good luck!
|
|
|
|
Post by jurisprudence on Jan 21, 2019 16:30:22 GMT -5
I'm with everyone else. That hair looks fantastic, and it being your first attempt is just astounding. I consider myself to be both pretty damn sharp and highly creative, and in all sincerity I am truly HUMBLED and floored by every creator who has the ability and skills (which I have not been able to master) to mesh and do everything else necessary to bring these beautiful hairs, clothing and objects into our games. BRAVO!!!
|
|
Ashmodan
Member
I have too much free time.
Posts: 46
|
Post by Ashmodan on Jan 28, 2019 8:37:13 GMT -5
EDIT: i have another problem. i'd like to do the uv_1 but whenever i try (with data transfer) the hair deforms with the shoulders (and upper chest width in general) and i don't want that and whenever i try to edit it it ends up even worse. could someone possibly help? here's the new blend(btw i edited the initial mesh and decided to make it a male hair) |
|
|
|
Post by mauvemorn on Jan 28, 2019 9:45:14 GMT -5
Hi. If you look at the uv_1 template, you'll see that it is stretched in the shoulder and neck area. It is the reason it looks so weird, but its normal. Your uv_1 map works fine in game. The only thing I would suggest you to do is to choose Nearest Face interpolated instead of the default one. As you see, the result is a bit better  |
|
Ashmodan
Member
I have too much free time.
Posts: 46
|
Post by Ashmodan on Jan 28, 2019 10:03:05 GMT -5
may i know which hair you used as base for data transfer?
|
|
|
|
Post by inabadromance on Jan 28, 2019 11:27:01 GMT -5
aaaa so pretty! i'm all for long hairs for males. there's a lack of that :D
|
|
Ashmodan
Member
I have too much free time.
Posts: 46
|
Post by Ashmodan on Jan 28, 2019 12:01:57 GMT -5
yeah i know x) it was supposed to be a male hair since the begining but for some reason i used a female base at first.
it's supposed to be a hair of a specific video game character i love.
|
|
|
|
Post by mauvemorn on Jan 28, 2019 12:26:45 GMT -5
I used head+torso instead. - Unfold rig. Make head and top selectable ( 1 ). Choose head and duplicate it with Shift D. Click in 3d view to finish the operation (but don't move the mouse or the mesh will move, too). Do the same with top. Then select top.001 and shift-select head.001, combine with Ctrl J ( 2 );
- Choose s4studio_mesh_1. Add Data Transfer. Choose head.001 as Source object and Nearest Face Interpolated;
- Switch to Edit mode. As you see, there are stretch faces. Select any face on that back strand ( 4 ) and select the whole thing with Select - Linked ( 5 ); - Select these stretched faces in the middle. Disable Sticky Selection Mode ( 6 ). Then switch to vertex select and, holding Ctrl, deselect vertices on one side ( 7 ); - Move vertices from one side to another with G X ( 8 ). One unwanted vertex will follow. Once the rest is in place, select this stretched edge ( 9 ) and move it to the side. Select these 2 vertices and put them in their right place; - Delete head.001. Transfer uv_1 map from s4studio_mesh_1 to s4studio_mesh_2 and s4studio_mesh_3. |
|


 . I think it looks awesome!


