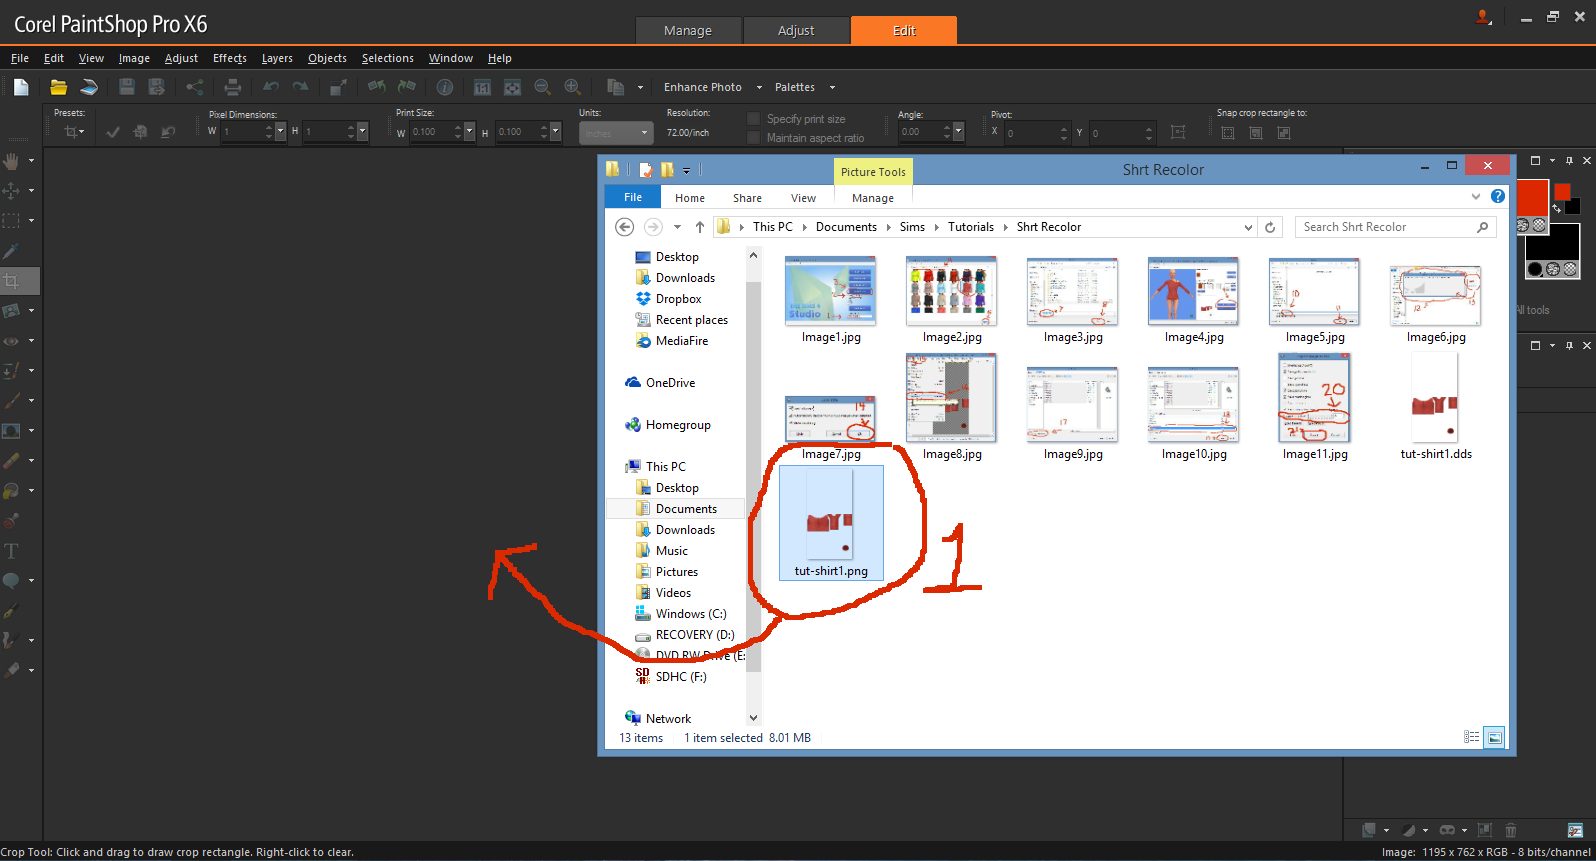
Part III -Adding the Tank Top Strap-Let's go back to Paint Shop Pro.
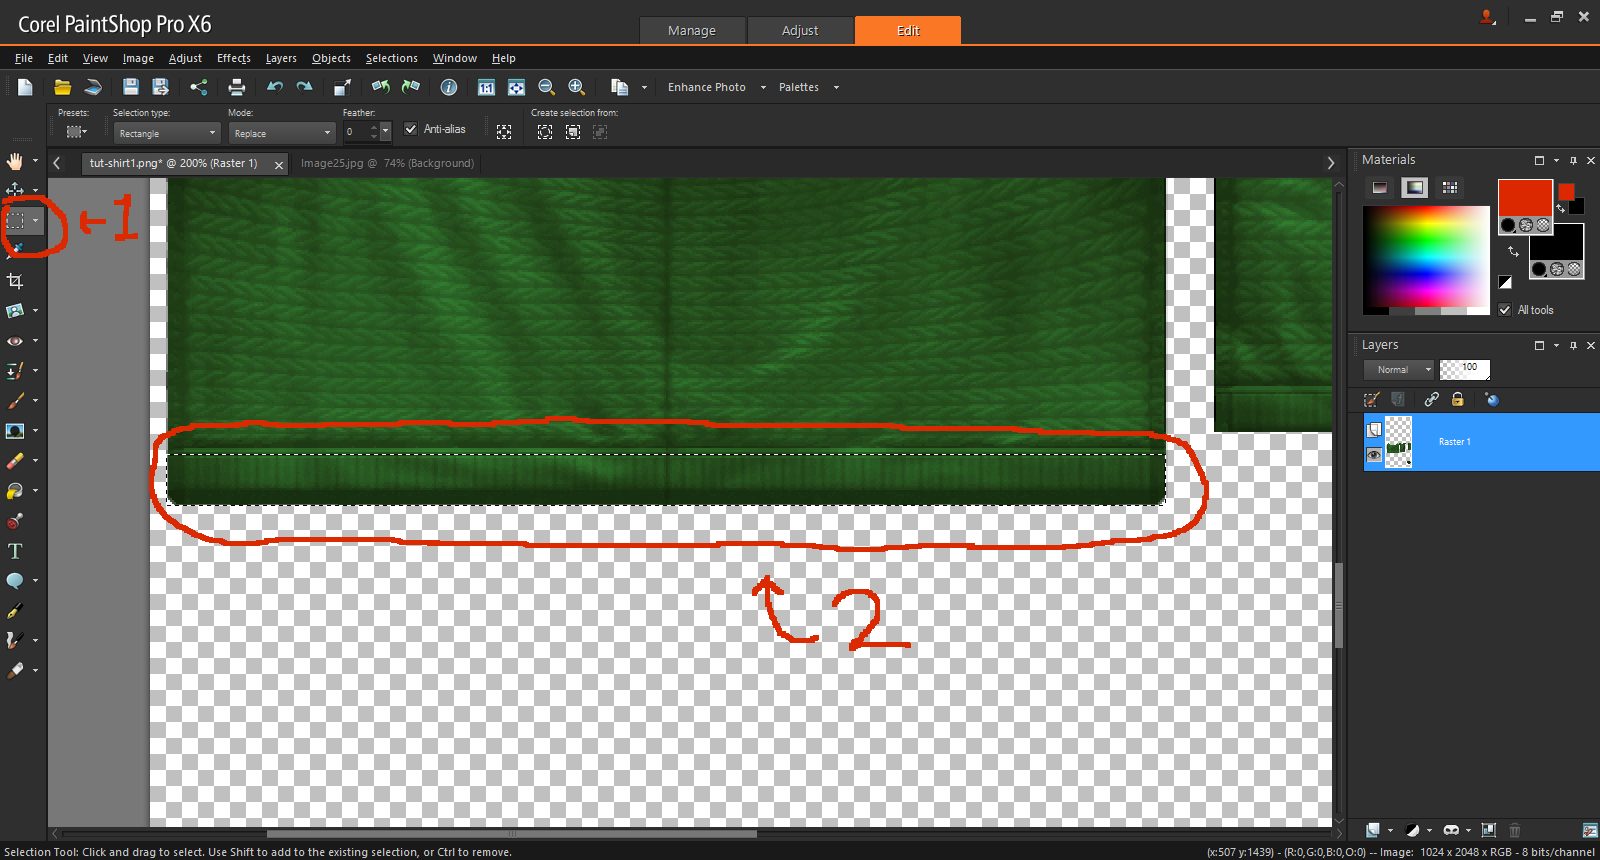
1. I'm going to color the borders on the shirt black, to match the strap we will add. Click on the selection tool in the left menu, as displayed. Zoom in on the bottom shirt border. You can zoom with the mouse wheel, or by clicking "+" To zoom back out, use the mouse wheel, or "-"
2. Click and hold in the corner of the border area and draw the selection around the area we want to turn darker.
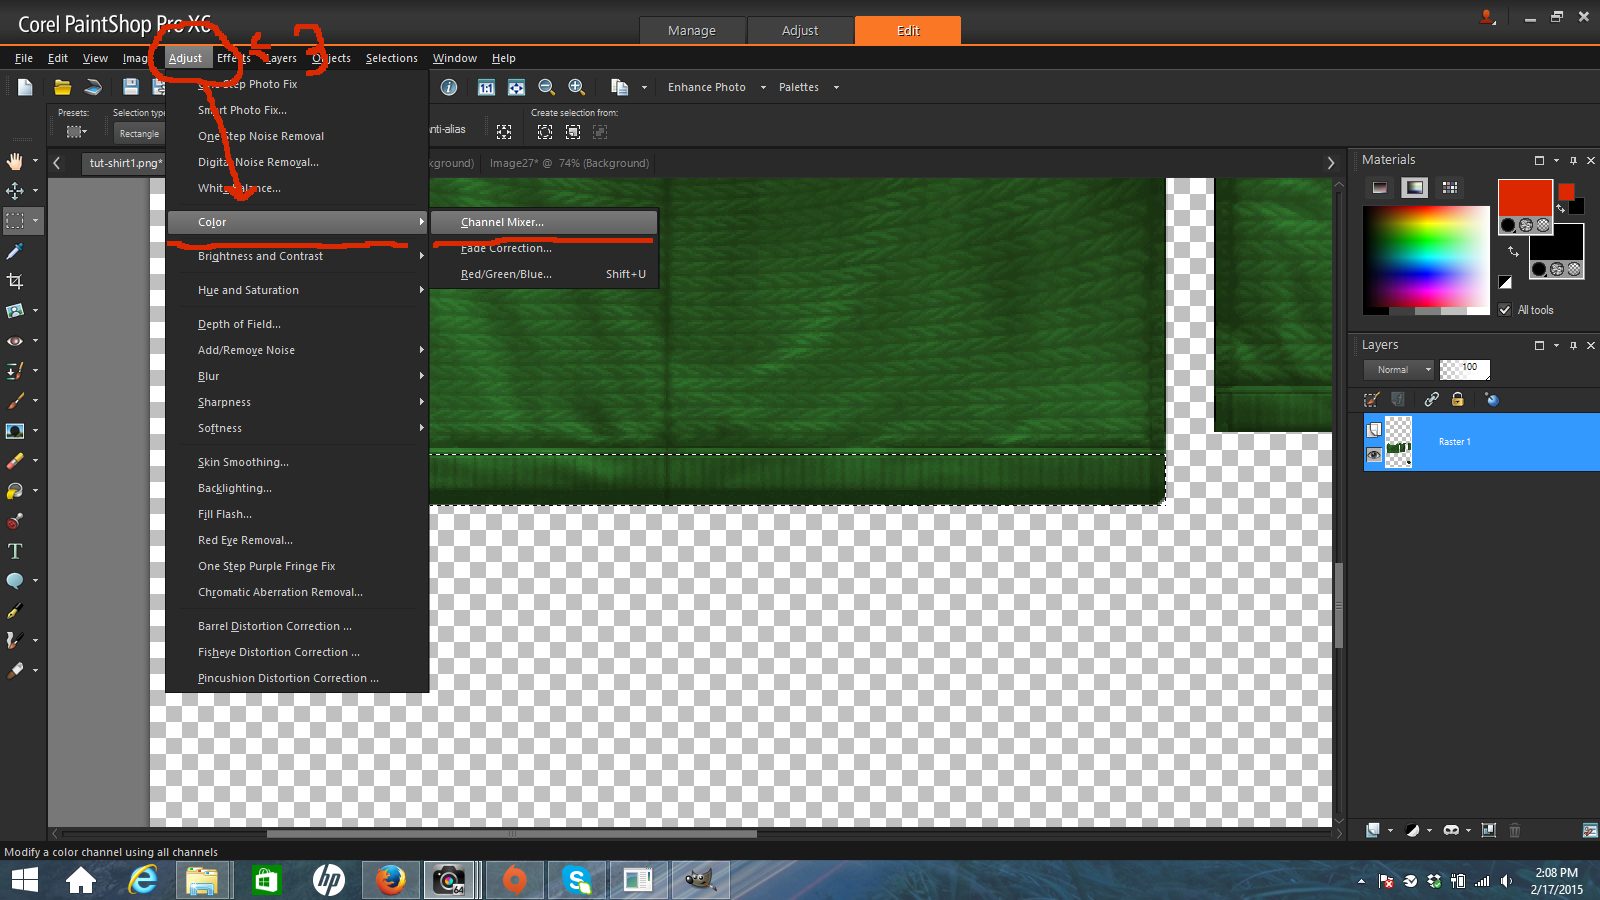
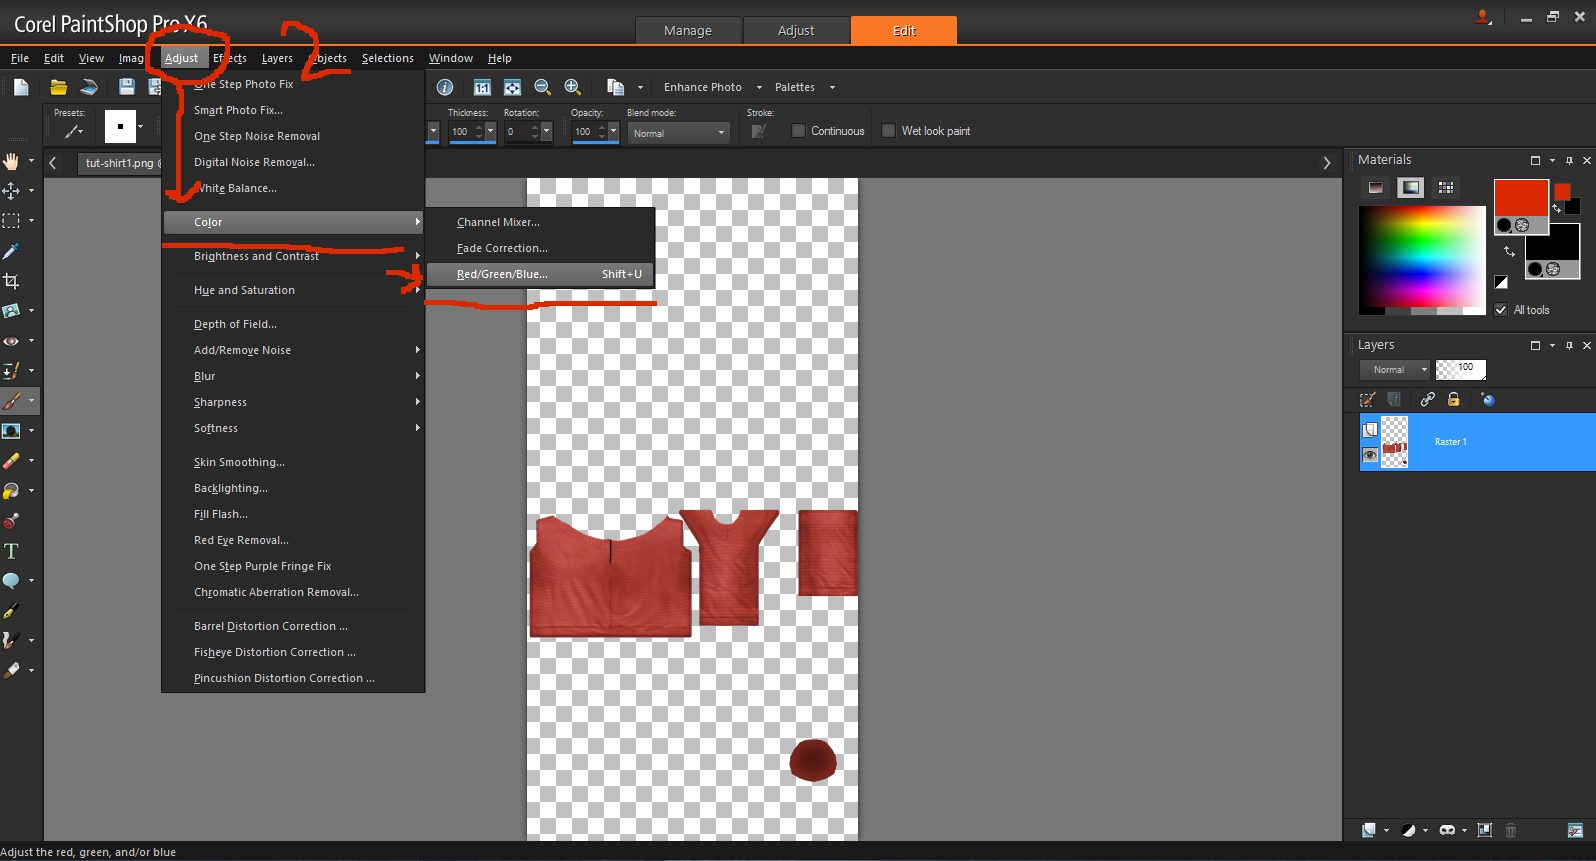
3. Once you have the desired section selected click on "Adjust," in the top left, and scroll down to "Color." Hover your mouse over it until the menu to the right pops out, and click on "Channel Mixer..."
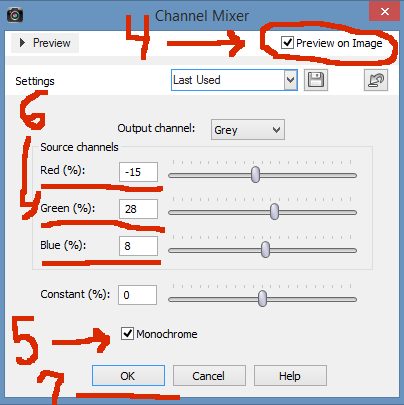
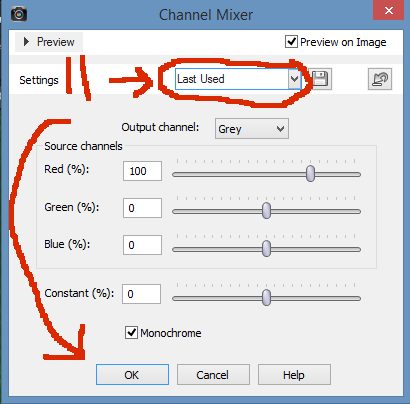
4. The "Channel Mixer," window should pop up. Make sure the "Preview on Image" box in the top right corner is checked.
5. Check the "Monochrome" box on the bottom, this will change the "Output channel," to "Grey," making the selection black and white.
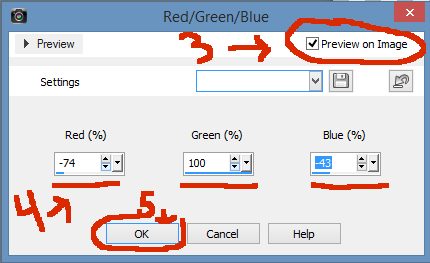
6. Manipulate the values of red, green, and blue, as you'd like. It is easy to black out the entire selection, but we want to save some of that texture, so the combination I found pleasing was Red: -15, Green 28, and Blue 8.
7. Once it looks the way you like, click "OK."
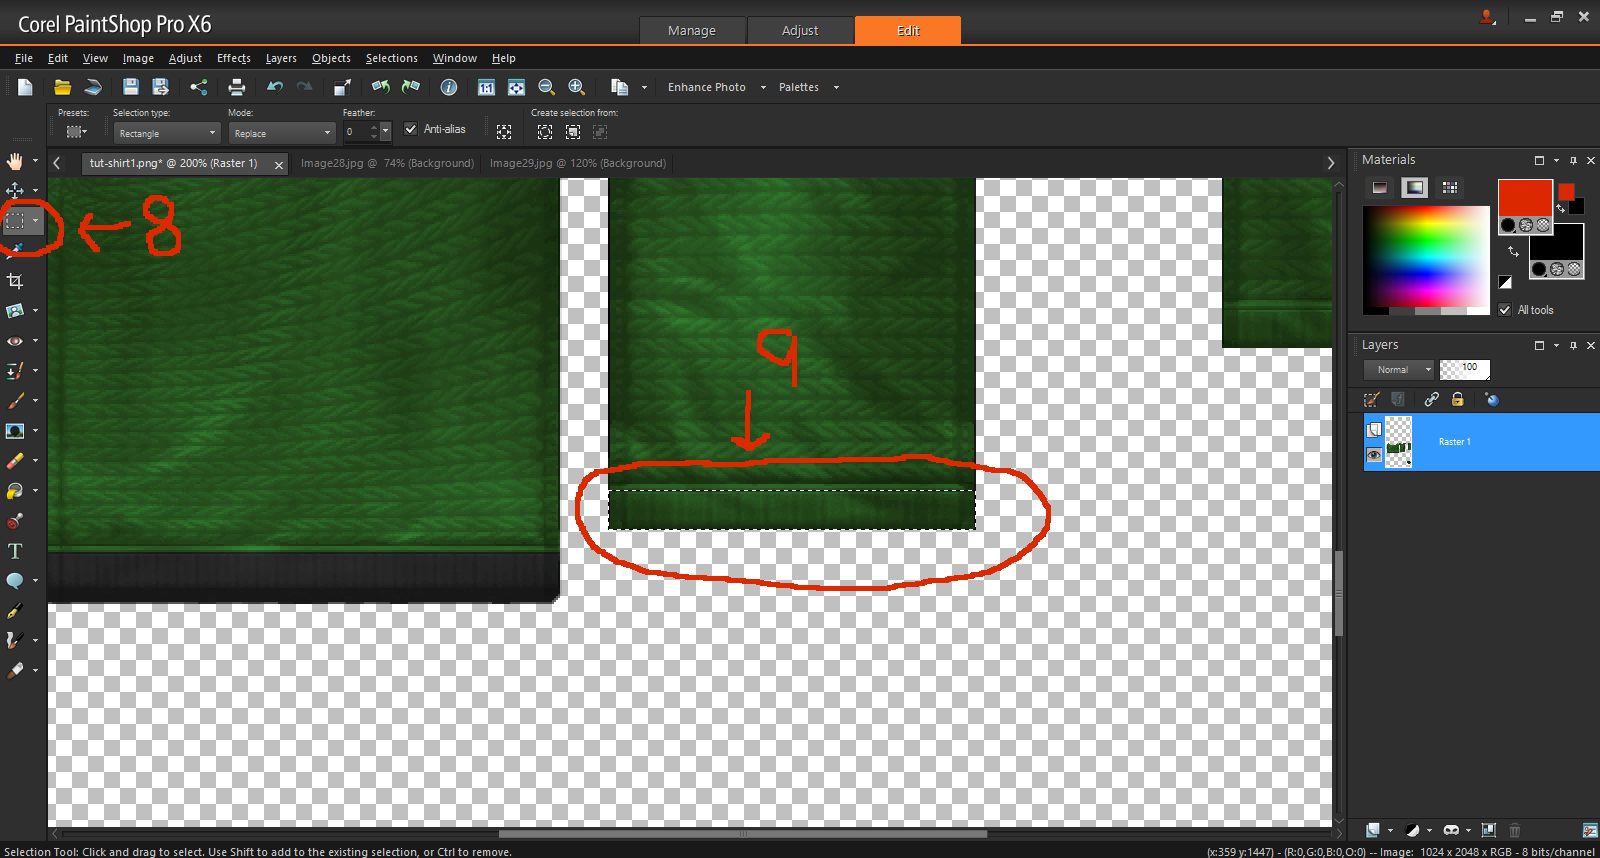
8. Make sure you have the selection tool selected. Zoom in on the first sleeve, it's the first green square to the right of the shirt.
9. Click and hold at the edge of the sleeve to select it, where you want to change its color.
10. Repeat step 3, and open the Channel Mixer window.
11. Make sure that for the Settings, "Last Used" is selected. Then click "OK."
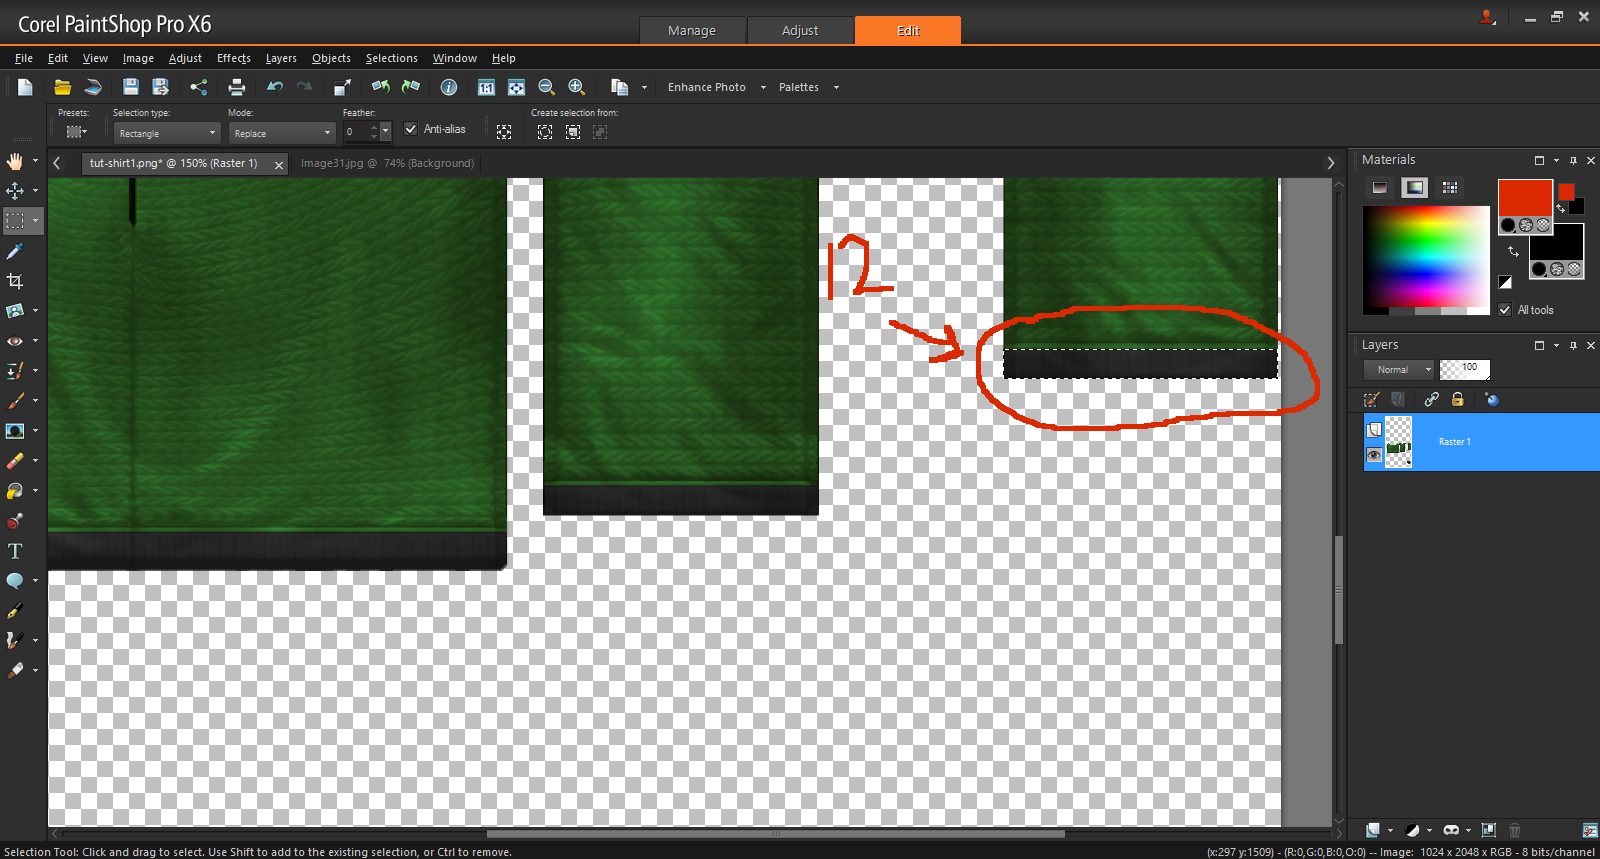
12. Select the last sleeve's edge, just like you did in steps 2 and 9. Open the channel mixer window again, as in step 3, and repeat step 11.
13. With the strap still selected, press CTRL C, to copy it. Then press CTRL Shift V, to paste it as a new image.
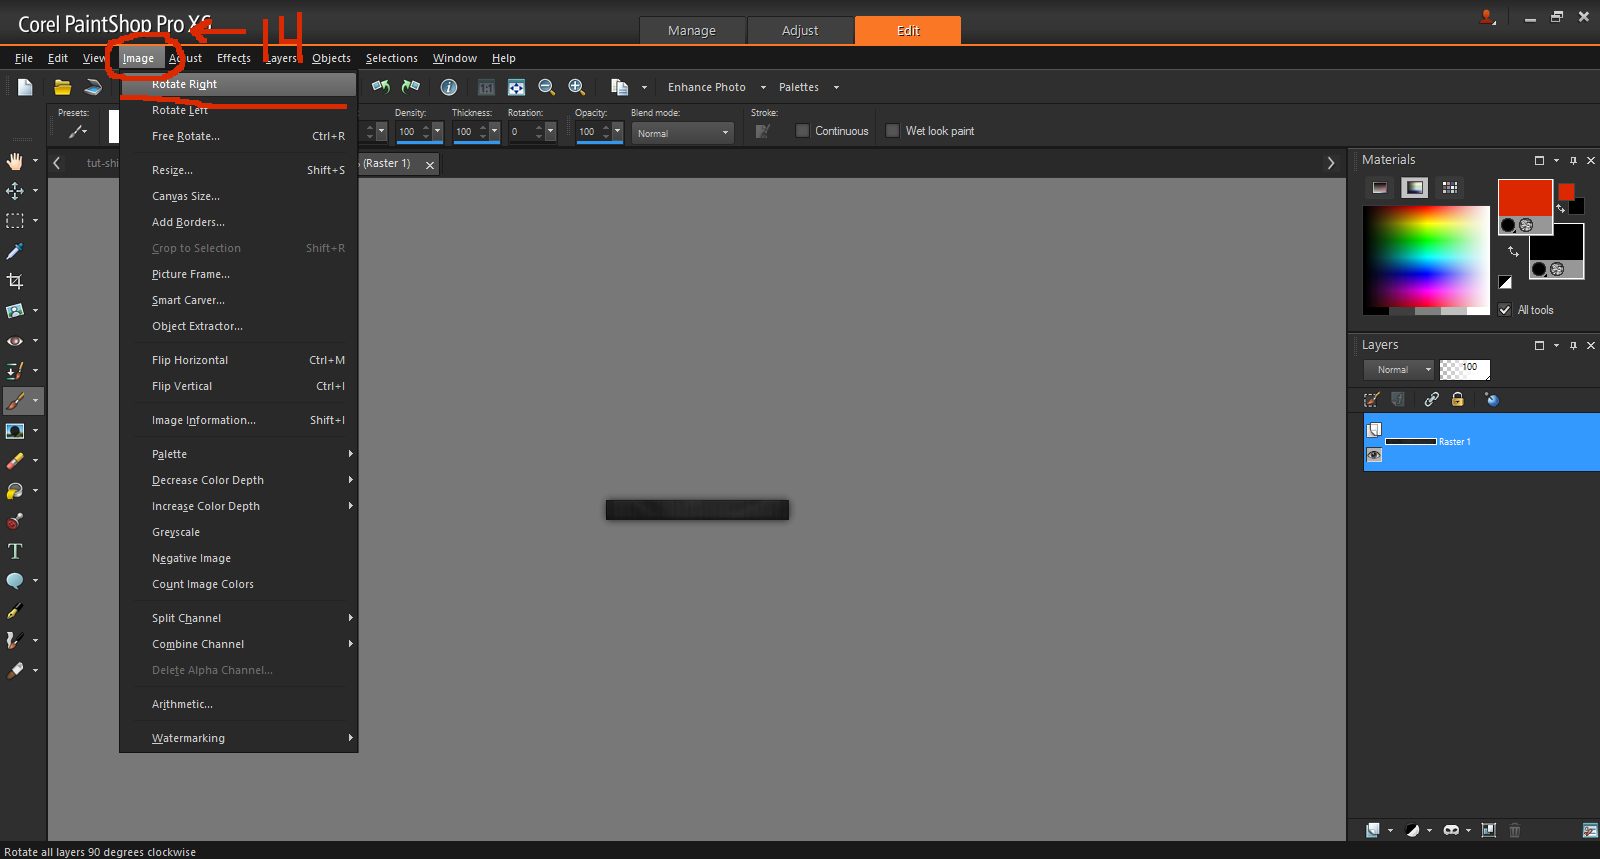
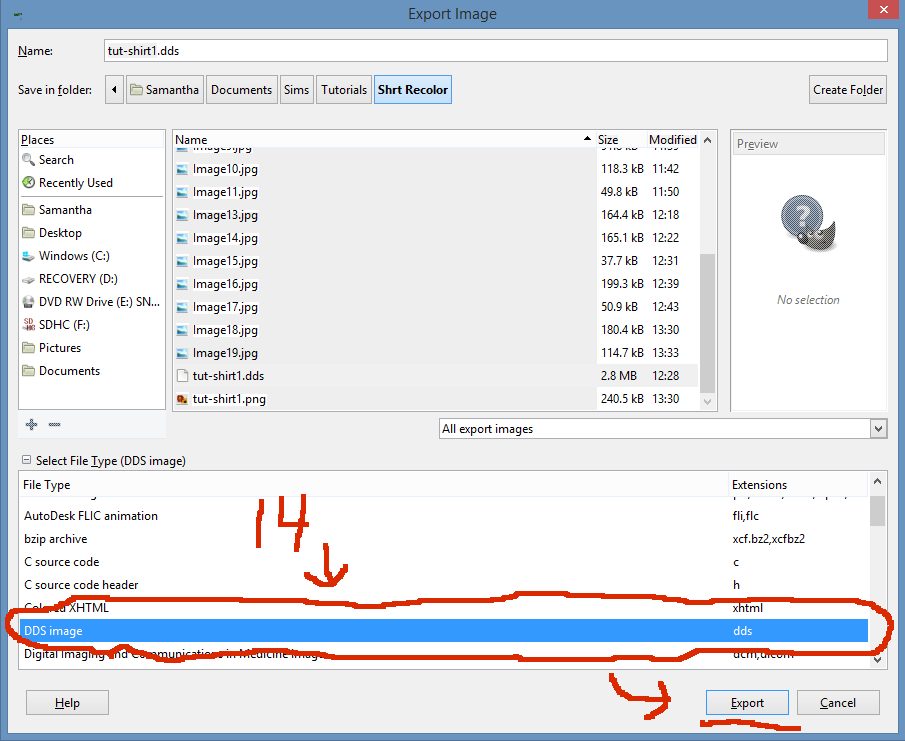
14. Pressing CTRL Shift V should pop up a new tab in Paint Shop Pro, with just the selection you copied. Click on "Image" in the top bar, and scroll down to "Rotate Right," and click it.
15. Click CTRL C again, to copy the edge, which is now vertical.
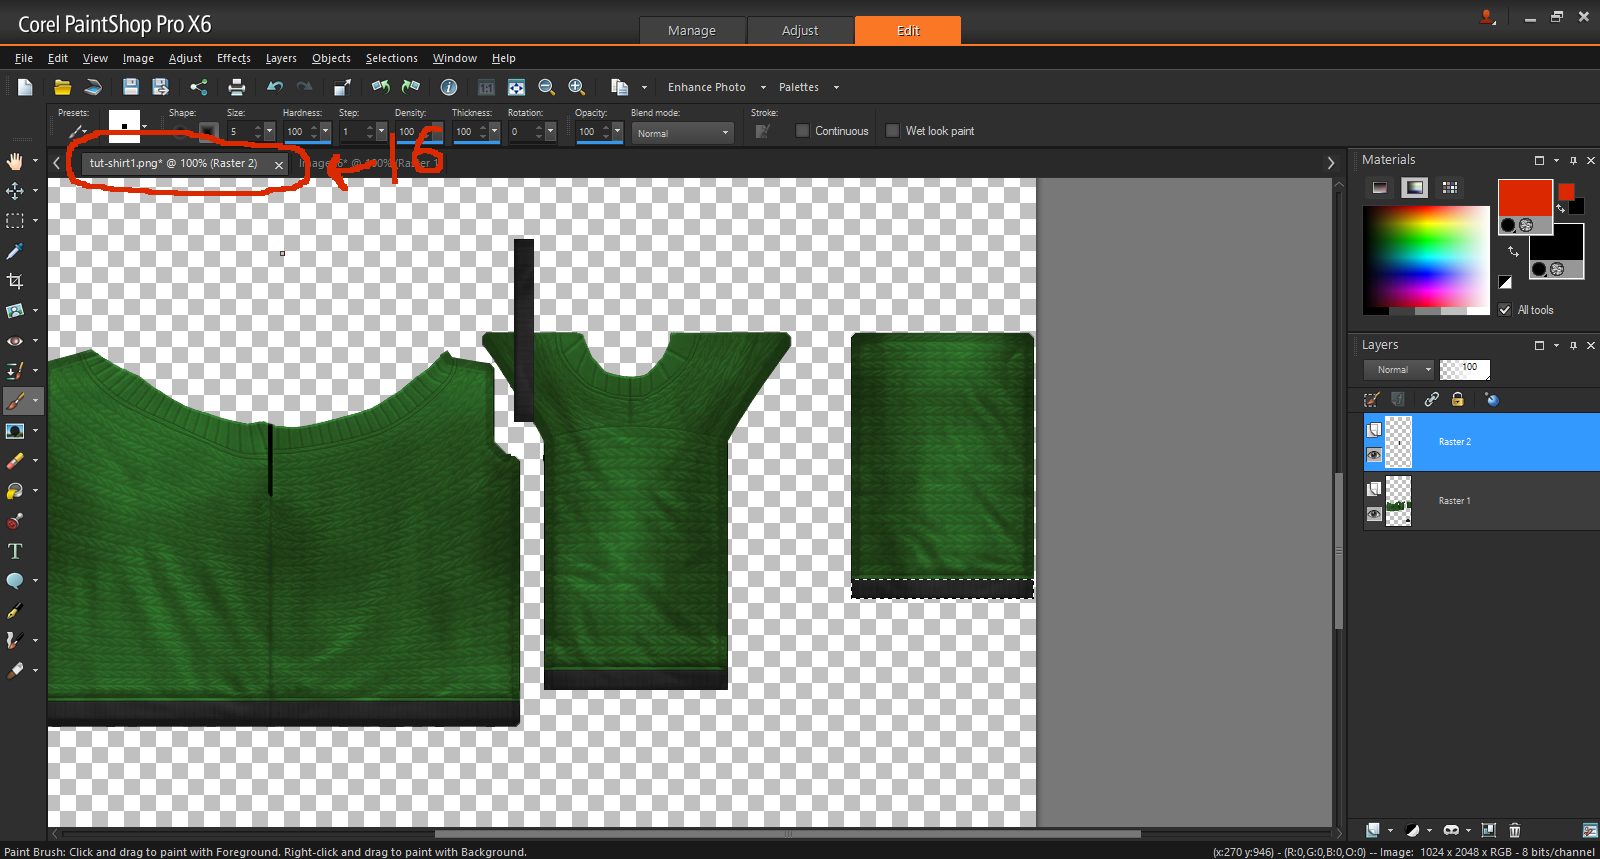
16. Go back to the previous tab which has your shirt texture, and click on it. Then press CTRL V to paste the horizontal strap as a new layer.
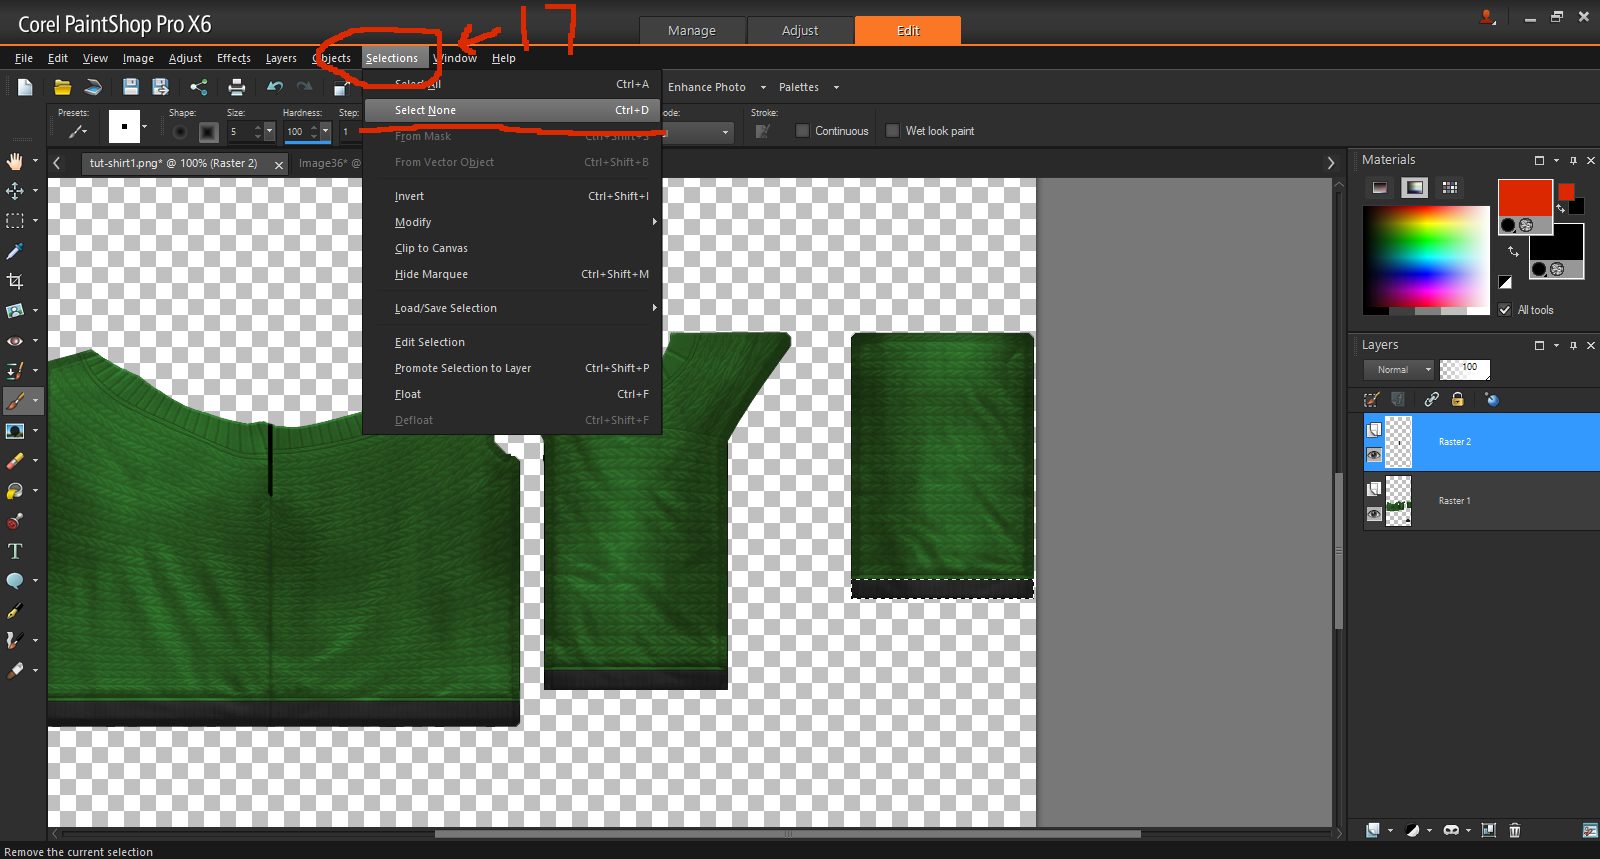
17. Click on the "Selections" button in the top menu and scroll down to "Select None." Click it, so that we don't have the original edge selected anymore.
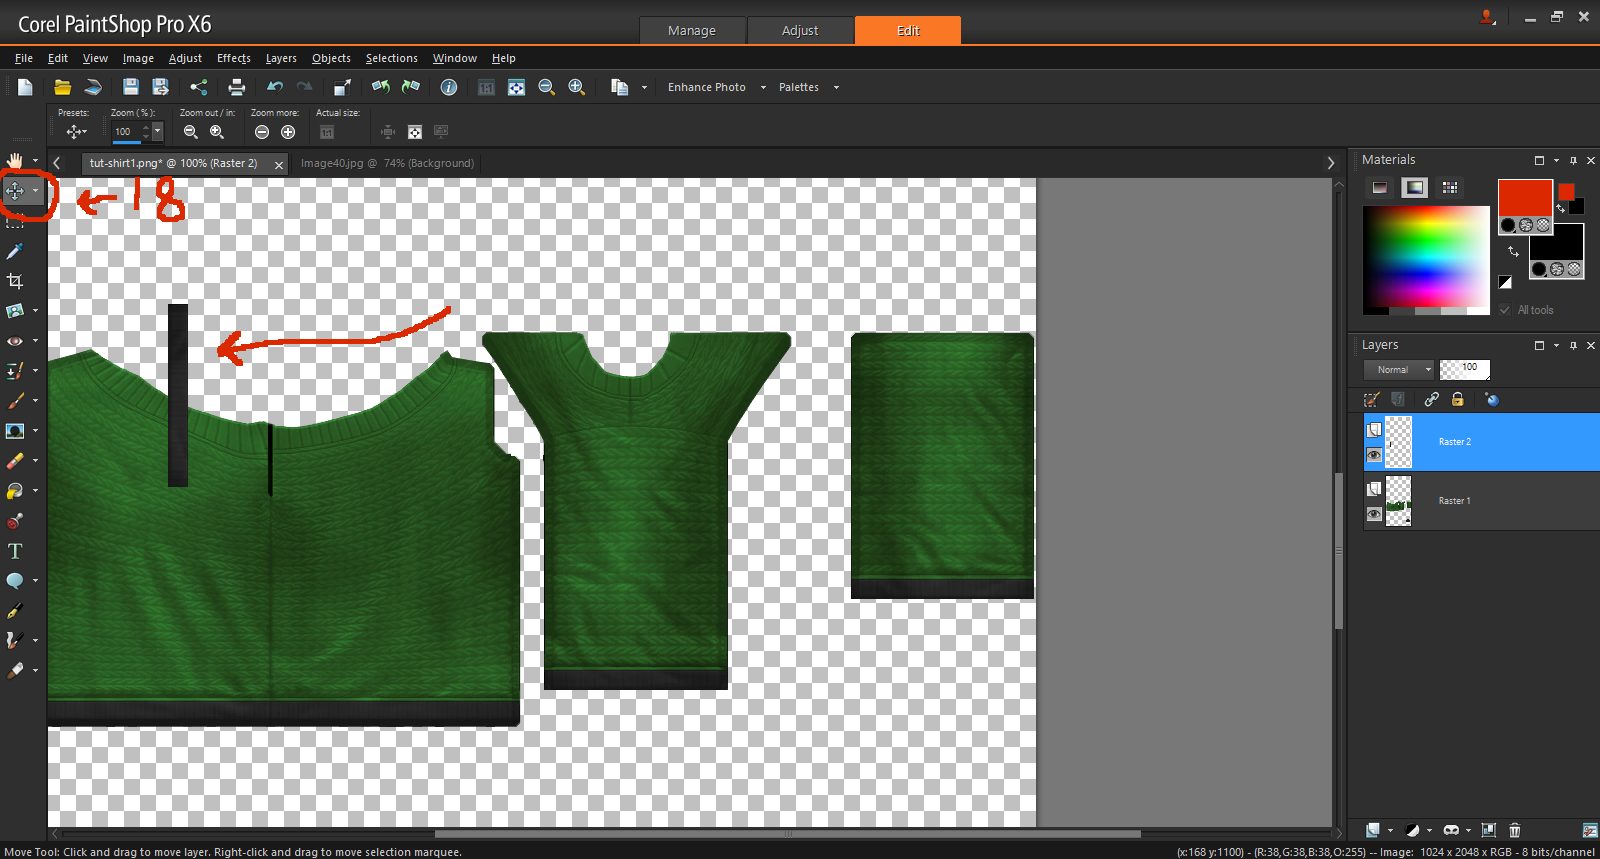
18. Select the "Move Tool" from the left menu. Click and hold on the strap to move it. We want to pull it over the front of the shirt to where we estimate the strap should peak out.
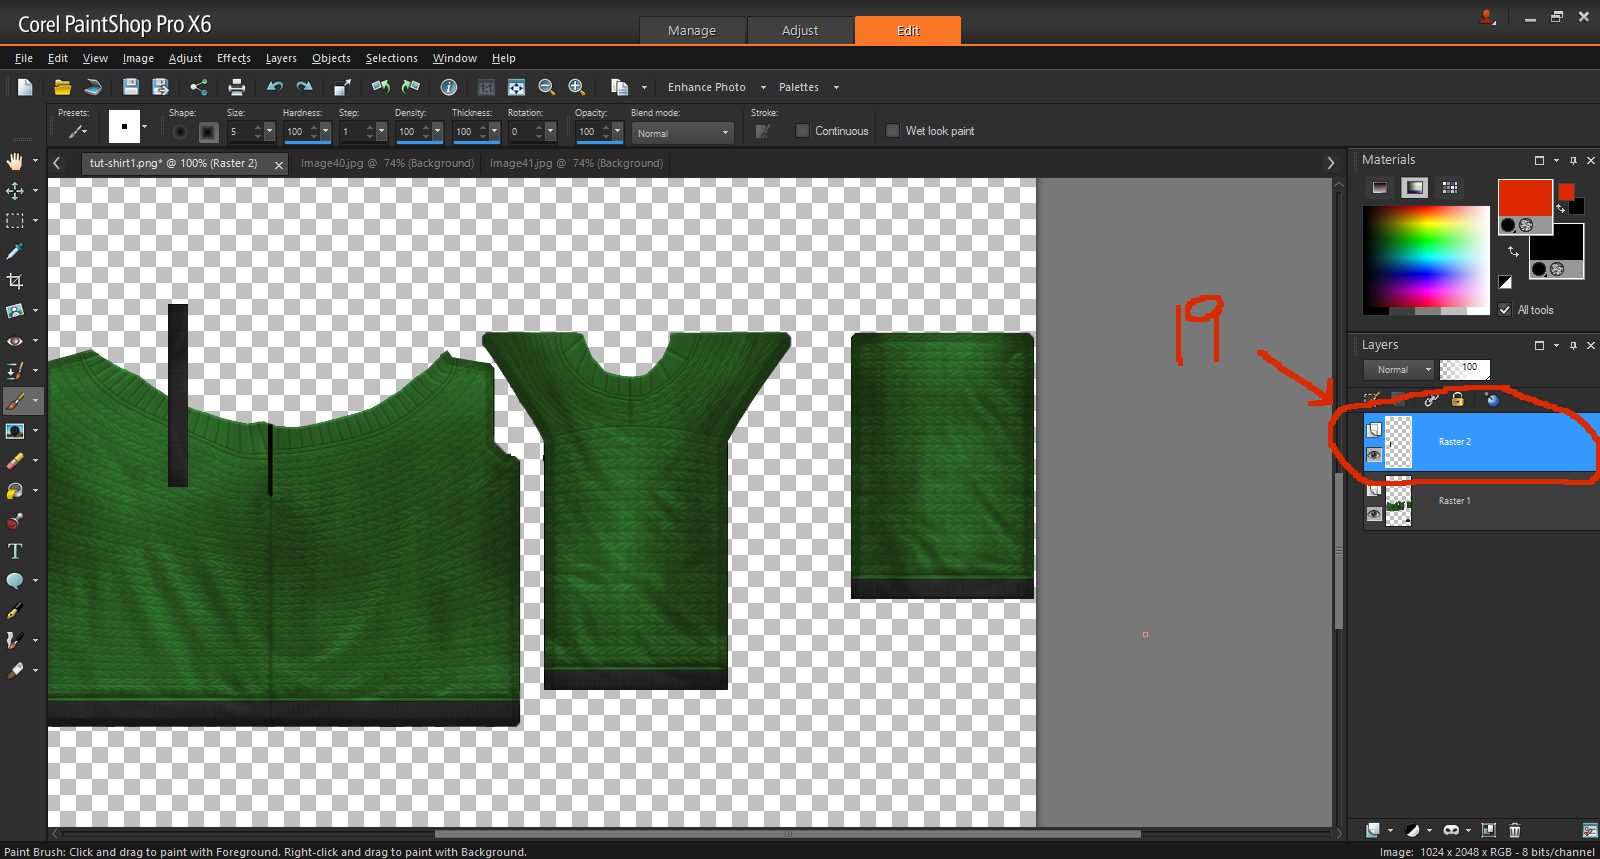
19. Pay attention to the layer selection on the right side. The strap is your first layer, and should be selected. Press CTRL C to copy it, and then CTRL V, to paste a copy of it as a new layer.
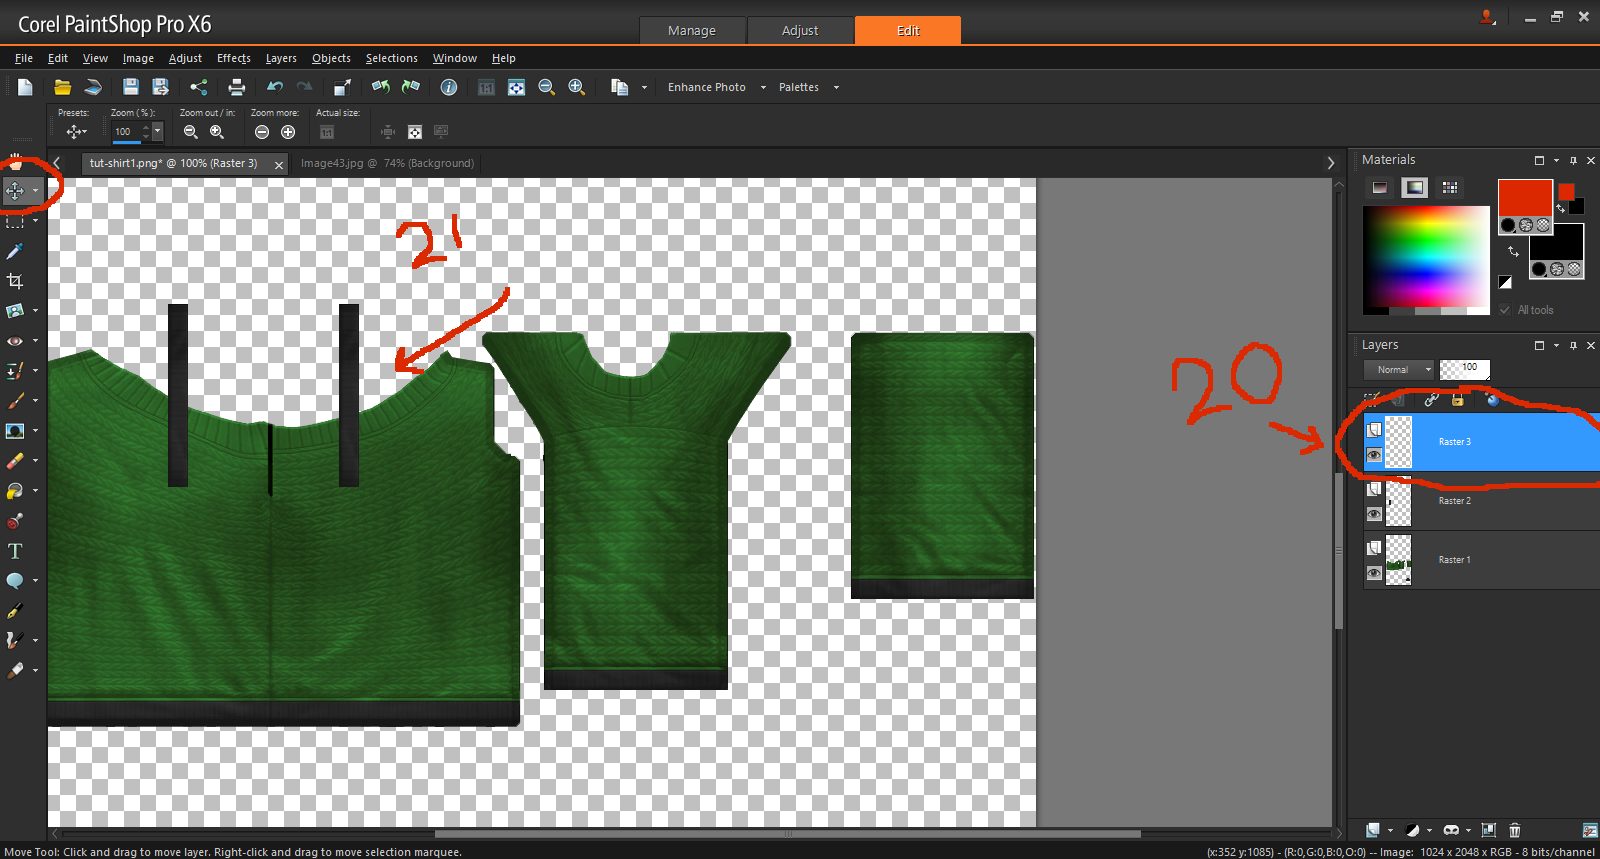
20. You will see a 3rd layer now in the right menu, and it should be selected.
21. With the Move tool still selected, grab the copy you just made, and position it roughly as shown.

22. In the right menu, click on the bottom layer to select it. It should be called, "Raster 1." Click and hold to drag it to the top of the other layers. This brings it to the front.
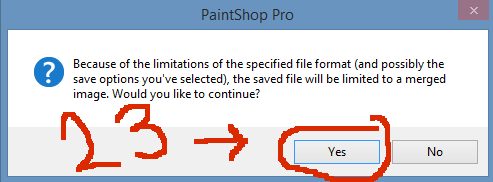
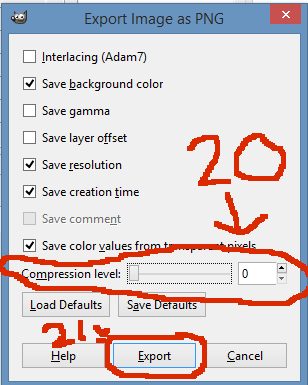
23. Save your file. You will get this message since you are saving multiple layers in a png. This means that the png can only save a flat image, and will not save the layers separately. They will not merge in the Paint Shop Pro application, but if you need to close it, I suggest saving it as a .psp file, as this will save layers. Click yes, to save it anyway. As long as we leave Paint Shop Pro open, we can easily still work with the layers.
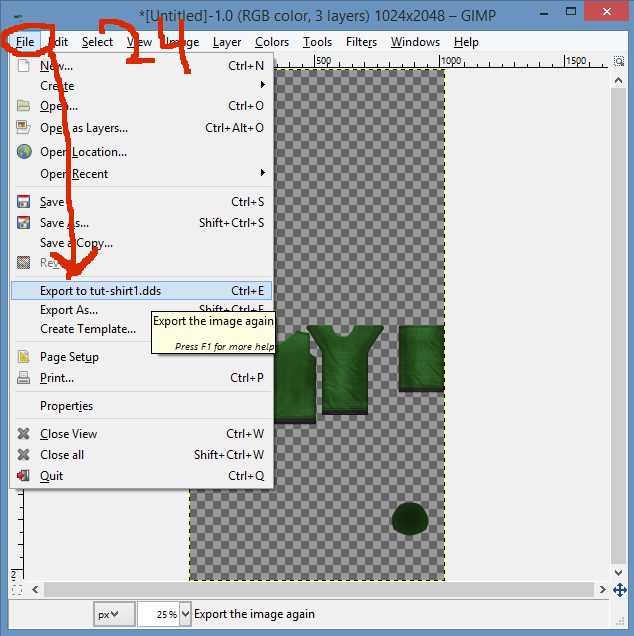
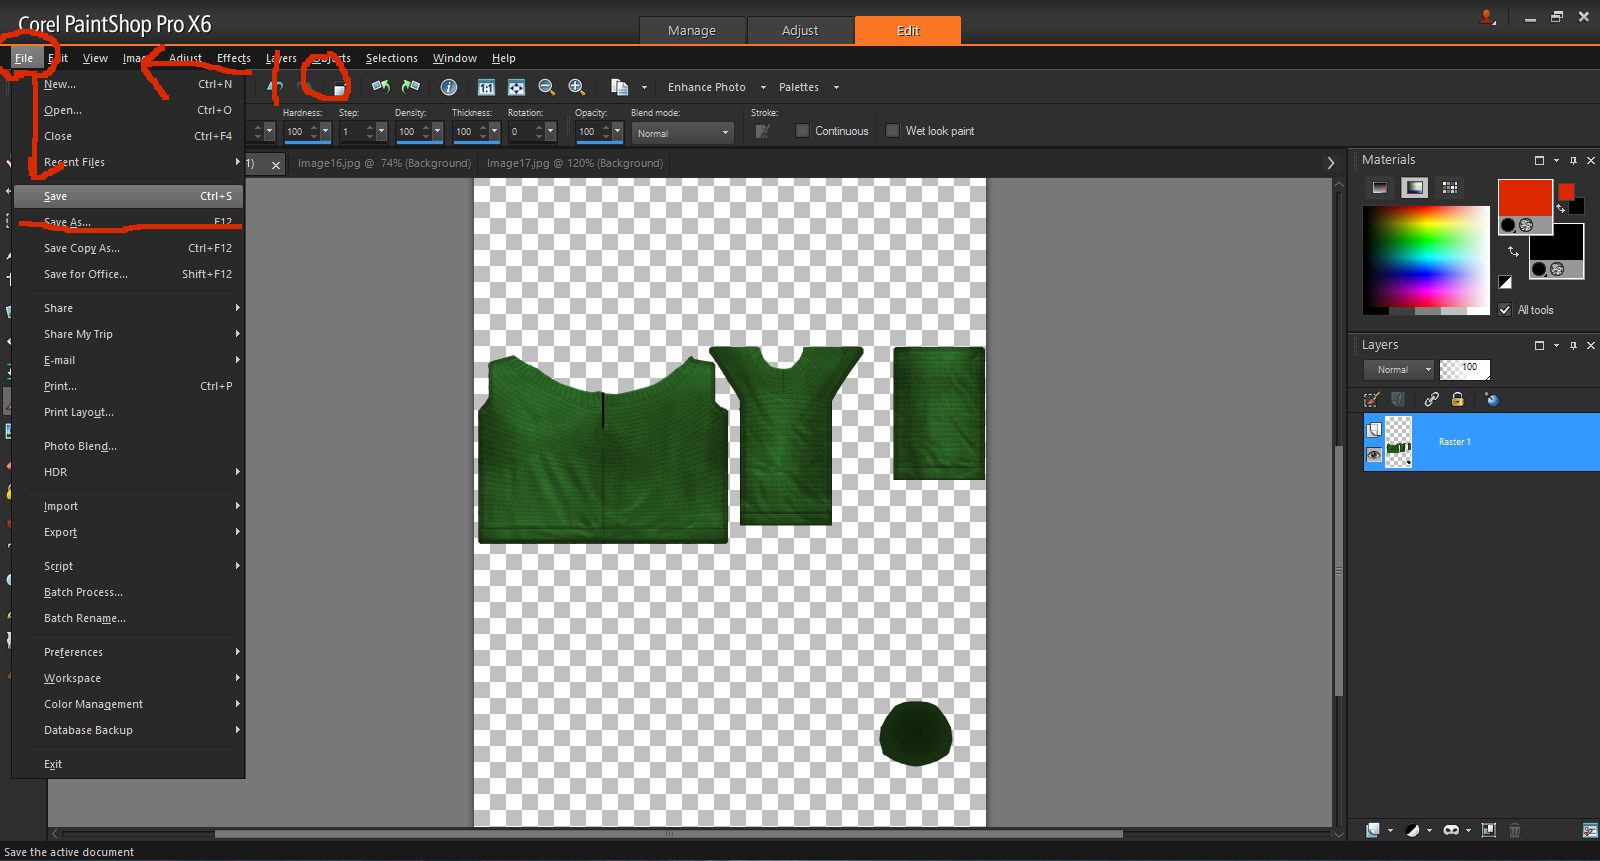
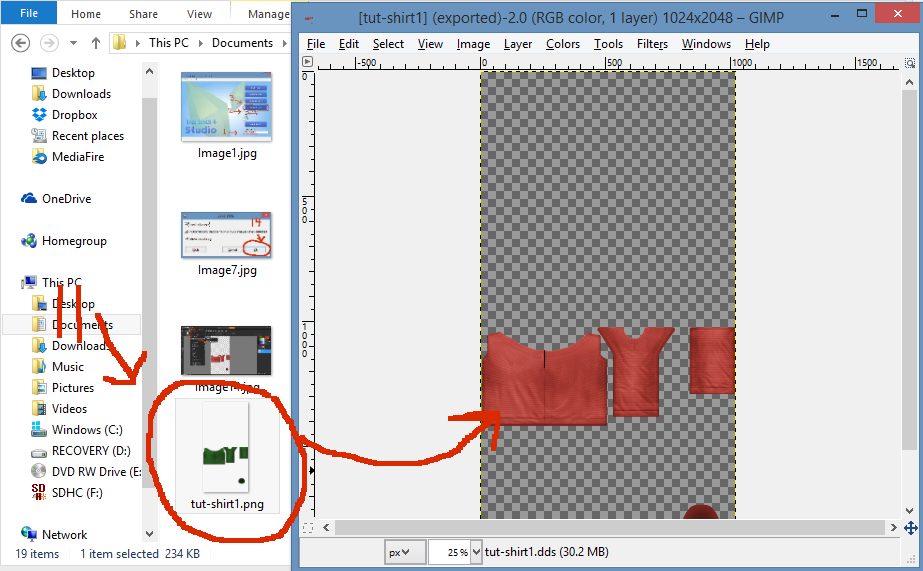
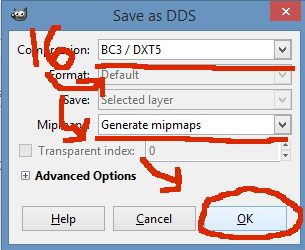
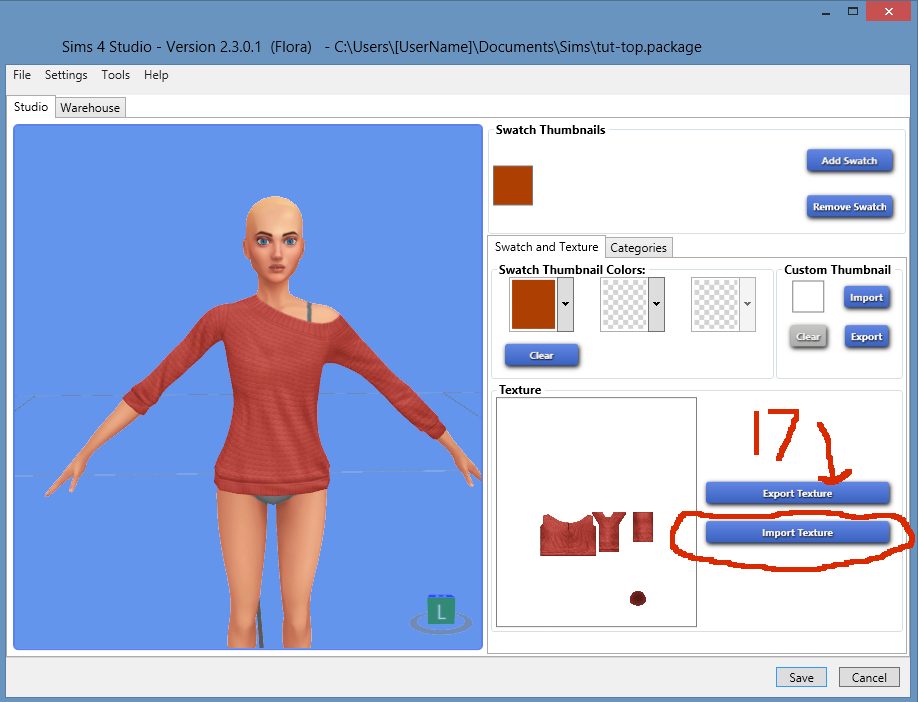
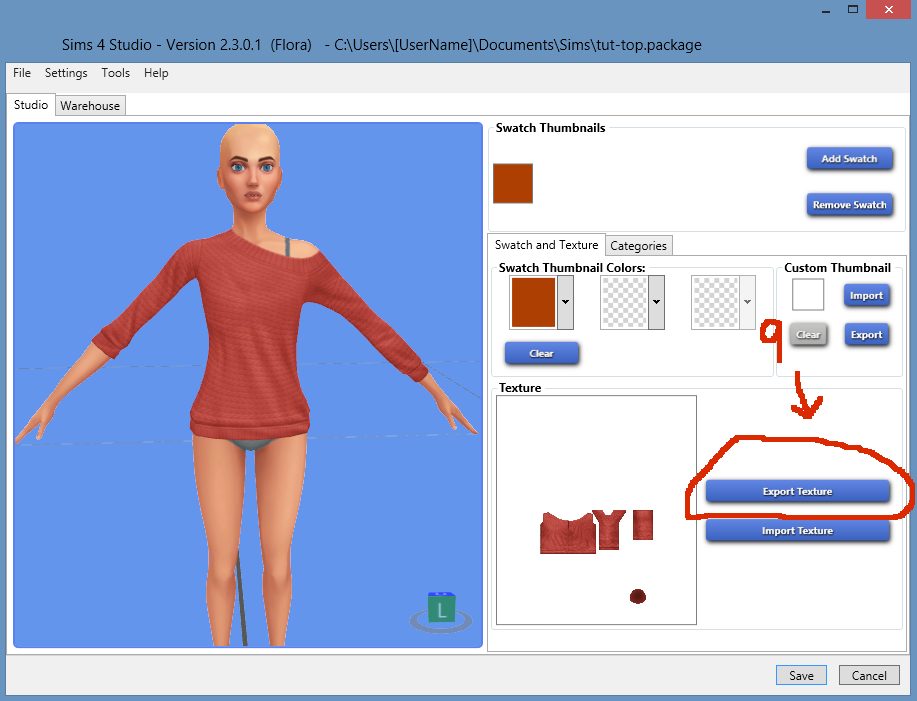
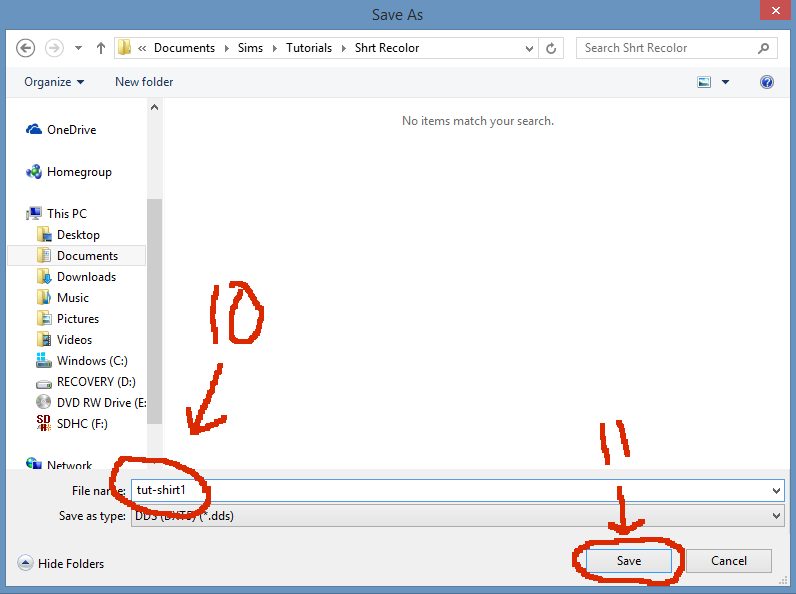
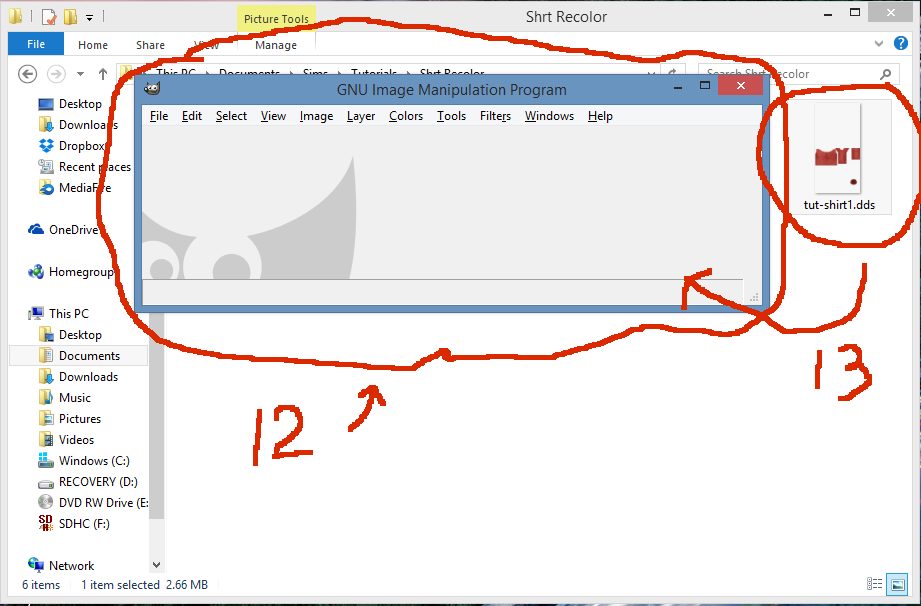
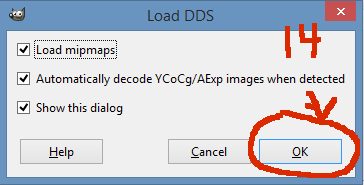
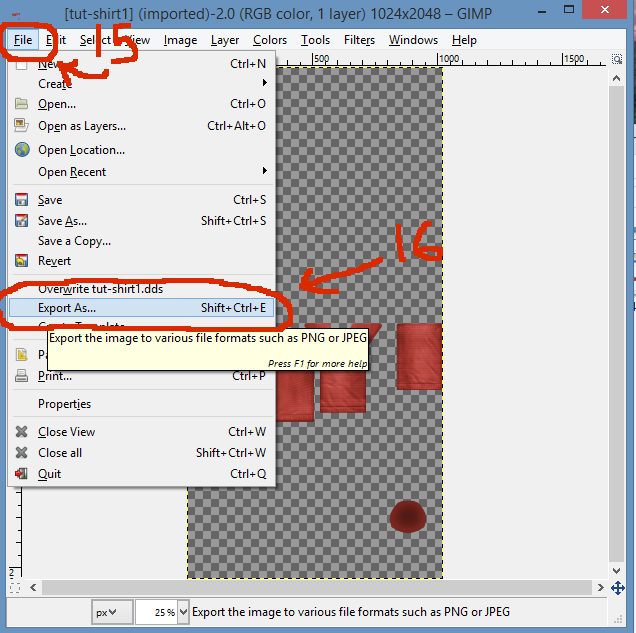
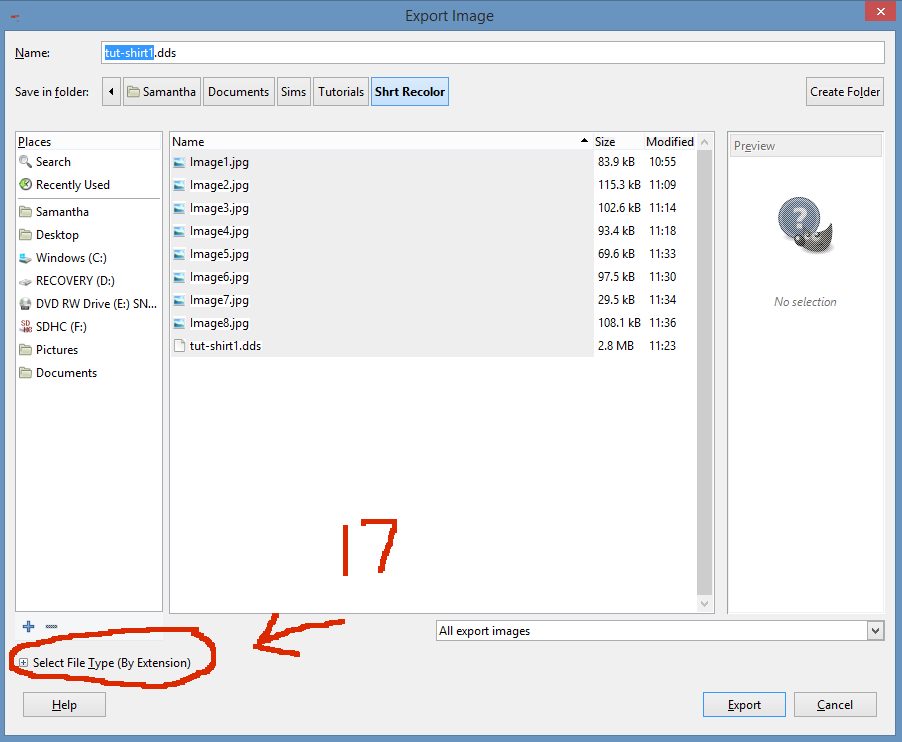
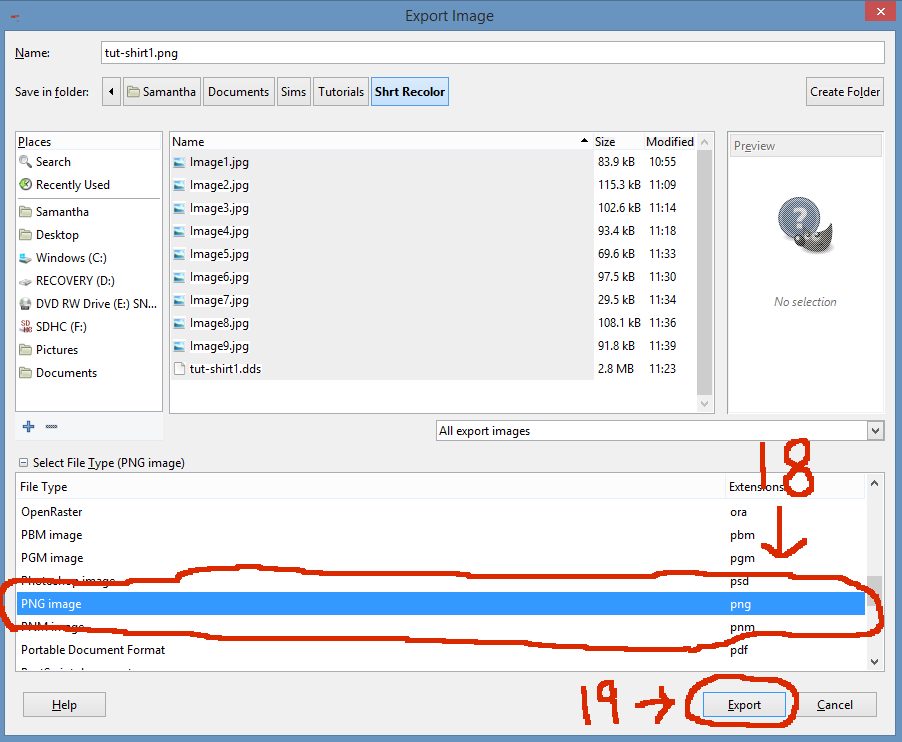
24. Now we want to see how this looks on our Sim model. So we need to convert it back to a dds file in Gimp. Repeat step 11 of Part II, to get the new outfit working in Sims 4 Studio. Saving it out as a .dds can be simplified if you left Gimp open. Click File, then scroll down and you should have the option to directly "Export to -whatever you named this project-" Click that and go back to Sims 4 Studio.
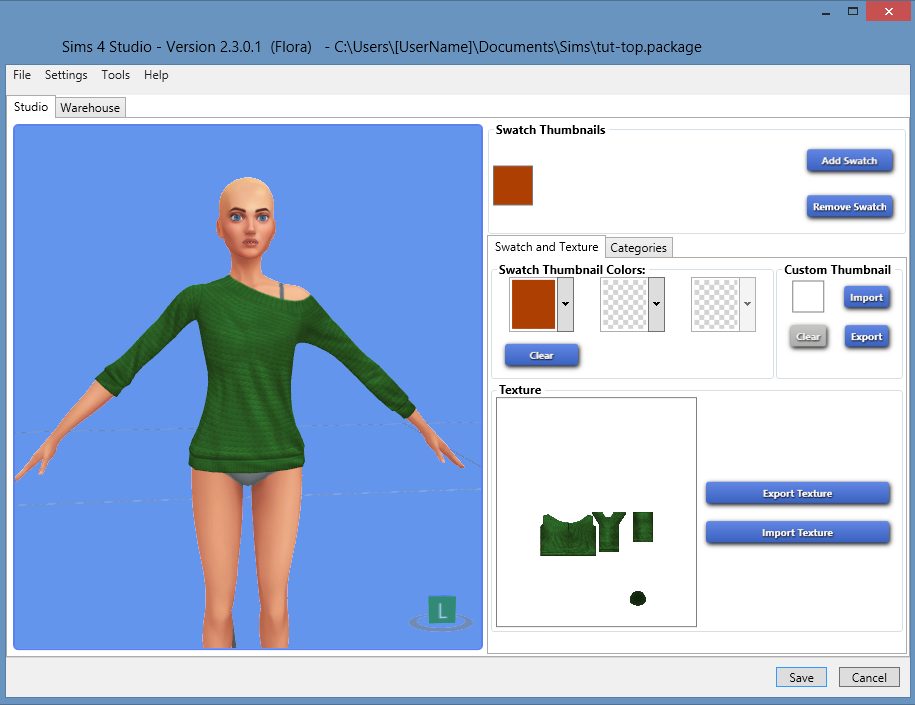
25. Repeat steps 17 and 18 of Part II to view your new texture in Sims 4 Studio.
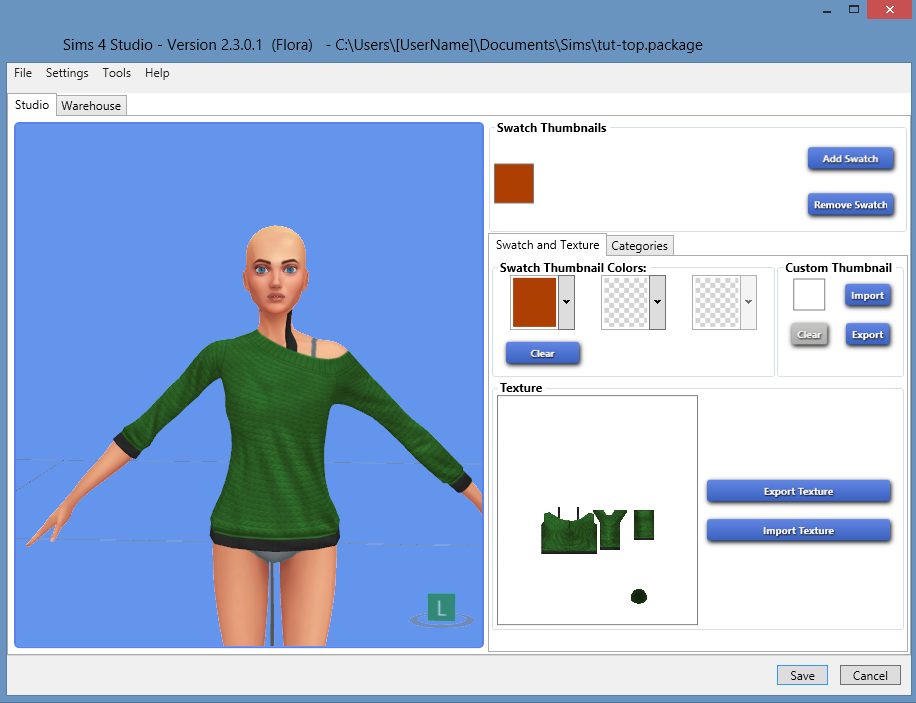
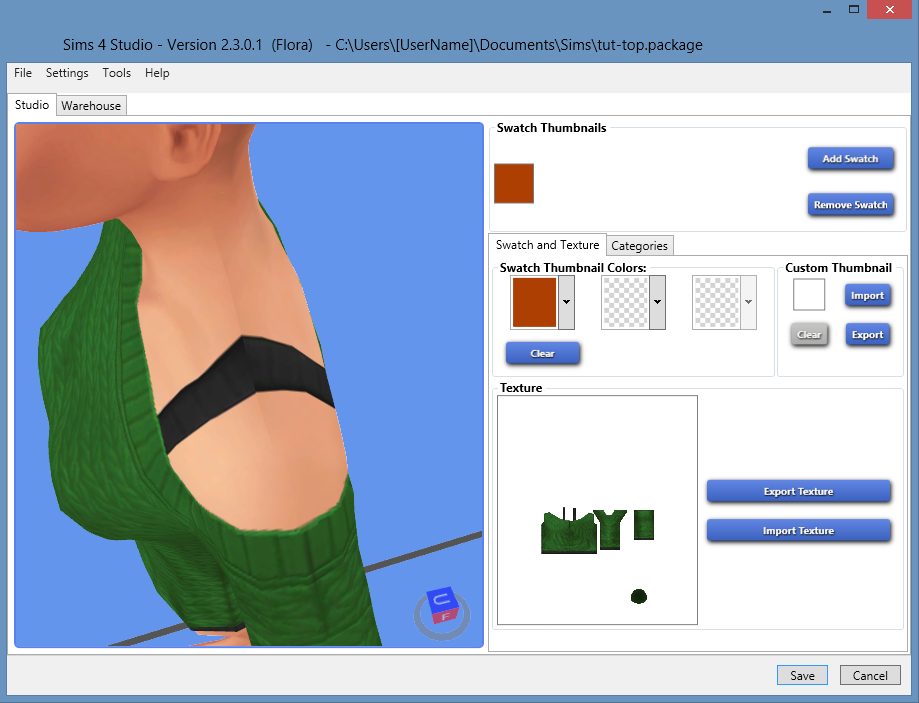
26. Oops! Chances are your top looks something like this. Unless you are very good at estimating distance, there's a good chance you'll have to reposition straps a few times to get them to meet up and look right. But that's ok, we'll fix it. Zoom in on your model and rotate her around a bit and see how far off your straps are, then go back to Paint Shop Pro.
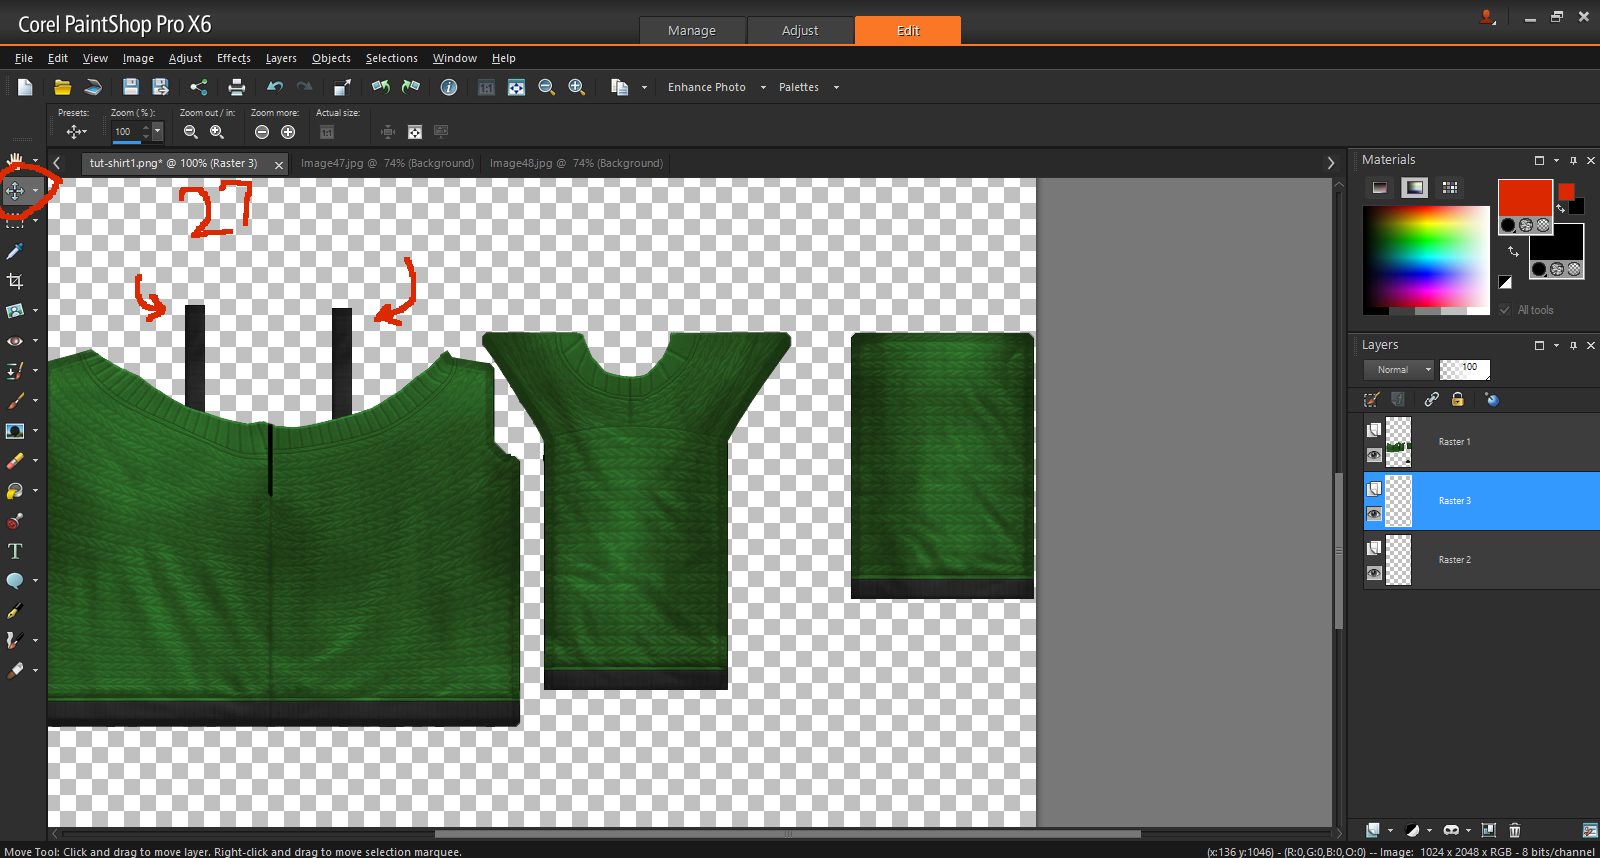
27. Make sure the Move Tool is selected, and click on the first strap. It's layer should automatically select. Click and hold to grab it, and drag it. I need to move mine right a bit. Once it's in place adjust the 2nd strap.
28. Now we do the trial and error dance. Save your file, and repeat steps 23 - 26, until it looks right.
29. It took me a few tries, but I got it. Now it doesn't look perfect though because the straps doesn't seamlessly connect on top. This is easy to fix.
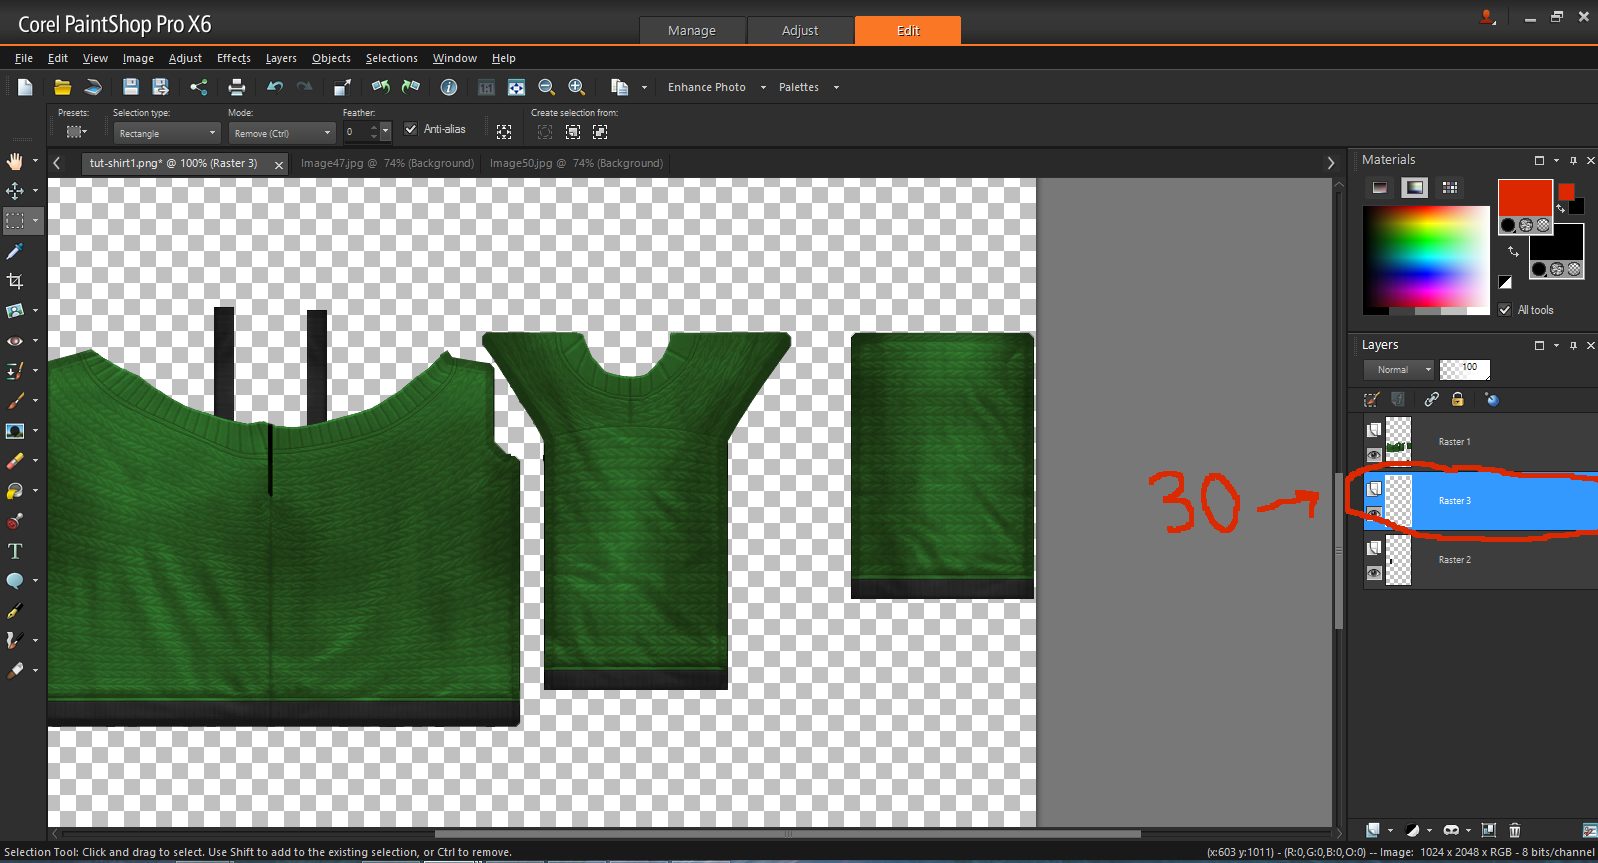
30. Go back to Paint Shop and select the layer titled, "Raster 3." Then press CTRL M. This will mirror the layer. Save it, and try it out in Sims 4 Studio again.
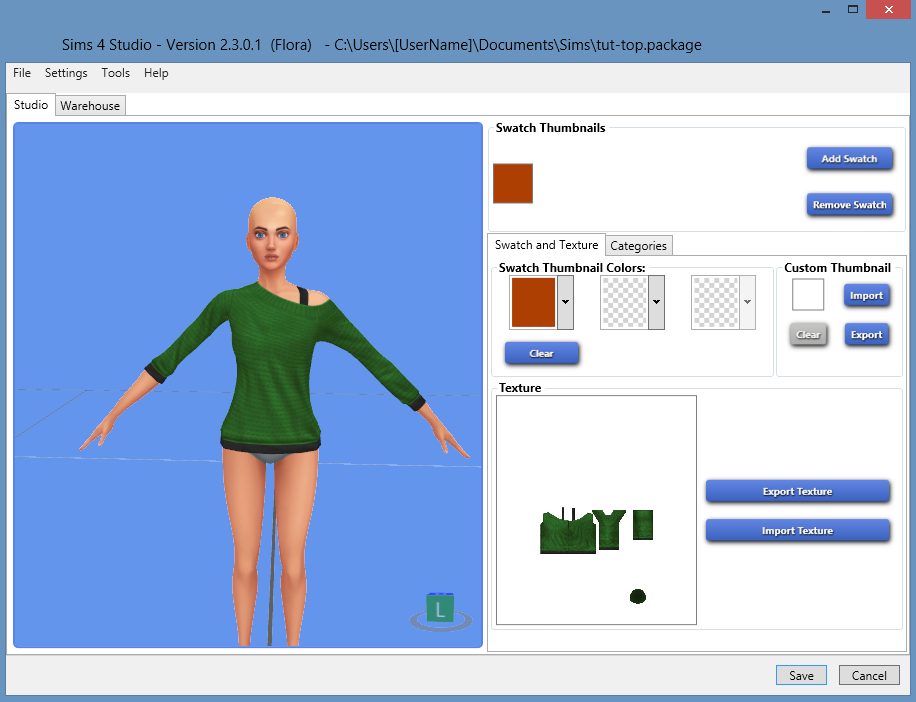
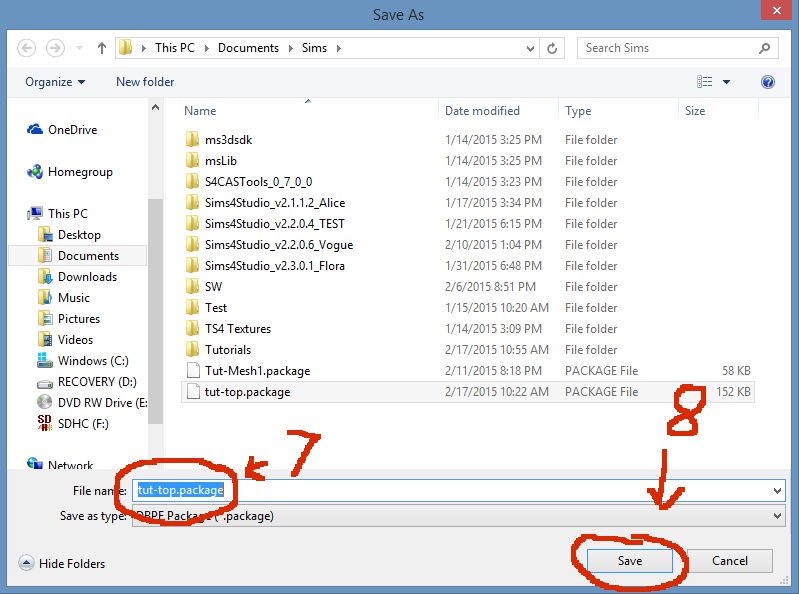
31. Viola! We are done! Now you just need to click the save button in the bottom right corner. Go back to your .package file and move it to your mods folder, where you would put all the CC you download.
I hope this tutorial has been helpful to you. If you have any questions please feel free to ask. Happy simming!