|
|
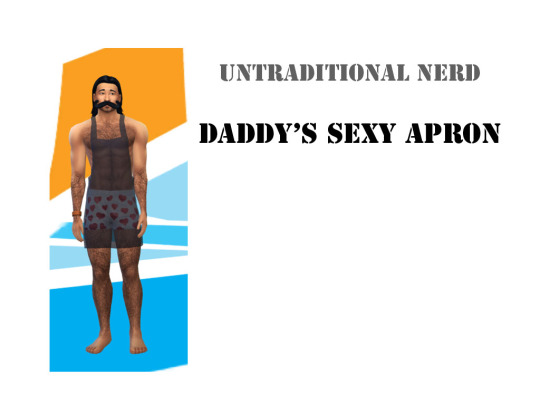
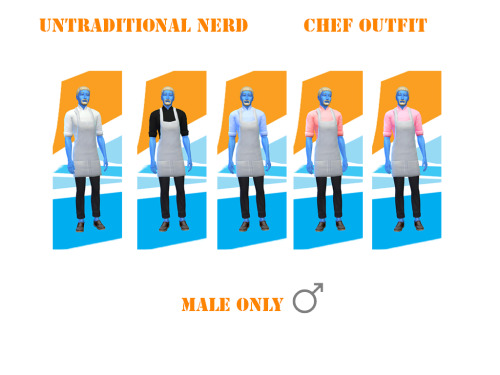
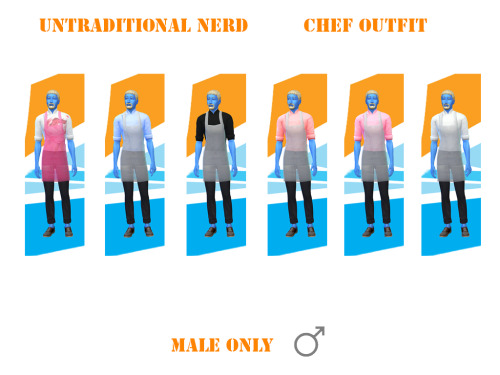
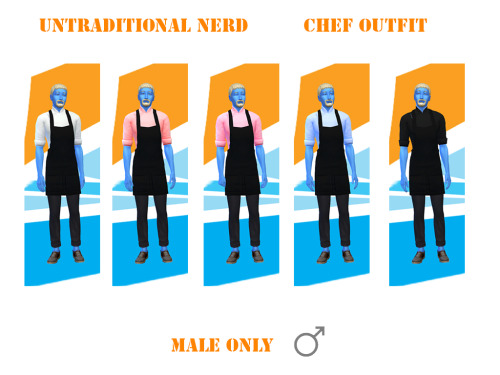
Post by untraditionalnerd on Apr 24, 2015 11:29:58 GMT -5
|
|
|
|
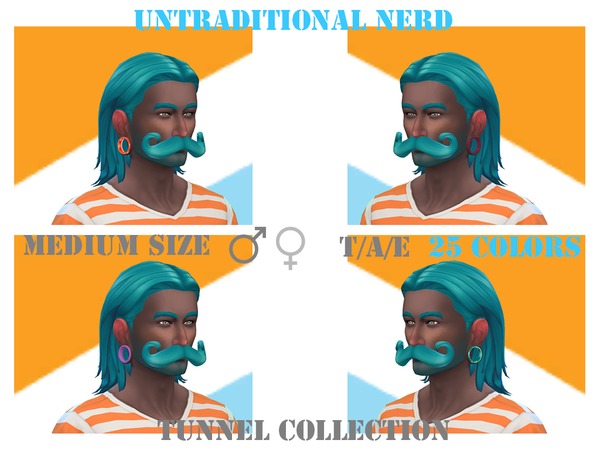
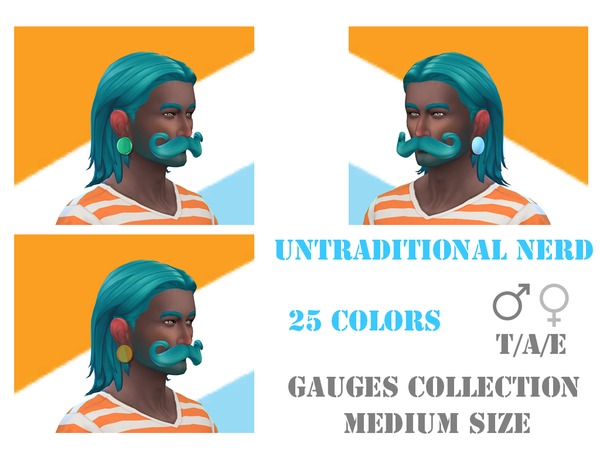
Post by untraditionalnerd on Apr 22, 2015 14:40:11 GMT -5
Hello :P
I'm almost done creating my whole piercing set. 2 parts released 2 more to go. I can't stand anymore that I can't use the sliders on my CC because of the lobe part of the EA body mesh. As far as I know we can make a body part disappear if it's a stand alone part ( this is one of the reason why the EA CAS parts like pants, hair and body are divided in so many parts. It looks like hands and ears are attached to the body: hands to top and ears to the head. Is there any way we can create a mod that removes the ears or the hands? I used to have one in SL. I know there is a slider mod for body parts but will not fix the problem... because the lobe is not modified by the slider.
Any ideas how we could do that?
A way to replace a body part like the head would be nice ! I don't mind to work on with the whole head if I can get the ears the way I want.
|
|
|
|
Post by untraditionalnerd on Apr 21, 2015 14:39:28 GMT -5
As far as I know a sim can pee with others in the room if he is behind 1 tile wall. The problem is that if sims pass behind him they will get embarrassed. I hope someone will make a mod to remove the same sex embarrassment.
|
|
|
|
Post by untraditionalnerd on Apr 20, 2015 17:32:12 GMT -5
|
|
|
|
Post by untraditionalnerd on Apr 20, 2015 7:18:56 GMT -5
 Thank you so much ; ; It works !!!! XD I need to edit the mesh and lower it a bit so kids can use it too. I removed the sitting line and the puke line as well. I don't think someone wants to puke there hehe. Now we can change how sims will behave with an object. Is there a way to create a pose/animation and set it to be used by editing the xml so that animation is used only for this item? I saw that there are many poses set to happen when sitting. I would like to add it because the flush animation and the clean animations are a bit wrong eheh. Hmm I could try to make the item unbreakable and never dirty... Tutorial Hunting session started XD ( never mind can't find anything about it I will leave the item as it is for now then :3) Thank you again Orangemittens for this amazing tutorial and Thank You S4S team for the amazing tool ; ;. I will let you know when I release it. |
|
|
|
Post by untraditionalnerd on Apr 11, 2015 9:46:13 GMT -5
Yeah I saw it today! It's really good. I know there are a lot of people that will be happy about her CCs.  |
|
|
|
Post by untraditionalnerd on Apr 5, 2015 15:35:36 GMT -5
|
|
|
|
Post by untraditionalnerd on Apr 5, 2015 15:33:28 GMT -5
Blue is the new Orange  |
|
|
|
Post by untraditionalnerd on Mar 30, 2015 16:53:49 GMT -5
|
|
|
|
Post by untraditionalnerd on Mar 28, 2015 18:58:01 GMT -5
lynq thanks This is the first time that someone ever told me that something I made makes them squirm :3
|
|
|
|
Post by untraditionalnerd on Mar 28, 2015 14:00:21 GMT -5
Thanks :D
|
|
|
|
Post by untraditionalnerd on Mar 24, 2015 11:14:51 GMT -5
On Tumblr and soon on TSR   |
|
|
|
Post by untraditionalnerd on Mar 19, 2015 11:35:19 GMT -5
Vertex paint colors: white > may not load the mesh Black > no sliders Green > Effects the second uv map (uv_1) blue > Effect the third uv map! (uv_2 the one we can find in the head/face mesh) yellow>? mystery. Could be used for passive parts like mantels. Maybe we can use it for hair as well. I was thinking about the blue 1 and looks like that is used only for head parts. It must be linked to uv_2. Uv_2 is the detailed mode sliders that the face has. This is the reason why I put green over the ears they don't react to sliders but with blue they do. Which means: Green > Uv_1 Blue > Uv_2 (Priority) I managed to apply 2 bone groups to 1 vertex without distortions. I still can't get a third one to work properly but for now a third group should not be needed since it should not affect that much. The position of the vertex on the Uv_1 and 2 is what create a distortion or not. For small or simple projects we can manually position the vertices but in case of big projects we need to find a way to project the uv like the EA one. I wonder if we can get the game to read a new slider. New color vertex + new uv map + script. Sadly I'm not a programmer and I don't even know if it's possible. I remember that there is a mod that remove the sliders limitations I wonder if that could be used as a starting point. In my case I could have 1 ear piercing package that actually fit the ear, can be reshaped by using standard ea sliders and have 1 more slider for the plug size.  It would be nice to override a CAS part somehow. |
|
|
|
Post by untraditionalnerd on Mar 18, 2015 16:29:14 GMT -5
Yeah vertex paint is a mystery some time it's needed some time is not. I don't think we can escape clipping. Most of ea cas parts clip to each other anyway eheh.
I wonder why the head has one more uv map. I wish EA gave more information about this like Bathesda did with Skyrim. I do not expect them to release a tool but at least a complete guide.
white you say hmm that's interesting because when I create a new mesh and I don't change the vertex color S4S doesn't even load it XD
I keep hoping that someone will study how to remove a cas part or make it invisible. This way we will be able to actually change how a part looks w/out having to keep the old part inside the boundaries of the new mesh. I miss second life and skyrim about this :/
|
|
|
|
Post by untraditionalnerd on Mar 18, 2015 14:49:08 GMT -5
ah! I thought none read it and since I fixed it there was no point to keep it on :3 Sure I will explain what I found out I'm more that glad to share. More people think about this and look in to it and more chances we have to get it to work! :D So to explain what I did I will show a screen so it's easier to understand 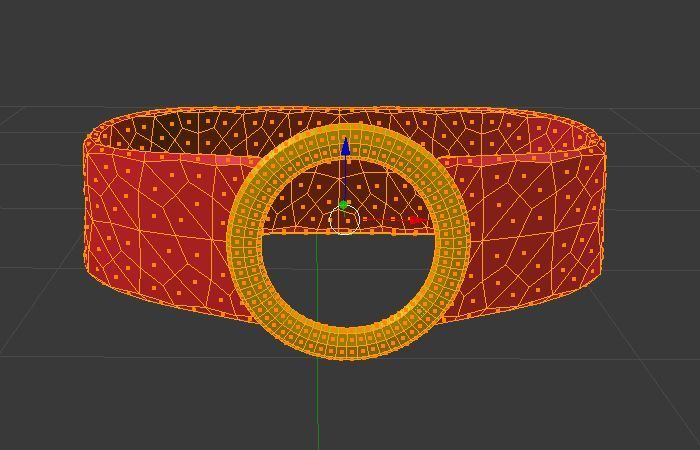 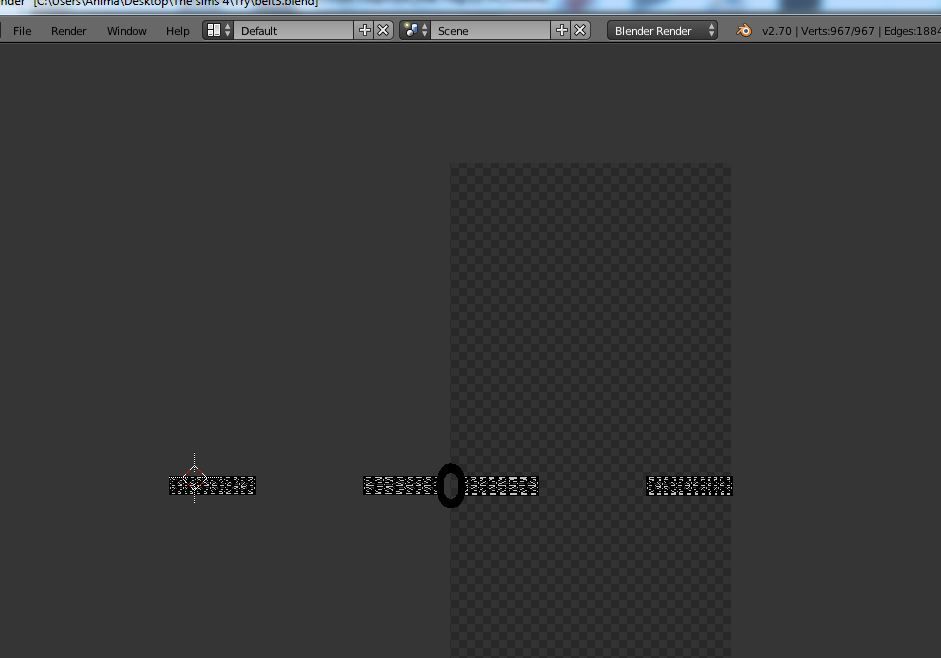 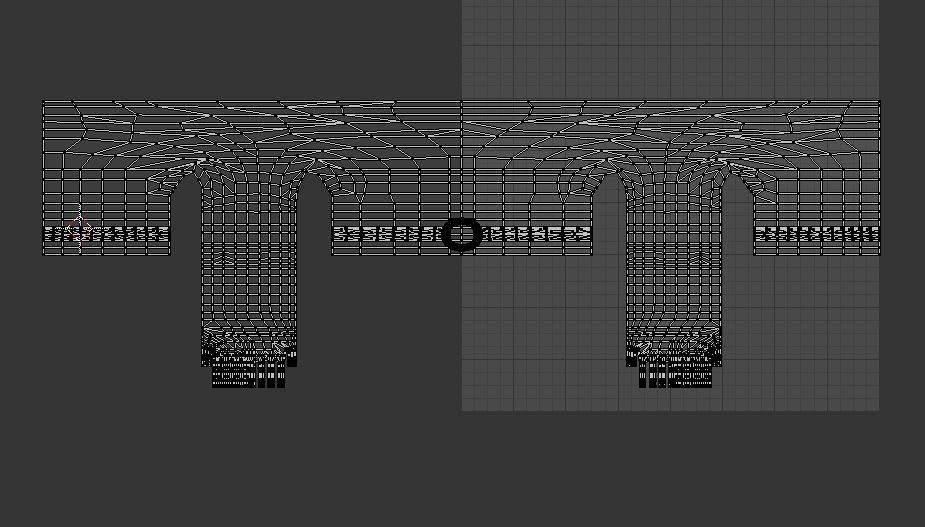 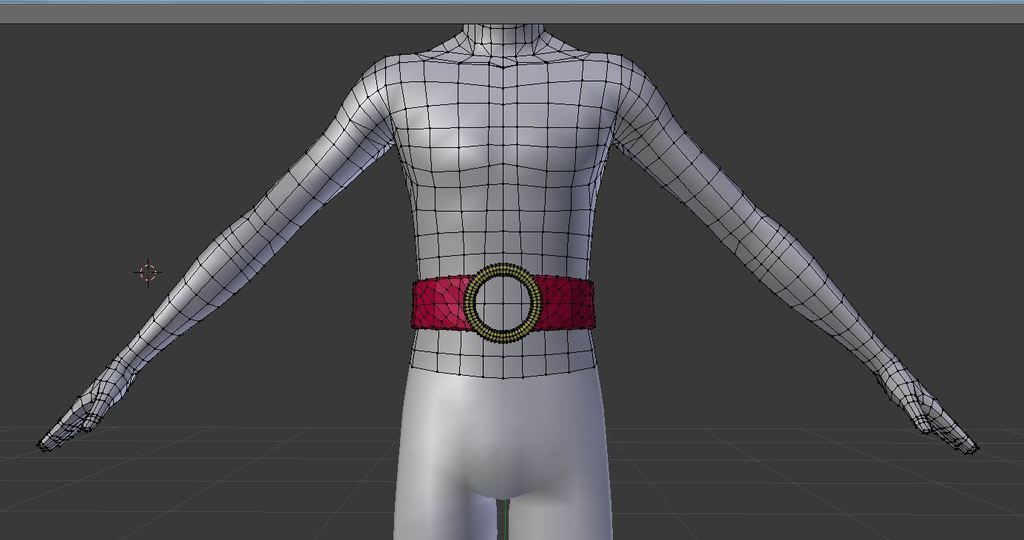 So I was trying to make it work properly. The problems wasn't the band around the waist. It's easy to make especially if you clone a part of the body and modify it. The problem was the buckle. The weight and the vertex color was proper but it wasn't working properly. In the beginning I didn't touch the band because even if it had few distortion it wasn't the main problem. Buckle situation: color vertex black ( as accessory ) weight> 3 groups by transferring and UV_0 placed in random position. By random I mean not perfectly matching the area. _I removed all the weight of the buckle and assigned it to spin 0 ( before this I tried with 3 weight, then 2 and then going for 1, did this experiment by weight transferring from an outfit with a belt and when removing normalizing it) Spin_0 is the vertex group that it's linked with the waist slider in my opinion. ( at this point only weight is "correct" ) I don't understand the use of green or yellow as vertex colors. I think that green is for general purpose ( like if the part is in right place and has correct information make the slider work on it or something like that). I noticed that yellow is used for parts that react in a passive way to sliders ( bottom of a jacket or the mantel of one outfit) or it could be something else :/ maybe a filter for only certain sliders/ rules. I went with green and it worked but it was distorted and uneven. That's why the mannequins that we use in blender doesn't work if used as parts ( vertex color is red instead of green ) The problem was in the UV_1. I used cylinder project and I don't think it's the best 1. I need to find a way to project the UV as the UV_1 is projected. It's flattened from the front view not projected ( if anyone knows how to do let me know please) I placed it down around the area where spin_ O is located. It was working but with some distortions. The band had some mayor distortions. So as you can see I manually modified every vertex of the band to make the vertices match or be close by a vertex of the body and looks like it works fine. The buckle is positioned it as I saw it on the body and it works just fine it does bend a little by following the body shape but I think for now as result is just fine. To answer your question the distortion is not by the uneven painting because I used the option to apply it to all the mesh. I think it's by uneven vertex position. I don't know if it's even because I have to create a uv_2 on my accessory and have the ear vertices match the originals or at east to stay around the same area eheh. I tried to use green for the accessory ear but it didn't work even if the UV_1 had the ear in the right area. I used blue color and it worked somehow as you can see in the pictures. When I can I will try to: Position the uv manually to make it match the uv_1 and 2. Test if it could work with more than 1 weight group ( I'll test it on the belt since the earring has only the head weight.) Sorry for the lengthy answer but I felt like there was not point to say something without explaining how I got to that point. This way if I did a mistake on the way someone else can notice it and we can work together to get it to work Edit: Black color makes the part untouchable in game. You cant use any slider on it and if it's big enough can as well block a body part like if an arm is black you will not be able to change its shape. Good for people that make costumes or cosplay Blue color: seams like it force the item to work with a slider by its Uv_1 position. Noticed that while working on my mustache. UV_1 had them on chest area and when blue they were moving with the chest are in game |
|