|
|
Post by spiritcc on Oct 27, 2017 14:46:04 GMT -5
It's just a question rather than a problem: I want to make some poses of people sitting on the base game stairs, just the usual ones that allow players to go from floor to floor. Would it work no problem? My idea so far is make a pose blind (as currently I wasn't able to find the stairs to import to blender) and just lift up the statue to whatever the stair I need and hope it would work. Would it actually work just like that or are there any issues or tricks I should consider before starting?
|
|
|
|
Post by spiritcc on Jun 24, 2017 7:55:56 GMT -5
I know this is a ridiculous question, but I for the love of god cannot figure out how to simply close eyes in pose mode. Five points to toggle around eyes, and only one kind of corresponds to the lower part of the eye.
Is there a some different way to close eyes, or am I just this stupid?
|
|
|
|
Post by spiritcc on Jul 20, 2016 16:36:19 GMT -5
So I took a CC clothing piece, made it from a full garment to a top and recolored it. The surprise suddenly popped up when I put a plain color on the top instead of a usual fancy texture  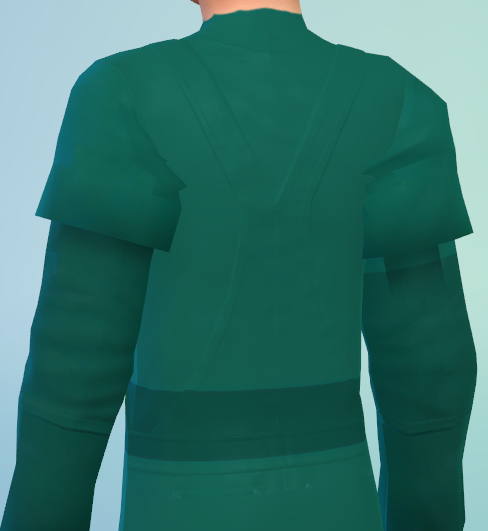 There's an obvious bump map showing, giving us an idea which EA meshes the original author has combined to create the piece. One problem is, the original package that I use for my recolors was empty: no speculars, no bumps at all. I created my own bump and the specular map and to my noob eye, they worked absolutely fine (despite being terrible), until just now I started realising that maybe they weren't working at all this time because of this hidden original bump that was there all along. I don't know where to look for it now, because it's obviously present on the mesh, but is nowhere to be seen in the warehouse files. My bump is probably far from perfect (as it's pretty much the first bump I've ever made) and was apparently missing an alpha layer the last time I checked, so maybe if I actually do everything right, it might overwrite the invisible original map, but who I am to guess :D I wouldn't even care in the first place, wasn't it for the original bump giving the recolor two evident glowing nipplesHere's the zip with both the original package and mine. Did I guess the issue correctly or is there another problem? |
|
|
|
Post by spiritcc on Jul 15, 2016 16:46:04 GMT -5
Wow, learn something new everyday, here's one more thing to worry about in every day modding :D
Thank you so much for the quick reply! now let's hope I won't need to adjust every single texture out of a thousand that this turban has for the new placement
|
|
|
|
Post by spiritcc on Jul 15, 2016 16:38:03 GMT -5
...wait a second, I changed the packages right in the mods folder, not in the working one, and yet still dropped the working one in the zip, oh my. Here and here are the proper packages. Although the UV 1 could be a thing, I never touched anything related to that in any of the files |
|
|
|
Post by spiritcc on Jul 15, 2016 16:12:45 GMT -5
So I have changed someone else's turban mesh (just for myself) and converted it for kids. One problem is, both of them have this 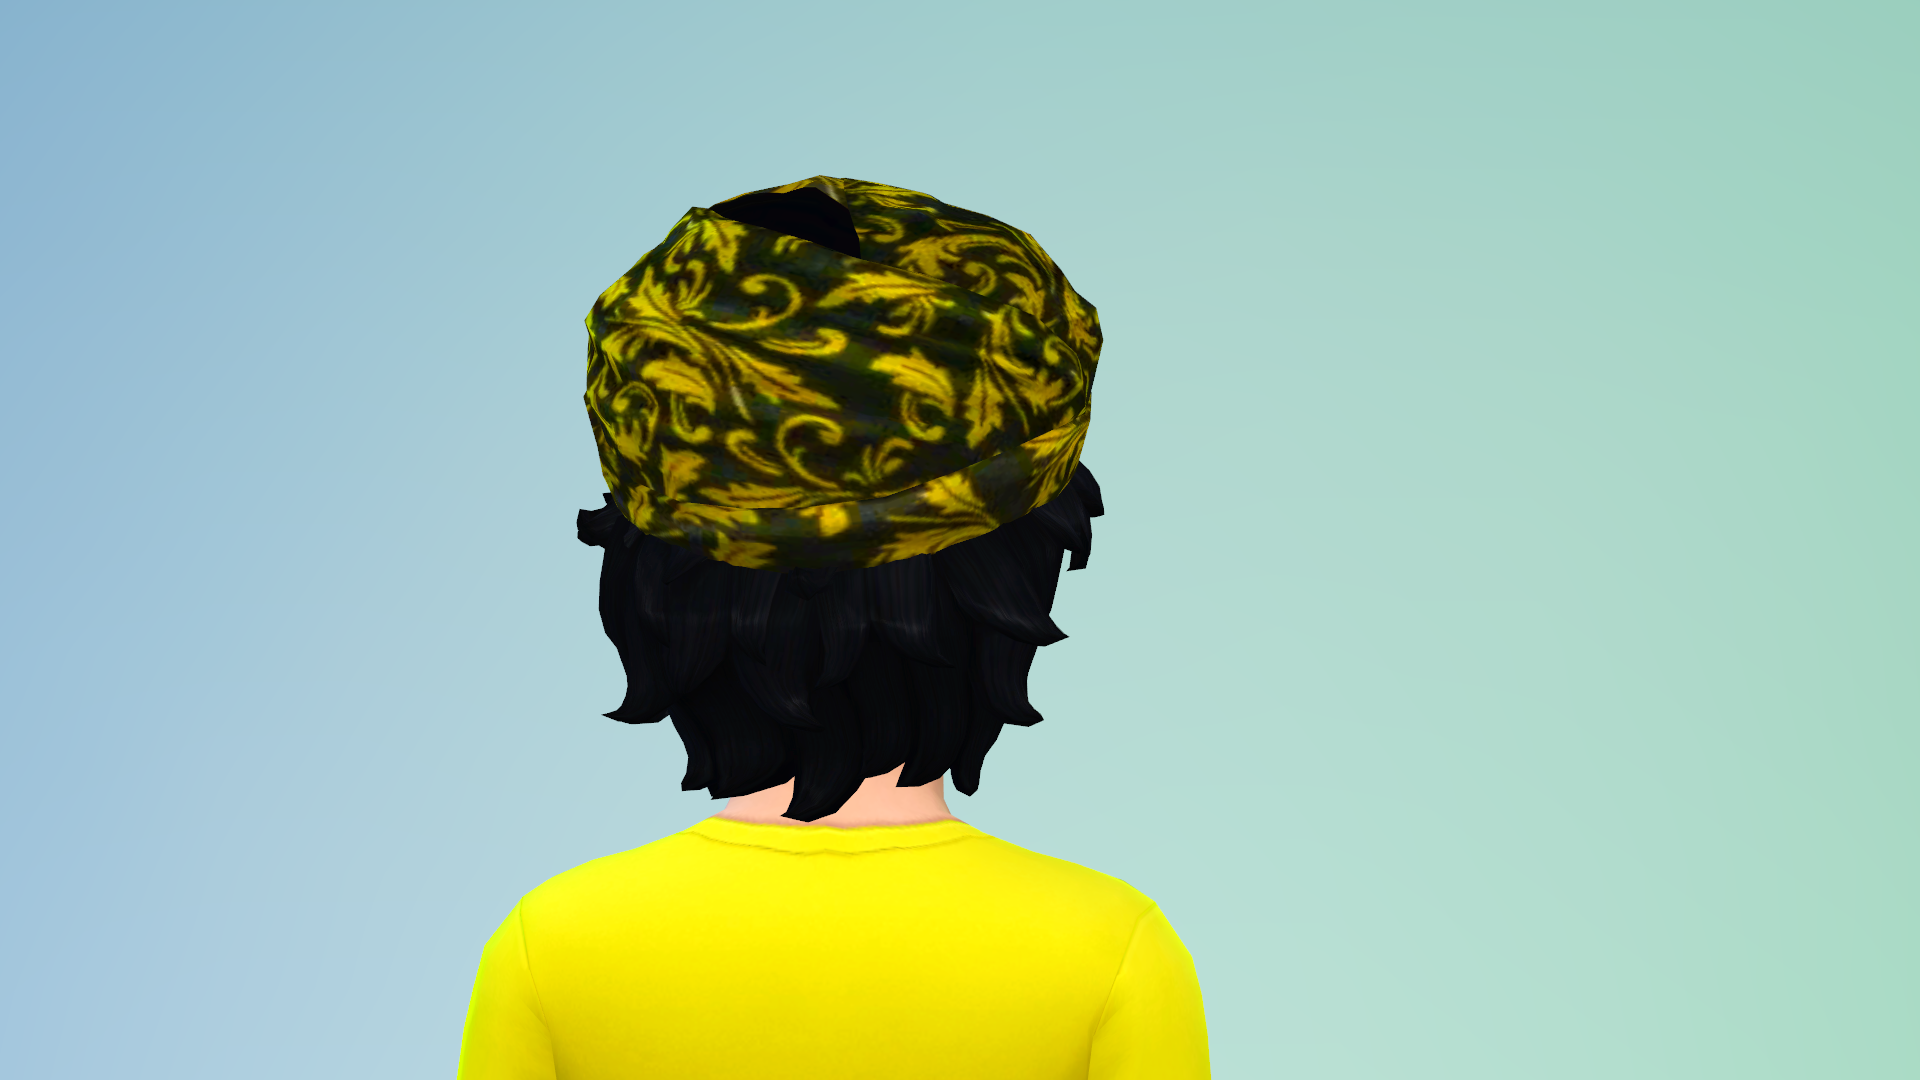 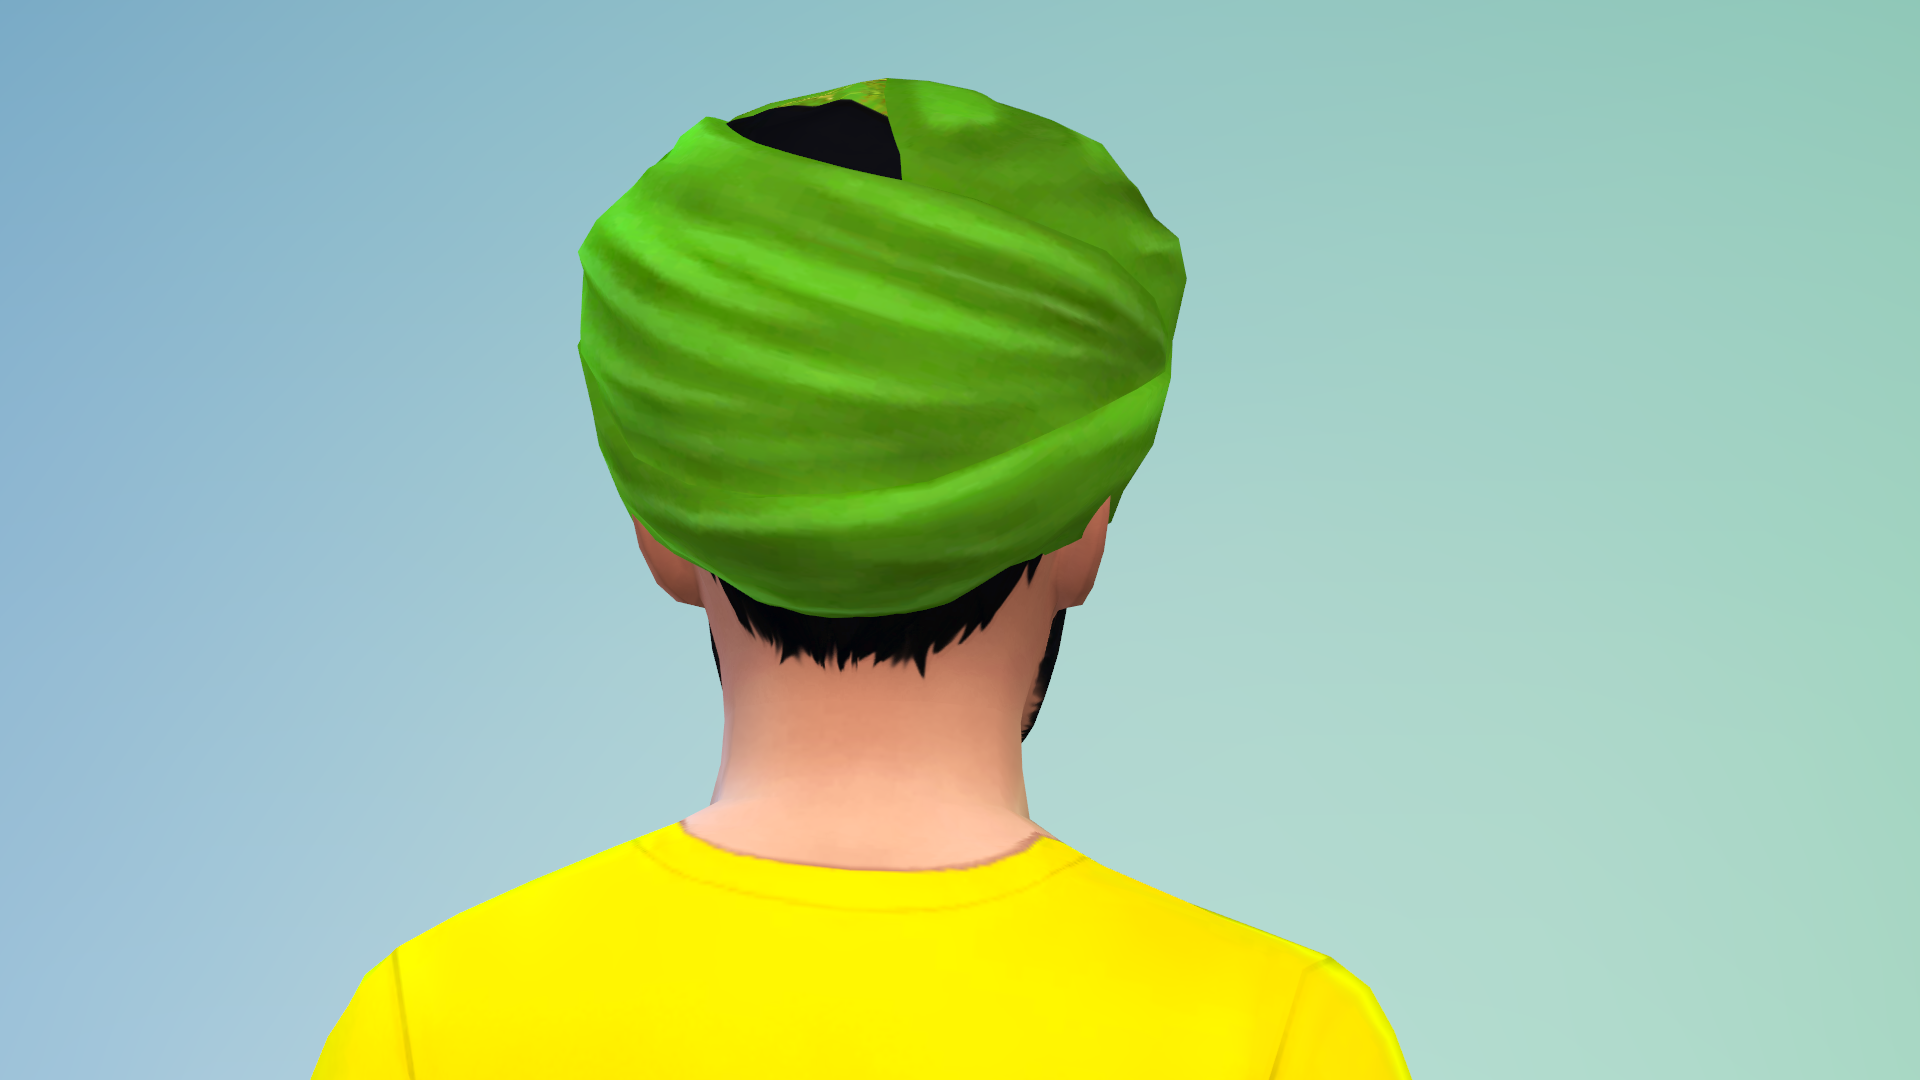 At first I thought I made the mesh too low so the hair were clipping through (different hairstyles have different levels of badness, from none at all to huge gaping holes), and after adjusting the mesh thousands of times I kind of realised that even if the mesh would be a cone the size of a grown man, the hole will still stay on the exactly same spot, so its size was not a problem. I have actually managed to solve the problem somehow, unless I thought I did: the vertex paint on the turban was black for some reason, so I changed that and removed doubles, so the hole was gone. Now, without me even touching the package, it came back. Removing doubles for all LODs didn't help, the vertex paint was all right, the UV map wasn't screwed (since I have only scaled the original mesh down without anything major), no holes showing on the mesh and on the texture (as I've said, no issues are present with certain hairstyles). Unless I'm really stupid and missed something from everything I described, now I have no idea what the issue is. The texture also shows on glasses if they are worn, but right now this is the least of my problems (glasses that match the hat with no extra work, high five, you unfortunate glitch). Here's the zip with packages and blender files |
|
|
|
Post by spiritcc on Jul 3, 2016 14:47:58 GMT -5
The original mesh change didn't have anything to do with the problem, I just decided to change it to my tastes. This is when I figured out the recolor version (that I had lying around there in the game) changes when I change the original, even though I never even touched it.
As for the replacing the base game mesh with a new one, is it basically taking a hat, for example, deleting its mesh, importing the new one on its place, and then replacing the bump map/textures in the warehouse? Some similar tutorials that I've seen look complicated about the replacing mesh bit
|
|
|
|
Post by spiritcc on Jul 3, 2016 11:56:31 GMT -5
I've decided to convert a turban (mesh done by someone else) to suit a child, just for my own use. The only things I did for that was to change exactly one lod in blender and change the age tags. I have also changed the original turban's mesh and accidentally overwrote it instead of saving as a seperate package. Therefore now I have two package files: the changed adult one, and a new child one, all have the same textures. Now I found out that those packages (that are actually three, if I take a seperate recolor version into account) are apparently all linked together, and neither can live while the other survives: only one package appears in the game, usually the first one to get into the mods folder (when I added the child version - it was nowhere to be seen, when I deleted the adult's version and brought it back, it now was this version's time to be missing in the favor of the child one) . The recolor version of the original adult turban that I haven't even touched suddenly changed to the new shape that I gave to the original (!) file; after the adult version went missing, the existence of the recolor stayed, but not the mesh itself - it's invisible in the game, with a visible mesh outline on the head. When I tried fiddling with the tags to see if something was wrong there, I saw that changing any tags in one file automatically changes them in the other, so I can't even tag the kid and the adult versions differently (therefore right now I think the main problem is that the files somehow share the same tags and cannot be displayed at proper ages and sections, somehow). I tried creating a subfolder for one of the packages and obviously it did nothing. To screw things up even more, when I discovered that all other lods of the mesh apart from the first one have been unchanged, i.e. kid's turban is still the adult version high above the head and the adult version has the original shape, I didn't bother and uploaded the same mesh for all of the other lods, which obviously didn't help either, only probably was the cause of the recolor version glitch. So in short, the original turban existed perfectly with the recolor, I converted the original for a child, changed the mesh for both packages and now all three act like one and cannot be displayed at the same time and I have no idea how it happened and what to do. Here's the very original turban package. Here's the zip with the three packages and two blender files (I thought of simply using an in-game mesh to overwrite for the turban one, but I ain't saving all those over9000 swatches until I make sure there's no other way to do it) |
|
|
|
Post by spiritcc on May 27, 2016 14:26:20 GMT -5
That was exactly the tutorial that made me attempt to convert a hair mesh :D
So at least now I know that there are no special tricks and I'm not wasting my time trying to adjust the mesh by all this scaling and moving.
Although, the merging part is interesting. Is there a difference between using the deafult kid mesh that comes with the hair (as in the tutorial, I first edited the warehouse settings to make the hair for kids only category, thus resulting in the blender file being the normal adult hair + kid mesh) and an exported bold head? I avoided merging because I feared if hair and the scalp become one mesh (as far as I understood this is not what needs to happen, but oh my noob ways I have no idea what to merge the edited edges with), a disaster would happen in the studio. Does an exported head make a difference?
|
|
|
|
Post by spiritcc on May 24, 2016 12:01:31 GMT -5
Sorry for a stupid question, but what do you mean by merging? Right now I'm trying out deleting the unneeded parts from both the hair and the head, and a few issues come because I don't know any proper way to hide the big gap between the meshes (in a way that would leave the hair mesh as unalterted as possible because holy llama do those adjusting manipulations end up ugly because there are so many points you have to think about when moving a vertex) 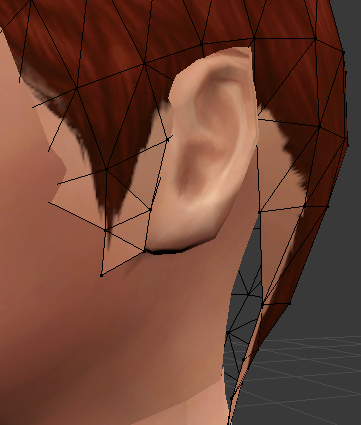 The neck is still too small, moving those parts close to it results in a painfully looking mesh from behind |
|
|
|
Post by spiritcc on May 22, 2016 15:59:21 GMT -5
So I decided to try and convert a very unfortunate hair mesh that, unlike many other hairstyles, is like 100% not transparent 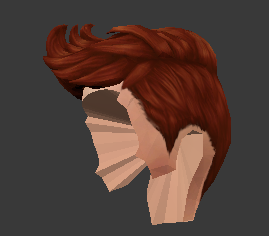 Therefore it looks like this on a child 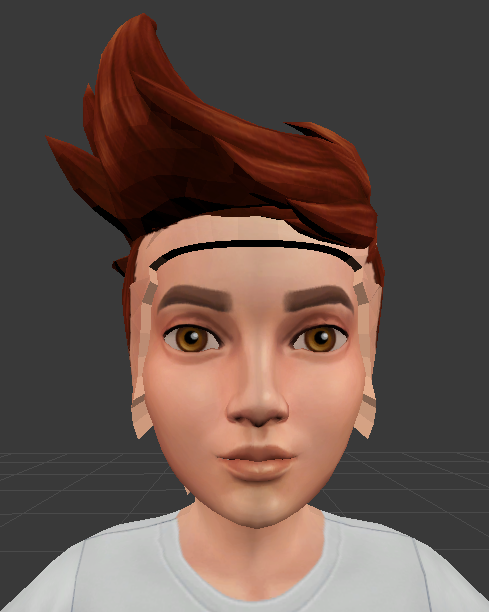 Obviously it happened since an adult's head is bigger than a child's, and since my blender skills are rather poor, I have no idea how to fix it properly. Moving those inside the head kind of helps, and yet it still looks poor on the texture (since those parts often bury the texture with themselves), deleting reveals a good chunk of space between the child's head and the hair. I'm suspecting that neither deleting nor hiding will look good in the game. Is there a way to adjust the hair that I don't know about, or is it just really leveling up your hiding-the-mesh skills? |
|
|
|
Post by spiritcc on May 21, 2016 13:33:10 GMT -5
(The second link leads to the same tumblr page)
Mine was already set on production, uh oh are things bad :D
Thank you!
|
|
|
|
Post by spiritcc on May 21, 2016 12:17:25 GMT -5
I cannot for the love of llama figure out why I apply decent looking textures to a mesh and get something really weird in the end, one of simple examples being: 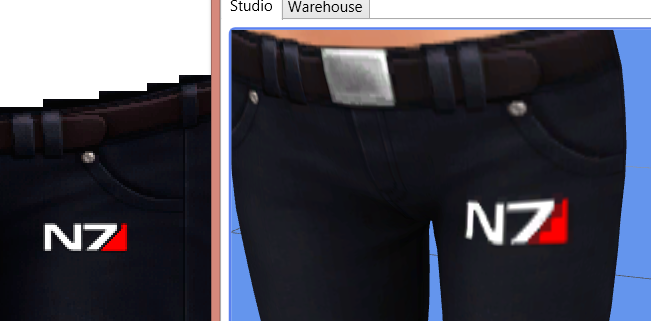 I am obviously doing something wrong then, but I have no idea what: does the material of the clothing matter, or is it something to do with bump/specular maps, or is it a some sort of stupid photoshop mistake I make? This read triangle is by far the worst I had to deal with |
|
|
|
Post by spiritcc on May 15, 2016 17:03:01 GMT -5
The character mesh.
I can't draw in black on a black alpha channel, so I use a white brush. When I check the results in the studio, it's literally white facial hair on the mesh. I can't even figure out the basic colour and I can name a dozen things that I might be doing wrong, but I'd rather just find out a proper explanation.
|
|
|
|
Post by spiritcc on May 15, 2016 15:02:57 GMT -5
As I haven't found a tutorial on making facial hair, I tried using the eyebrow tutorial instead and obviously never managed to figure anything out, so the main problem is just me having no idea what to do.
If I assume correctly, facial hair can also be drawn on the alpha channel, which did work: however, I have a problem with making the hair basic black. I decided to use a brush straight away: black brush doesn't work at all (the alpha channel is black after all), white brush turns the hair white. White brush with black on top makes white parts stay white on the model, and black parts disappear (the alpha channel is black after all, part 2).
Basically, what is the correct way to make facial hair?
|
|

