|
|
Post by oplerims on May 19, 2020 14:01:12 GMT -5
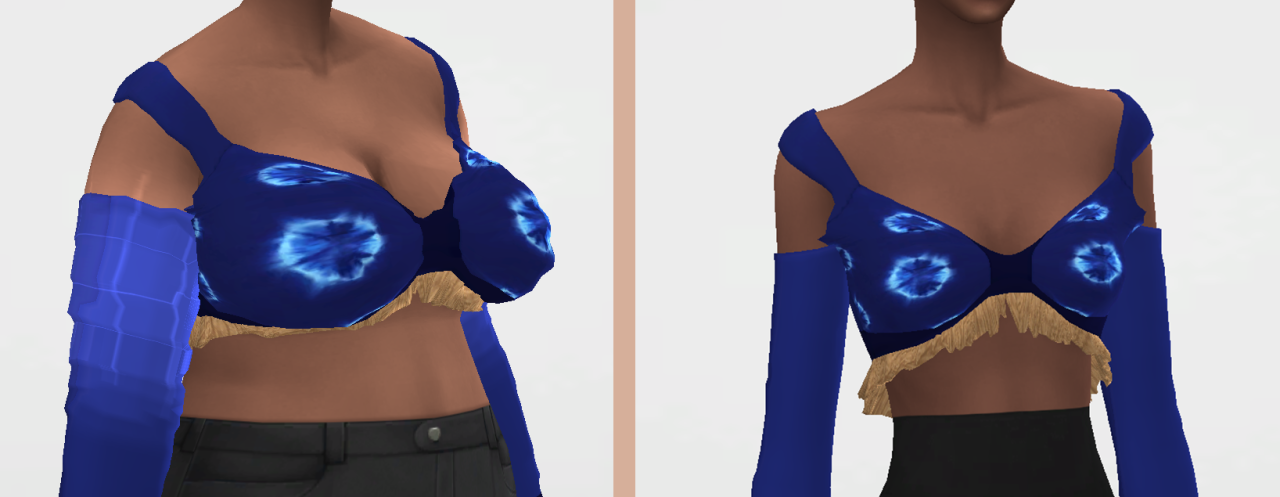
Hello, I created a top and it works perfectly on thin sims but the texture becomes weird like small stairs when more chubby sims wear it:
And also the breasts and arms sliders looks chunky with that top. What cause these issues and which tutorial could help me to solve them ? Thank you! |
|
|
|
Post by mauvemorn on May 19, 2020 14:12:28 GMT -5
Hi. Breast size is affected by both a uv_1 map and weights.If the transfer is not smooth, then the results won't be smooth either. You should use Nearest Face interpolated instead of the default option  About weights, there is a way of smoothing them, but it can cause peoblems. In this explanation I'm telling to choose All groups when using Smooth tool, but you should do it to breast vertex groups only, select the individually There is one way you can resolve it without changing topology, but I usually avoid suggesting it because it can cause more issues if you're not careful: 1). Never use it on the body. Either separate the garment or just select it only; 2). Each vertex can be influenced by no more than 4 vertex groups, the rest will be deleted by s4s during import. Use Limit total to remove the right ones ( with the lowest values) after every time you use Smooth tool; 3). Some vertex groups ( armpits, sometimes knees and elbows ) should not fade smoothly, it will affect animation. It is best to either avoid using this tool on these areas of clothing or adjust them individually afterward; 4). It can spread the paint too far, be very careful with it. You can use Clean tool and change Limit to, say, 0,05. Anyway - Make sure the mesh has Armature modifier and rig selected. This insures that weights auto normilize when you edit them in Weight paint; - In Edit Mode disable Limit selection to visible. Holding Ctrl, LMB-click-and-drag to select the garment partly, then press Ctrl L to select the rest; - Switch to Weight paint and enable Vertex selection masking for painting; - adjust the settings, if you need it to expand less or more, adjust Expand/Contract; - use Limit total with Limit set to 4 and Subset to All groups; - if it won't work, select each breast vertex groups and use Smooth tool with more Expand and Subset set to Active group. Don't forget to use Limit total again; - since you adjusted weights on the mesh with split edges, don't forget to remove doubles to make sure that vertices that share coordinates also have the same vertex group values.
 |
|
|
|
Post by oplerims on May 19, 2020 15:07:24 GMT -5
Thank you!! Everything is smoother now (:  There is a small glitch now but I think I can fix it. Thank you!! |
|
|
|
Post by mauvemorn on May 19, 2020 15:43:11 GMT -5
I don't like how the mesh is highlighted under the top, on the body. Did you not separate the garment before transferring the uv_1?
|
|
|
|
Post by oplerims on May 20, 2020 16:51:22 GMT -5
Hi, sorry for not replying sooner I was not online. This is exactly the bug I thought I could fix but actually I could not lol
You are right I did not separate the garment before transferring the uv_1, and when I saw your reply I separated the garment and transferred the uv_1 but the highlight is still there :/
Am I doing this wrong? I tried to transfer data from the full appended mesh (yfTop_EP06SweaterOpenshoulder_FlowerBlack) and I also tried with the appended mesh separated from the body and it did not work.
I made it with Nearest Corner of Nearest Face then with Nearest Face Interpolated
|
|
|
|
Post by mauvemorn on May 20, 2020 22:19:46 GMT -5
When you separated the mesh, did you replace the body after that? If yes, please share the blend file
|
|
|
|
Post by oplerims on May 21, 2020 3:41:49 GMT -5
No, I used the same old body I separated the garment from.
Should I append a new nude mesh after transferring the uv_1 and join the transferred garment with the new nude mesh ?
|
|
|
|
Post by mauvemorn on May 21, 2020 4:50:36 GMT -5
Yes, you should never transfer weights and uv_1 to the body itself, it messes them up
|
|
|
|
Post by oplerims on May 21, 2020 5:44:54 GMT -5
Oh okay, I didn't know. I will finish weight transferring and editing on a dress I'm working on (following your youtube tutorial, thank you for what you do) before fixing the top. I will post here if I fixed it or share the blend file if I can't. Thank you!
|
|
|
|
Post by oplerims on May 22, 2020 8:02:35 GMT -5
Hello, I followed what you said for the top and everything works correctly now, thank you!  |
|
|
|
Post by mauvemorn on May 23, 2020 1:37:08 GMT -5
Hi again, sorry for not replying in time for the dress issue, I was not around my pc. Did you figured that it was a weight problem and not a uv_1 one?
|
|
|
|
Post by oplerims on May 23, 2020 13:11:02 GMT -5
No, actually i gave up the dress idea (and this is why i deleted and edited the post)
I think it will be simpler to turn it into a top and a skirt. If there are problems too I will come back here or create a new thread.
But how can I identify the problems like you do? How to know if it's a weight problem and not a uv_1 one
|
|
|
|
Post by mauvemorn on May 23, 2020 13:50:04 GMT -5
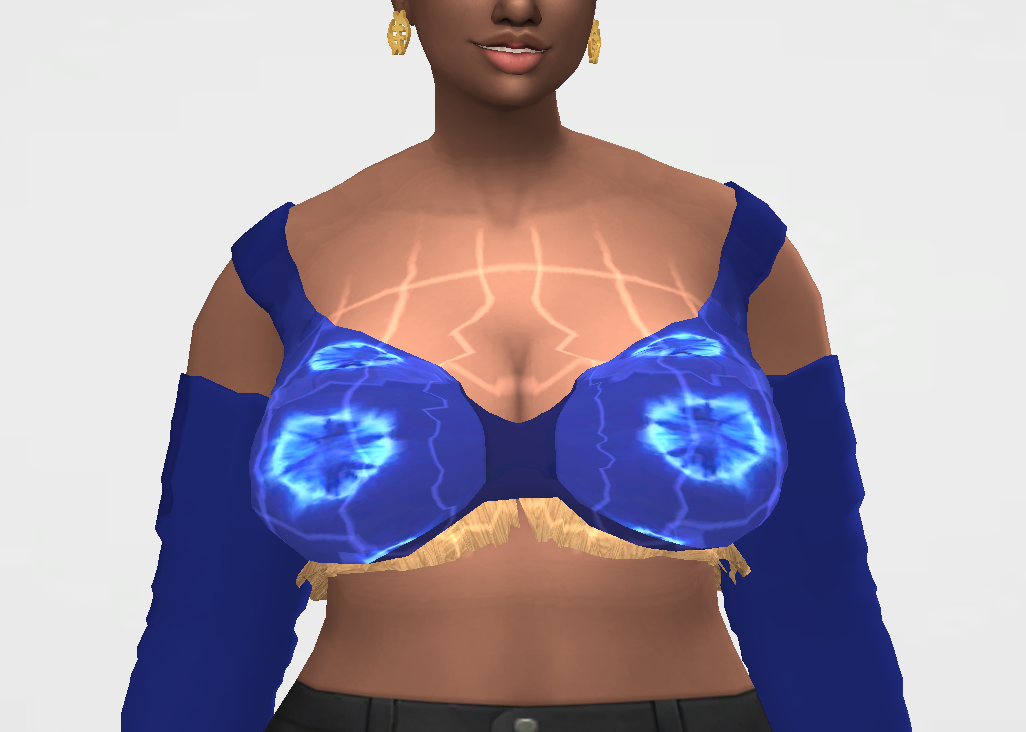
If you will turn it into a top, the problem will still remain. I can film you how to edit those breast bones if you will give me the blend Breasts are the only part of the body affected by weights for morphing, not moving. So if the mesh does not morph right in any other area, it's certainly a uv_1 map. Weights have more dramatic effect which fades in less smoothly than deformation maps. See how jagged the edge of the top is? That is because those vertices are affected by breast vertex groups differently. So if the distortion/clipping amplifies when you make the breasts specifically bigger or smaller, it's weights. If it amplifies when you change the body mass, it is a uv_1 map ( or a combination of both).  |
|