|
|
Post by laracroftfan1 on May 29, 2017 19:09:27 GMT -5
Enza, are you the one that messaged me on facebook? Just pm me your mesh or start a thread in the creator help section of the forum, and send me a link, as a community, wed love it if we post the problem publicly as to make a solution available to everyone. Awaiting your response!
|
|
|
|
Post by evekat on May 27, 2018 16:10:43 GMT -5
Is there a tutorial for this with Blender? I tried to follow it, but I failed majorly.
|
|
|
|
Post by annabluu on May 27, 2018 16:27:59 GMT -5
this will not work in blender because blender cannot render the transparency issues.
|
|
|
|
Post by evekat on May 30, 2018 18:33:22 GMT -5
this will not work in blender because blender cannot render the transparency issues. I meant, is there a tutorial on how to fix transparency issues in Blender? |
|
|
|
Post by annabluu on May 30, 2018 21:17:12 GMT -5
no. there is not a tutorial on how to fix transparency issues in blender and that is because you cannot fix them in blender
|
|
|
|
Post by evekat on Jun 2, 2018 15:32:15 GMT -5
But how is that possible? People do it all the time, don't they?
|
|
|
|
Post by Mathcope on Jun 2, 2018 15:53:13 GMT -5
I would say that people making alpha hair often don't go for Blender as a main program. 3ds Max is the first choice as well as some that use Cinema 4d or another more advanced software. Blender is capable of rendering transparency issues actually, just nobody does because it's a bit tricky to set up the program. Here is a video on which settings you'd need to tweak: Here is a transparency issue I induced to show that is possible: 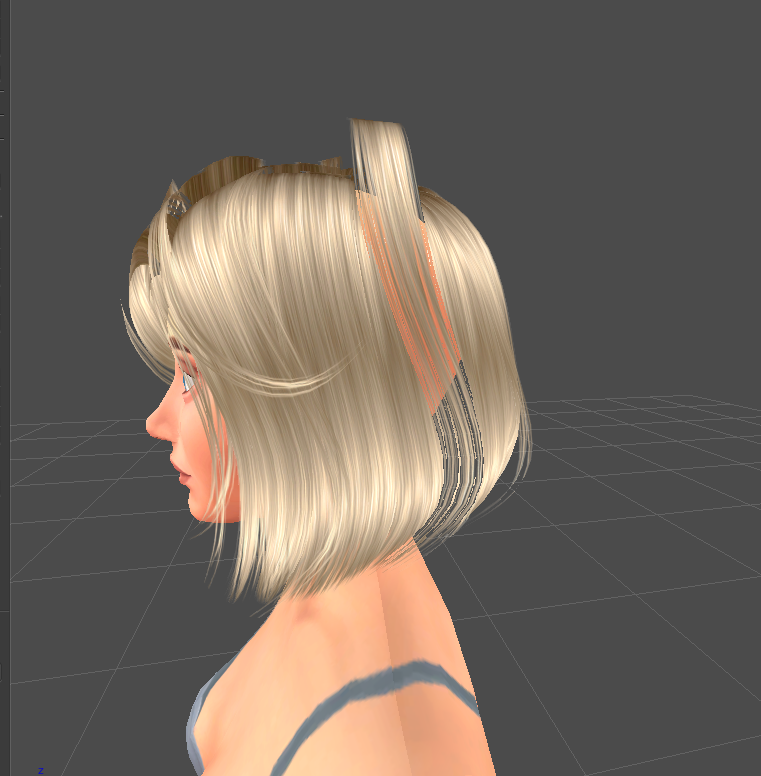 You can fix it as the same you'd do in 3ds max. Going for each plane mesh, pressing P to split into a new group until you finish all of them. Then you regroup them in the correct order. Make sure to select first the ones in the top and last the ones in the background. Fixed!: 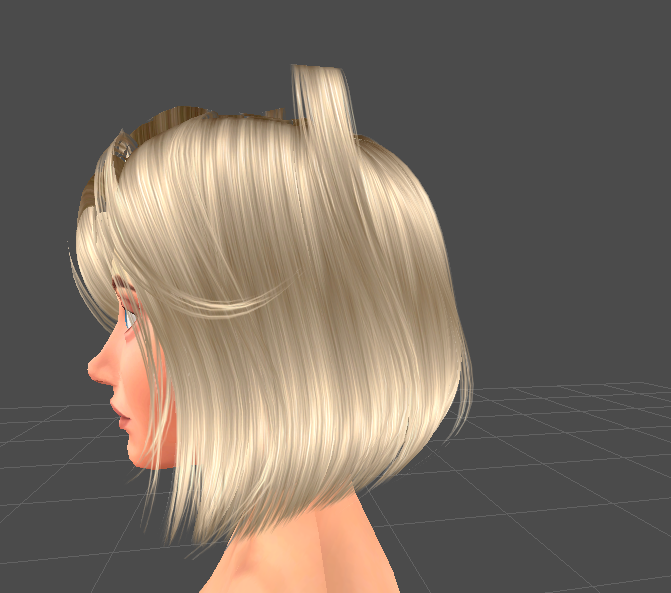 Again, as annabluu told you, this method is not the best to fix it simply because it's harder and Blender might not have the best render engine for this. However you can try to fix them going with this method and see were it goes if you don't have 3ds. It's not garanteed that you'd success but you can surely try. |
|
|
|
Post by annabluu on Jun 2, 2018 19:09:26 GMT -5
ah! how interesting!  this can help a lot of people knowing they have the ability to fix it in blender. I had no idea it was possible; I even tried researching and doing my own experiments. thanks Mathcope |
|
|
|
Post by evekat on Jun 4, 2018 17:23:08 GMT -5
I'll have to give this a try. I attempted to place all layers in the order they should be from top to bottom, and that didn't work, so I did bottom to top, and I literally got the same result. Unfortunately, Blender is my only option. Maybe with these settings, though, I can finally figure it out. Thank you. |
|
|
|
Post by Mathcope on Jun 9, 2018 17:59:18 GMT -5
Blender is not the ideal rendering tool to fix this kind of issues because it doesn't handle transparency as well as others 3d programs but given that it's the only tool you have to work it's worth a shot. You can probably fix the major issues. Minor issues might need further work to get it done properly. If you are still having issues with your project you can open a creators help thread sharing your files and a picture of the problem for a more guided help. evekat |
|
|
|
Post by shaystylez on Jun 27, 2018 11:30:39 GMT -5
where is the tutorial on how to load sims 4 avatars into 3ds max? or how to make hair using the application?
|
|
|
|
Post by laracroftfan1 on Jun 27, 2018 21:50:25 GMT -5
Evekat, if you send me your mesh I might be able to fiddle with it to see what I get in 3ds. 😁😁😁
|
|
|
|
Post by evekat on Jun 30, 2018 17:02:12 GMT -5
Evekat, if you send me your mesh I might be able to fiddle with it to see what I get in 3ds. 😁😁😁 I have a few I'm working on, but here's the one I was trying to order the layers in: www.dropbox.com/s/c7pckiyvns6axtt/test1.blend?dl=0
Layers are still separated from the last time I worked on it.
|
|
|
|
Post by jwofles on Jul 1, 2018 15:49:24 GMT -5
Here is an explanation I wrote for the process in Blender.
Triangulate the entire hair.
Then separate every plane in order from top layer to bottom (press L to select plane, then P to separate).
Separate everything till s4studio_mesh_1 is just an empty mesh (in edit mod it should just be an origin to show the middle but there should be no verticies etc).
You should have a bunch of separated meshes. Then, select them all from the highest number to low (for instance mesh_1.0075 then mesh_1.0074 then 73 etc etc etc), and when all selected, make sure you active selection is on mesh_1 (the empty mesh), and press ctrl + j.
This worked for an alpha hair I made in Blender.
|
|
|
|
Post by Mathcope on Nov 27, 2018 23:46:39 GMT -5
Here is an explanation I wrote for the process in Blender. Triangulate the entire hair. Then separate every plane in order from top layer to bottom (press L to select plane, then P to separate). Separate everything till s4studio_mesh_1 is just an empty mesh (in edit mod it should just be an origin to show the middle but there should be no verticies etc). You should have a bunch of separated meshes. Then, select them all from the highest number to low (for instance mesh_1.0075 then mesh_1.0074 then 73 etc etc etc), and when all selected, make sure you active selection is on mesh_1 (the empty mesh), and press ctrl + j. This worked for an alpha hair I made in Blender. The key here is the order of the groups. You could do this in almost any 3d program. Also Milkshape for example. The reason many do in 3ds max is because you can actually see the transparency and where you need to fix it. For someone that doesn't have experience in hair it might get difficult to decide which plane is on top of which. |
|


 this can help a lot of people knowing they have the ability to fix it in blender. I had no idea it was possible; I even tried researching and doing my own experiments. thanks

