|
|
Post by tsminhsims on Mar 3, 2018 11:52:09 GMT -5
Hi, today I want to share with you an easy way to assign two bone: b__R_Clavicle__ and b__L_Clavicle__ ( move with shoulders )You can see the differences before assigning and after. 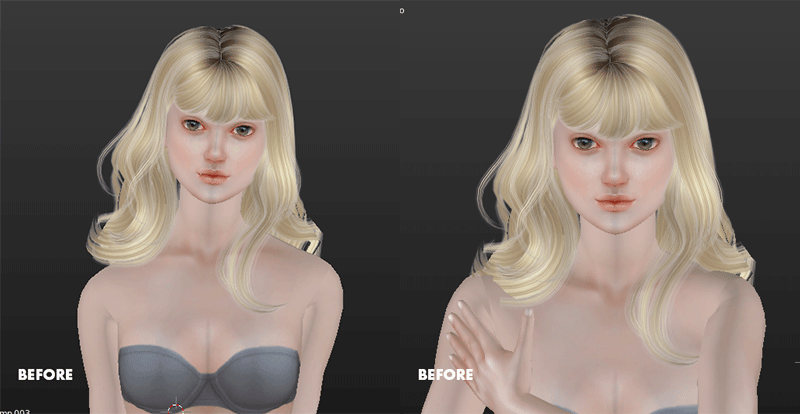 It helps your hair (or something else) can work smoothly with many animations and poses. 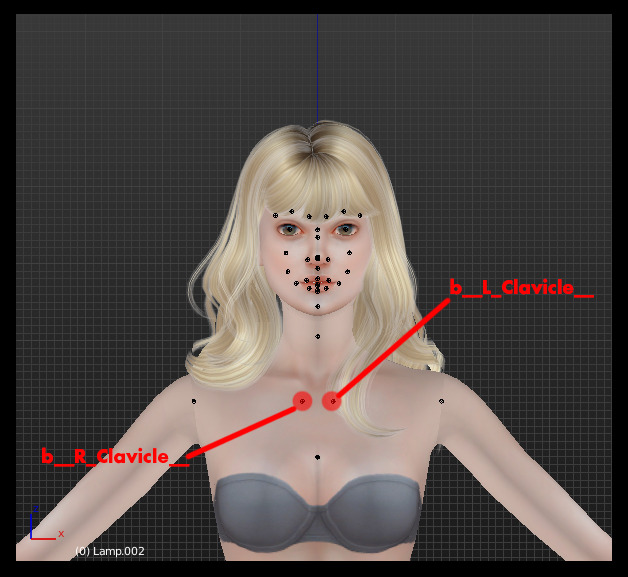 First, I want to show you the position of these bones, the b_L_Clavicle_ is on the right, and the b_R_Clavicle_ is on the left, so there is a small point you need to distinguish. Let ‘s start. Change blender view like this: 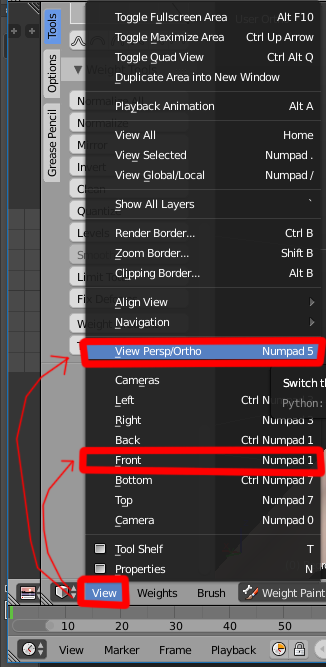 Step 1: Step 1: create two empty bones b_L_Clavicle_ and b_R_Clavicle_, and now we are working on the b_L_Clavicle_ first. Go to Weight Paint mode, set the Curve as the image below. 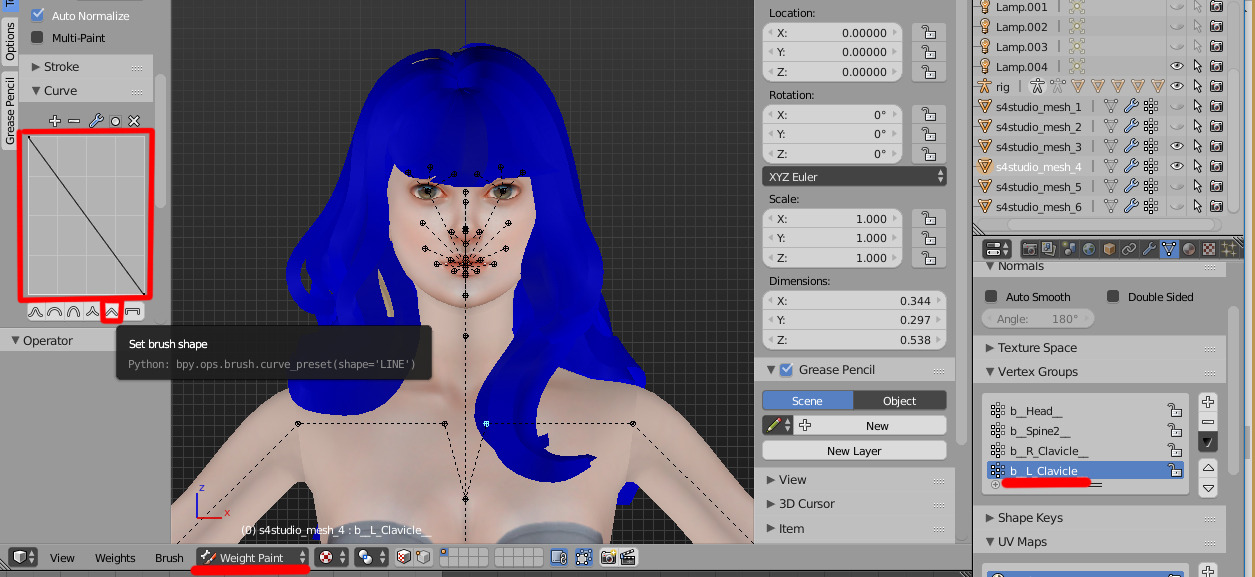 Step 2: Step 2: Select Weight Gradient and drag a line from two red points 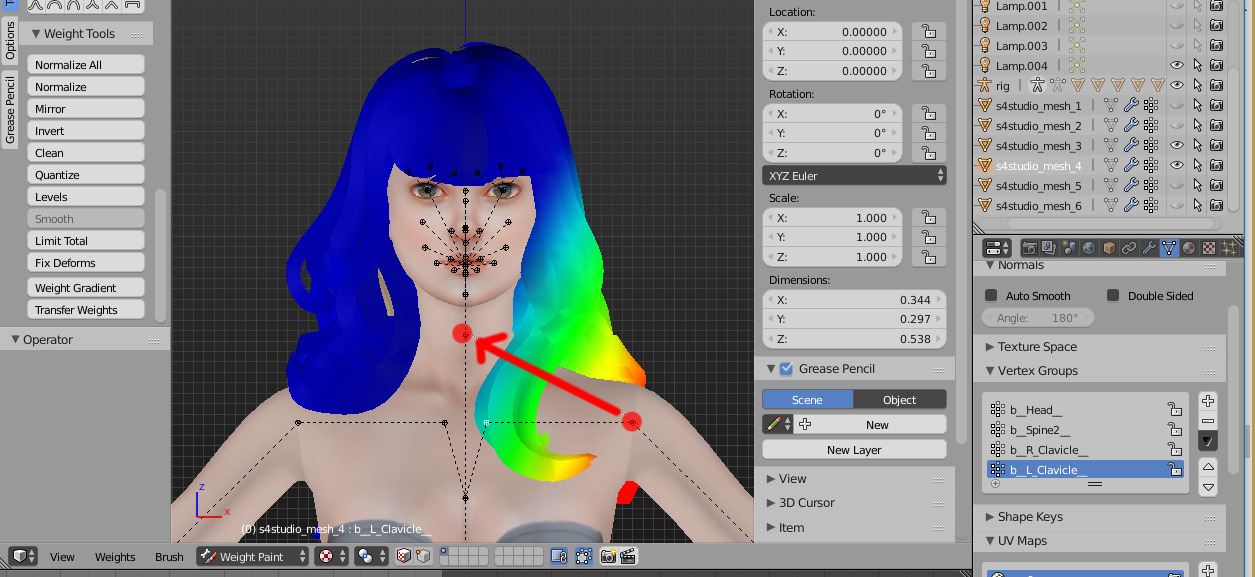 Step 3: Step 3: Click on Level and put a suitable number (it must be a negative number) to make the area smaller, I usually use -0.25 or -0.5. 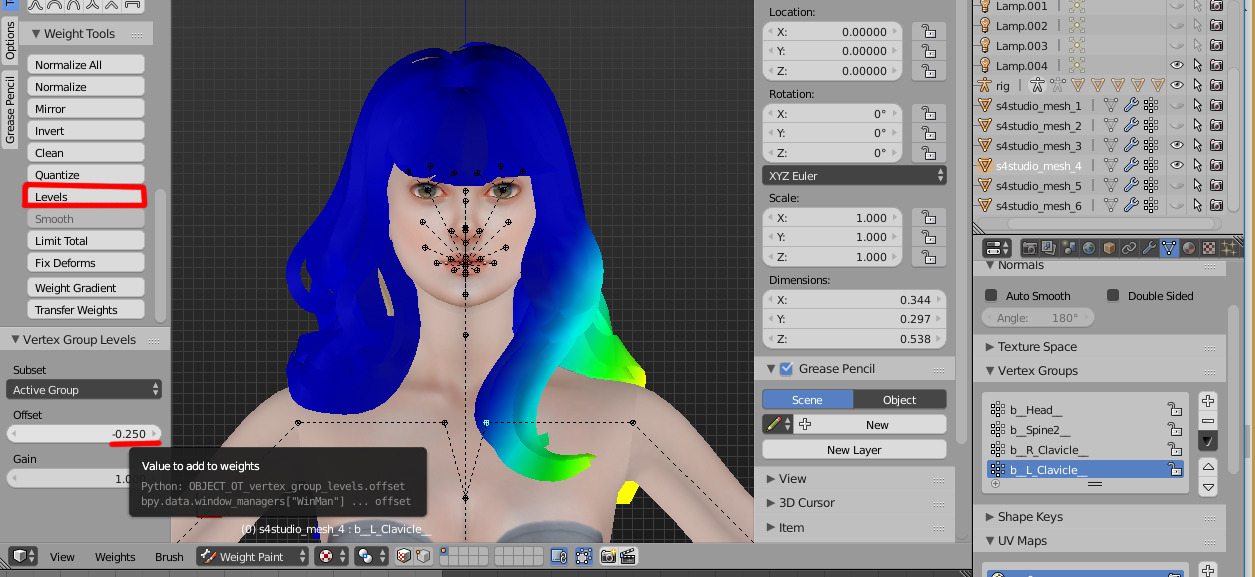 Do the same way for b_R_Clavicle_. And that ‘s it. But keep in mind, if you assign your mesh more than 4 bones, you should Limit Total to keep the number of the assignment on a vertex under 4, because the game just read 4 bones per a vertex. This is my result: With assigning: Without assigning: Read my other tutorial for hair here: [X]
|
|
|
|
Post by annabluu on Mar 3, 2018 11:55:04 GMT -5
thank you for this!  this will help many people. |
|
|
|
Post by orangemittens on Mar 3, 2018 14:07:55 GMT -5
Thank you for sharing this helpful tutorial |
|
|
|
Post by mothersuperior on Oct 26, 2018 23:16:42 GMT -5
Hey, I have a question, how do you import your custom sim into blender? I assume it's not the default s4s model since you have custom skin tone applied.
|
|
|
|
Post by tsminhsims on Nov 18, 2018 2:25:50 GMT -5
|
|
|
|
Post by mothersuperior on Nov 18, 2018 5:28:05 GMT -5
Thanks for the info! I'll take a look at it. |
|


 this will help many people.


