


Post by littledica99 on Jun 12, 2018 8:56:54 GMT -5
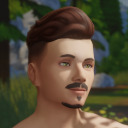
I was wondering why the only UV_1 template we have access to has UV Map seams all over it, making it impossible, or at least very complicated, to see if the UV_1 we transferred was successful. To solve this issue, i came up with a new UV_1 template, based on the skin of one of my sims that i've extracted a few years ago using a method that i've heard doesn't sadly work anymore. Anyhow, here's the result:

Anyone with a sim texture extracted can create this! All you need is a sim 3D model in a blender scene, the skin itself with the layout of a UV_0 texture. Once you've got all of your items listed ready, put the texture on the Sim 3D model via an EMISSION shader, make sure it's emission, it's very important! Once you've done that, you want to open your Node tab and, once you're there, create a new texture node. In that node, you want to add a blank 1024x1024 image, this will be used to bake your new texture on. once your new texture node is created, click on it, and close the node tab. You just want to have that texture node highlighted. Okay, now go into your model's object data (triangle icon tab on the properties column), and from there, select the UV_1. Okay, now go into the first tab, the one with the camera, and reach the SAMPLING section. Increase the render sampling to however your PC can stand (usually, my gaming laptop can stand 2000, i wouldn't recommend that size to any low end PC or mid range, in that case i would go with 1000 or lower). Once the sampling is increased, go to BAKE, select emission, put the margins to the max and click bake. Once the baking is done, you'll be able to save the new texture in the UV Editing / Image viewer tab.
it sounds hard from all the text, and i'm sorry for my low tutorial writing skills, but it's really easy once you get the hang of it!