|
|
Post by StellarElite on Aug 12, 2018 0:22:49 GMT -5
Hi all. Having a weird issue. These rips have all of a sudden appeared on my lamp. I'm just at the stage of trying to get the specular/diffuse correct in game to match other objects it will be in a set with and now I've taken a step back with this issue. It is a lamp and I have not done any vertex paint or editing of the light source yet. That was going to be my last step if I ever get there. These rips were not there before none of my earlier screenshots show them. However I did notice it in S4Studio but since it wasn't in game so I didn't bother with it as I just want to move forward and finish. Obviously paying for that now. 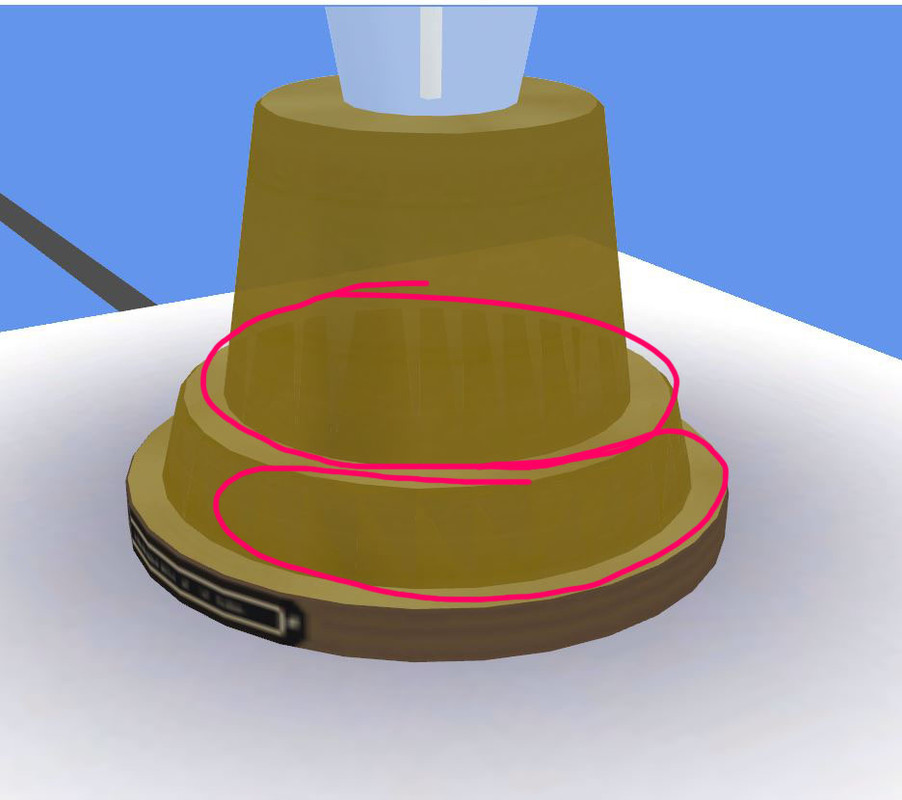 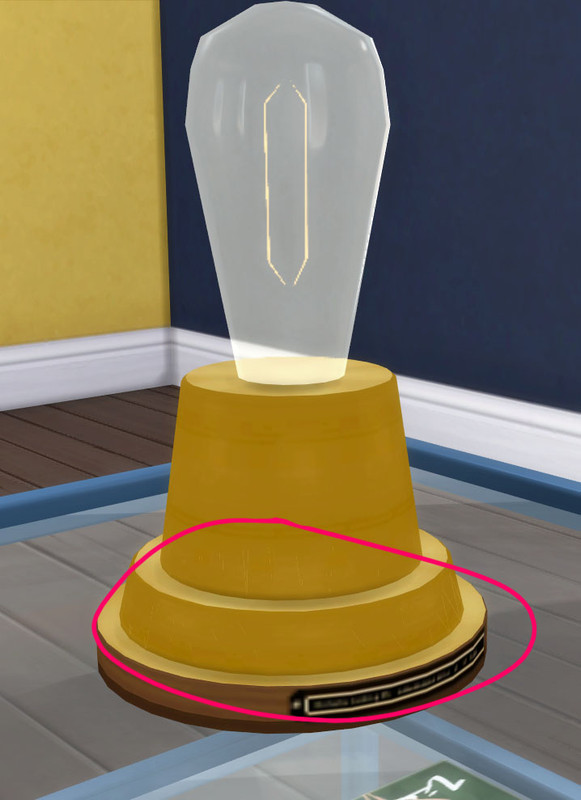 Blender FilePackage Blender FilePackageHas anyone seen anything like this? I'm not sure what could cause it I don't see anything in my blender file that looks like this on the faces. edit: And of course the preview image quality is degraded so much you can't even see the issue. There are basically white lines if you get close up in game that look like the old lot tears you used to get when messing around in CAW for TS3 if anyone remembers. They are in the shape of triangles basically. |
|
|
|
Post by kitkat on Aug 12, 2018 9:09:39 GMT -5
Just looking at your blend, it looks like an issue with your UV mapping. You have gaps between the faces of the cylinders which means the texture you use won't be uniformly applied over the cylinder. There will be gaps in the texture, too. Instead of a seam on every edge of your cylinder, you should mark the edge loops of your circular planes and one edge seam between the faces of the cylinders (I do it in the back to hide where the texture might be "torn" a bit) so that each cylinder will unwrap as a group instead of little pieces. Like this: Base:  Light Bulb:  The gaps in your map are the same general shape as the issue you're seeing in game:  |
|
|
|
Post by StellarElite on Aug 12, 2018 11:40:26 GMT -5
kitkat Thank you very much! It seems so obvious and simple now that you explain it this way lol. I had to laugh at how much time I spent mapping and re-mapping these little puzzle pieces into place so that the uv grid matched up but then still didn't work in game/s4studio. I wasn't even going out of my way to do things the hard way as usual this was me just selecting the whole joined mesh, clicking mark seam, and unwrapping en mass instead of being specific about it which is obviously why I wound up with a mess. I've learned a lot though and you helped immensely in that so thank you very much!! I am getting some strange projections on the map side when I mark the seams as you did though. Not sure why I'm not getting the same map you are. After marking the seam did you just select "Unwrap" or did you use one of the other options? I did try "Smart UV Projection" which I find makes nice neat maps but some of the pieces did not seem to be attached to anything in 3D view window I saw nothing "moving" for lack of better way to describe. Obviously we have to wiggle things around to figure out what maps what so we know where to put colours/textures but when I did smart uv projection pieces of the map seemed unaccounted for. 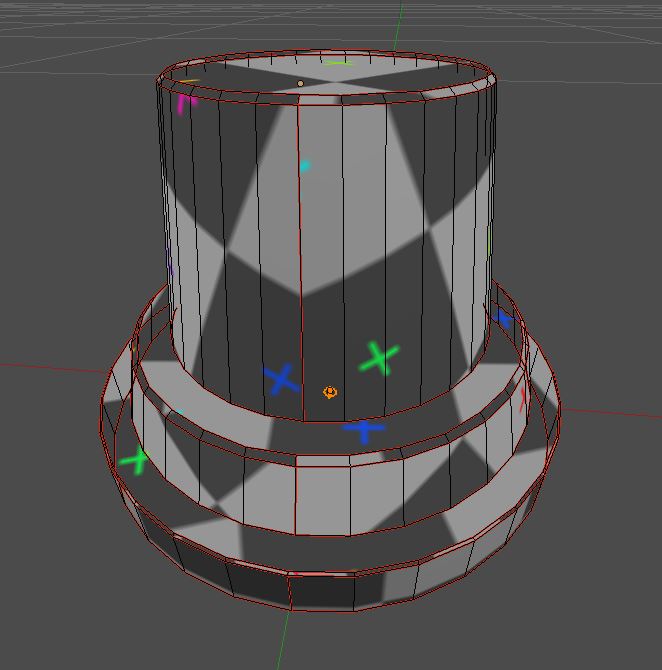 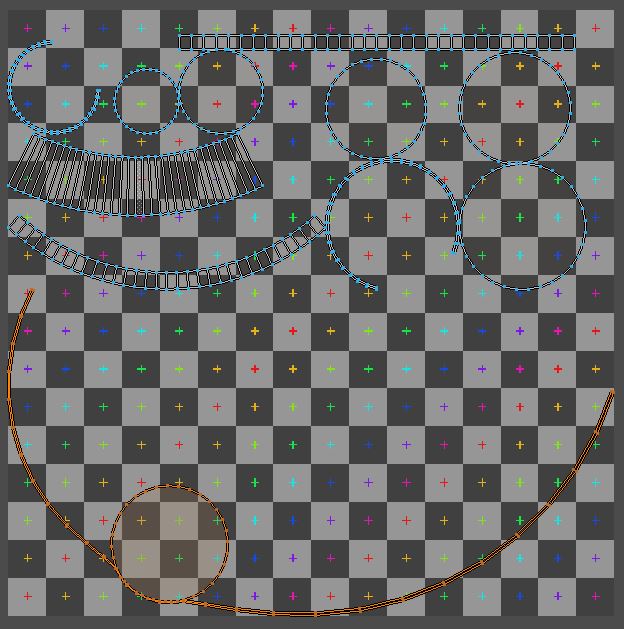 If this is how it has to be I don't mind too much but I like things to be neat and separate and I hate that that one really big semi-circle at the bottom left is attached to the circle. I think I did it the way I did because I read somewhere that the pieces can't overlap in any way so I went overboard keeping them separate. I didn't even think of the spaces IN BETWEEN causing artifacts ugh!!
|
|
|
|
Post by StellarElite on Aug 12, 2018 12:12:46 GMT -5
Ah! Please forgive my double post I just realized what I did differently. I marked seams on the small bevels as well as the cylinders themselves so I wound up with those sweeping curve maps. If I mark seams as I THINK you did I still get a different result though which is odd. Anyway I'm going to keep playing with things let me know if I'm doing something dumb lol 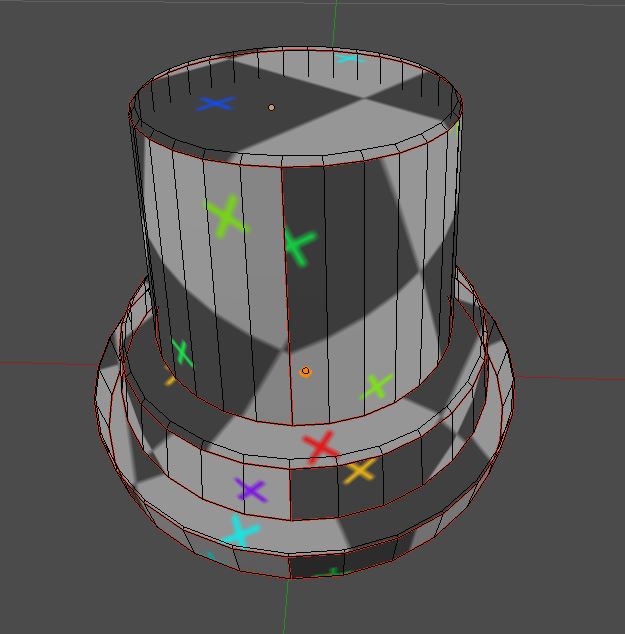 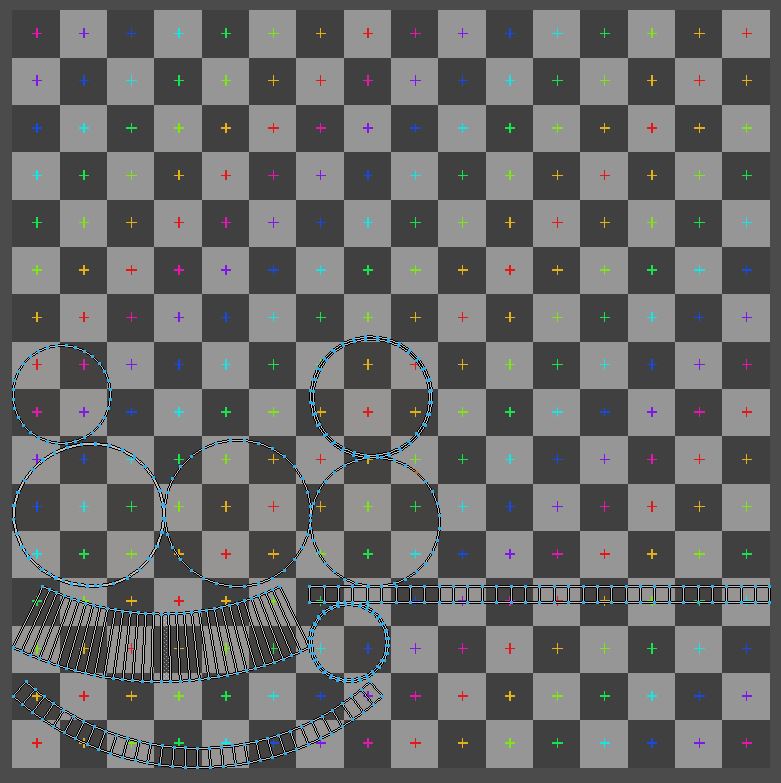 |
|
|
|
Post by kitkat on Aug 12, 2018 12:24:12 GMT -5
Happy it helped  UV mapping is a giant pain, lol. I just used the "unwrap" option. I don't really understand how "smart uv" works. I generally use unwrap (or "project from view" in ortho on individual parts if I don't like the overall "unwrap" result). The main difference I see is that you've marked seams to separate out the little beveled edges. I mapped them as part of the circular plane since the angle difference is so slight. So, just a seam on the bottoms of the bevels instead of top and bottom. (and remember to remove the little seam between the bevel faces if you want it all stay connected) You definitely don't want parts of your map overlapping, but you do want adjacent bits of the same geometries (like your cylinders) to touch and line up if they will be taking the same texture. I also forgot to add that I mapped the light bulb filament using "project from view" in front ortho view. Since it's so small and thin, that should work fine. |
|
|
|
Post by StellarElite on Aug 12, 2018 13:09:04 GMT -5
Thank you again! I will remember all this for the rest of the set and can take it back to the brass table I made even to clean up the maps! I will be using a brushed metal texture that is seamless on the top two cylinders so I think having the seam marked in the back should be fine? If the texture itself is seamless there should be no seam. However the texture I'm using as the wood on the very bottom is not seamless it is horizontal striped sort of so maybe I should play around with no seam on that piece or try a different wood texture. Will see.
I'm curious about the project from view it makes a very neat looking map but does it only do the one side? Does that mean if I pan around the object in game to the back view it won't show? Confused on that bit.
The funny thing is I love the texture part where I get to mess around in photoshop and puzzle piece it together but the mapping part has really been killing me with this set I'm making. I've never re-done something so many times LOL.
|
|
|
|
Post by kitkat on Aug 12, 2018 15:36:57 GMT -5
Thank you again! I will remember all this for the rest of the set and can take it back to the brass table I made even to clean up the maps! I will be using a brushed metal texture that is seamless on the top two cylinders so I think having the seam marked in the back should be fine? If the texture itself is seamless there should be no seam. However the texture I'm using as the wood on the very bottom is not seamless it is horizontal striped sort of so maybe I should play around with no seam on that piece or try a different wood texture. Will see. I'm curious about the project from view it makes a very neat looking map but does it only do the one side? Does that mean if I pan around the object in game to the back view it won't show? Confused on that bit. The funny thing is I love the texture part where I get to mess around in photoshop and puzzle piece it together but the mapping part has really been killing me with this set I'm making. I've never re-done something so many times LOL. Project from view only shows the side you see in the mesh window. In ortho view (which is a dead-on view, unlike user perspective), you can select just the faces you can see from that view and map them. You can do this from all views (on your numpad: 1 - front ortho, ctrl+1 - back, 3 - right, ctrl+3 - left, 7 - top, Ctrl+7 - bottom). If you don't zoom in or out all all while doing this, everything will be mapped to the same scale. It's most useful when you have flat planes or sides to map. It's a handy kind of shortcut when marking seams is cumbersome. [Sometimes my brain does seams well, and some days I just can't picture where they need to go to get the best unwrapping  ] Texturing and modeling are way more fun to me than mapping! Mapping is a necessary evil. It does get better with practice. I'm not an expert by any means, but I'm getting much better at it. It gets a lot more manageable once you learn some of the hot keys and little tricks to it. |
|
|
|
Post by StellarElite on Aug 12, 2018 15:42:52 GMT -5
Lol I don't know I'm feeling like I'm doomed to fail at this stuff. So now I've managed to create a new issue. Somehow after re-mapping and re-texturing EVERYTHING sims 4 studio seems to be ignoring the mesh I'm importing and sticking it's own in there with a map that looks nothing like mine and the same issue persists. Rips and tears are still there. I imported over and over, closed and re-opened S4S and even made a new clone and tried again. This phantom mesh seems to keep forcing its way in and it's got these triangles all over it that I can only conclude are causing the rips. I have no idea what to do now. This is what my mesh looks like -- My mesh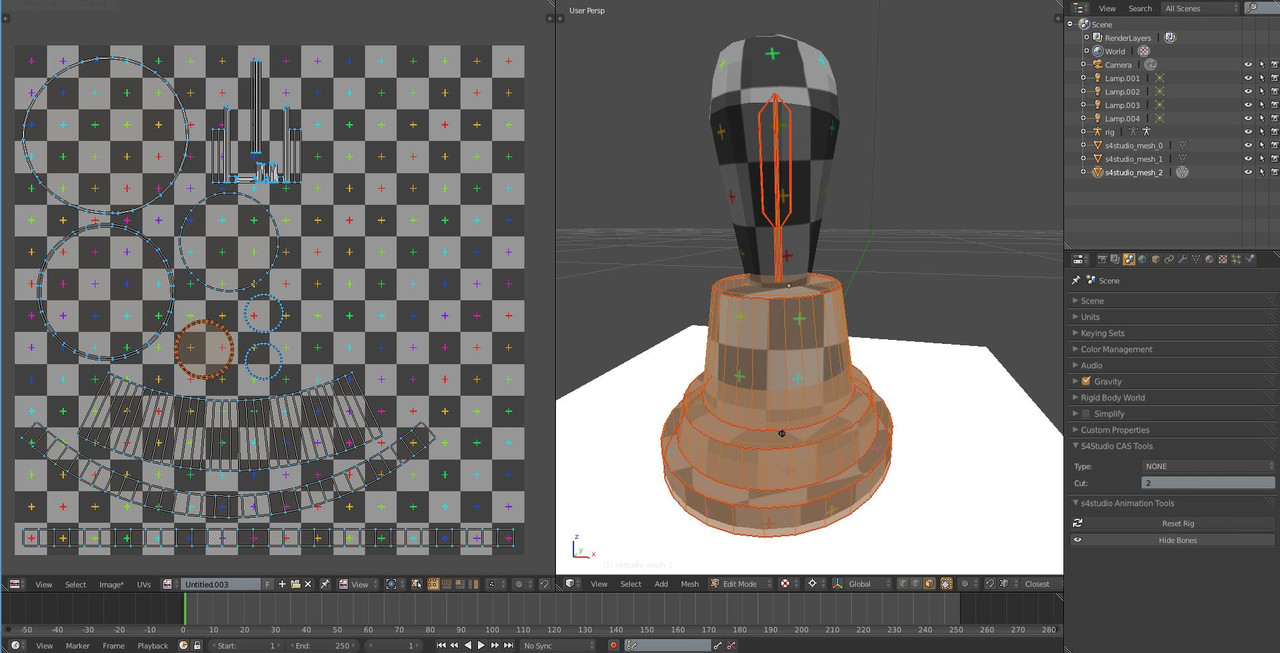 When there was no change I thought WTF so I exported the mesh out of both my original and test package... Original Package Test PackageThis is the mesh that exported from both my original package and the test package. I don't get it. 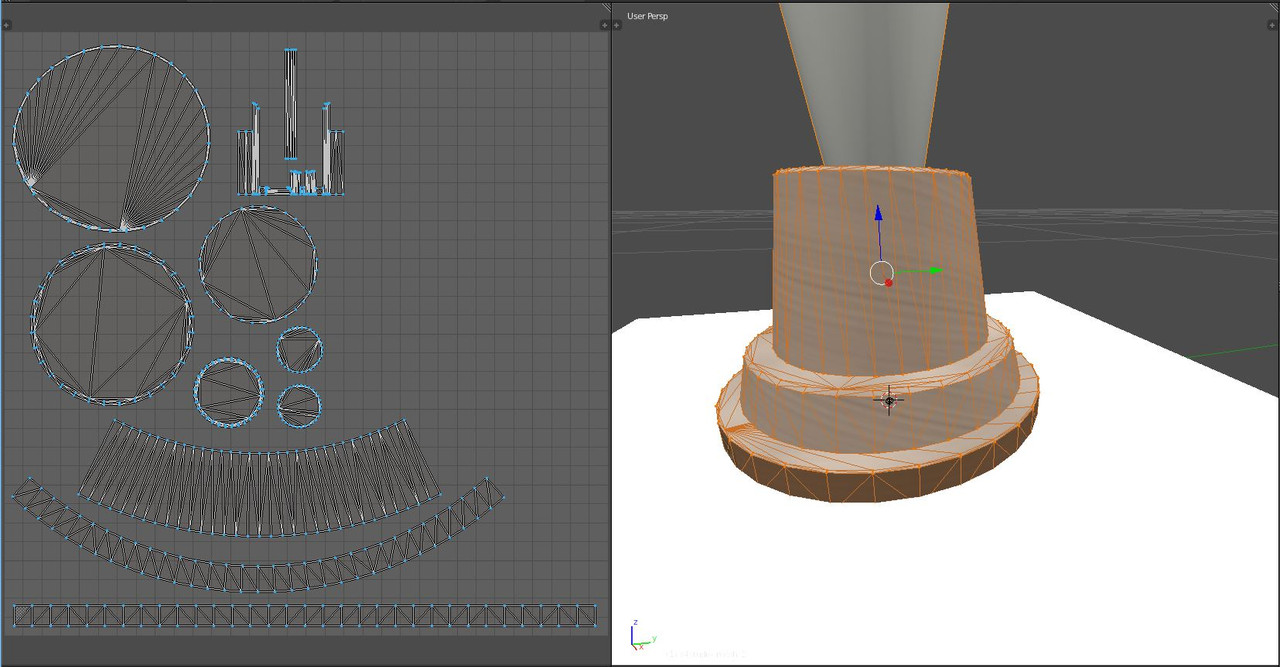 Exported Mesh Exported Mesh |
|
|
|
Post by kitkat on Aug 12, 2018 17:02:45 GMT -5
I think bringing it out of S4S is just making the polys visible. Your mesh has polys (shown as the number of tris [triangles] on the blender menu bar) even though they don't show unless you do the triangulate modifer on your mesh. Your lamp looks fine in game.  (The screen shot is from one of my meshes. Yours actually has 798 tris/polys)  |
|
|
|
Post by menaceman44 on Aug 13, 2018 7:20:47 GMT -5
You could try triangulating your mesh before you import it into Studio and see if that helps. I've seen creators post in the past with issues that have been caused when Studio has been allowed to triangulate the mesh instead of doing it in blender first before importing.
|
|
|
|
Post by StellarElite on Aug 15, 2018 7:41:46 GMT -5
Aaah ok I see I was so annoyed at this even though I'd read already in the past that games like to work with triangles. I didn't think about the program actually converting the quads to tris during the import mesh process. I will have to keep that in mind while modeling in the future then. I hate running modifiers like decimate and triangulate I find they always ruin my work lol Oh well. Again thank you guys for your patience and help! I had a bit of a temper tantrum and took a few days break over this haha! Oh man.  Edit: The weird thing is my game still shows them. I've noticed however, that there are tears like this all over the place if I look close enough. I was playing TS3 and there are lot tears everywhere. Even in my TS4 save now I can see them on sims faces if I get in close. I don't know what it is but I don't think i can fix this :/ I have a good graphics card too a GTX 1070 so I don't get it |
|
|
|
Post by menaceman44 on Aug 15, 2018 15:54:42 GMT -5
Nvidia? That's the problem. There is something that the game does not like about nvidia cards and the anti-aliasing doesn't co-operate properly. There is an unofficial fix though. You need to apply it EVERY time there is a patch though as the correction gets undone each time.
I use this method myself and can confirm it works.
|
|
|
|
Post by StellarElite on Aug 18, 2018 6:06:27 GMT -5
Wow! I didn't expect there to be a fix and it's worked perfectly!! I was seeing the rips in my toddlers face if I got reeeally close and sometimes on sims in CAS and of course on my lamp lol. Worked perfectly first try and there was even a video for impatient brats like me I have an Nvidia GTX 1070 from Gigabyte and it was NOT CHEAP. I built my computer this spring during the whole surge in graphics card/ram price insanity so this is a bit disappointing. Oh well. Thanks again so much menaceman44 !!!  Sending virtual cookies or whatever treat you like your way lol 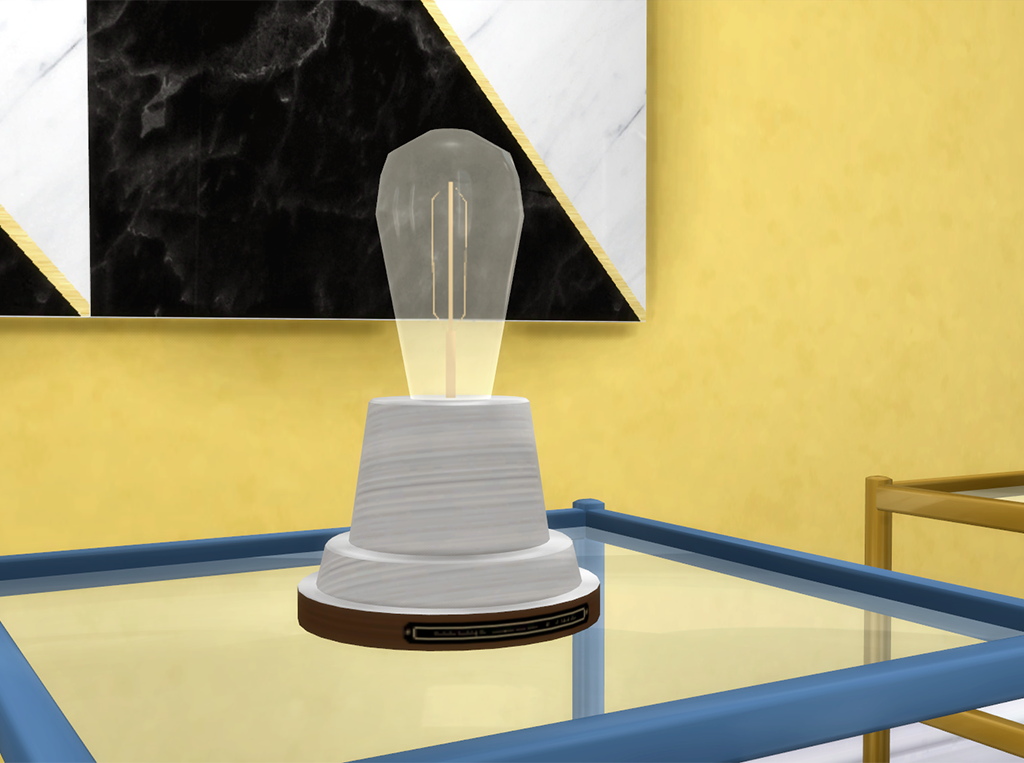 |
|


 UV mapping is a giant pain, lol. I just used the "unwrap" option. I don't really understand how "smart uv" works. I generally use unwrap (or "project from view" in ortho on individual parts if I don't like the overall "unwrap" result). The main difference I see is that you've marked seams to separate out the little beveled edges. I mapped them as part of the circular plane since the angle difference is so slight. So, just a seam on the bottoms of the bevels instead of top and bottom. (and remember to remove the little seam between the bevel faces if you want it all stay connected)
 ]
]

 Sending virtual cookies or whatever treat you like your way lol