Ashmodan
Member
 I have too much free time.
Posts: 46
|
Post by Ashmodan on Oct 4, 2018 22:15:04 GMT -5
i tried to make some cyber arm thingy with the gtw scientist outfit's arm (and added some metallic parts on hand and fingers) this is how the mesh was supposed to look like: ![]() 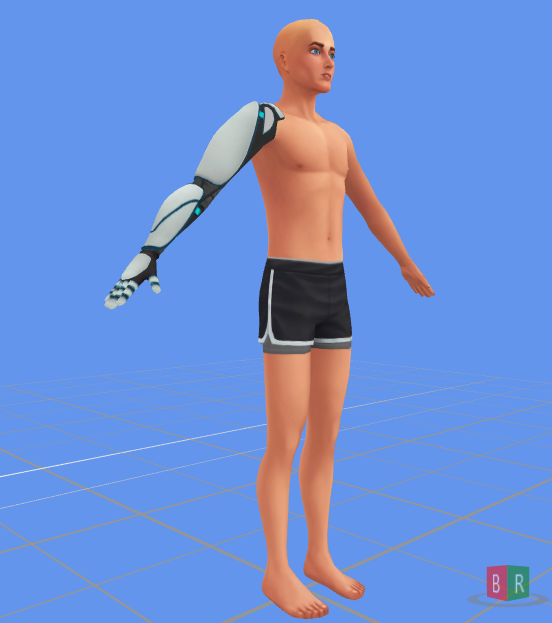 and this is how it looks like in cas: 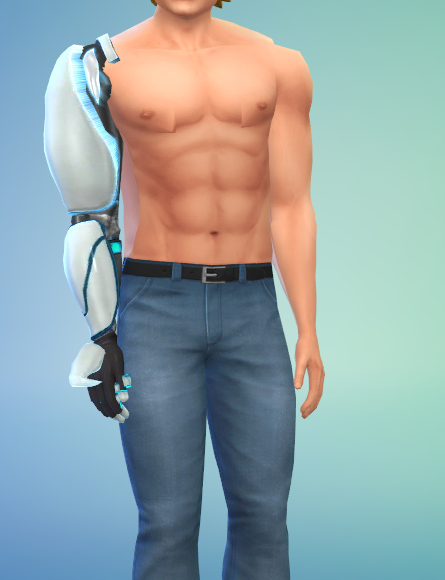 EEK EEKi guess it's some weighting problem but i can't find out how to fix it :/ i mean, i'm pretty sure i weighted the parts to the correct bones... |
|
|
|
Post by inabadromance on Oct 5, 2018 20:08:32 GMT -5
Hi! Can you please share the blend file?
|
|
Ashmodan
Member
I have too much free time.
Posts: 46
|
Post by Ashmodan on Oct 5, 2018 21:56:29 GMT -5
|
|
|
|
Post by inabadromance on Oct 6, 2018 13:43:12 GMT -5
If the weights are done incorrectly the original state vs the exported blend will be different. That is the reason why me or any that wants to assist you in this should want to see the original pre import version to understand what's wrong. In the future, please provide both files to not only speed up the thread but also to help out (us) learn how to reply and help you out. I'm looking at the blend and i don't see any weights issues at first glance. Your problem is a mix of wrong VERTEX PAINT and the lack of UV_1 (morphs). You have two extra uvs. Select uv_2 and click on the - to delete it. Now you should do a proper UV_1 for ONLY the new mesh parts. Select the new parts in edit mode and press P (selection) to separate into another meshgroup. Then follow THIS VIDEO TUTORIAL to create the uv_1. Once this is done, you can join both meshgroups again. Select both meshes in OBJECT mode and press J or Join from the side bar to join them again. |
|
Ashmodan
Member
I have too much free time.
Posts: 46
|
Post by Ashmodan on Oct 6, 2018 16:00:02 GMT -5
well, sorry then. thank you for replying, i didn't know about the uv things and i always wondered what the vertex paint was for. i'll check it out. edit: i followed what you said and i (almost) fixed it! all i still have to fix are the finger thingies to make them compatible with luumia's hands slider but when i tried to give them a uv_1 it looked messy (both in blender and cas). and idk if it's fixable, but the mesh makes the guy's arms going closer to his body. but otherwise, all the major issues are gone. thank you so much.  |
|
|
|
Post by inabadromance on Oct 6, 2018 21:47:49 GMT -5
have you divided the groups as suggest to only apply the uv_1 transfer on your mesh only? please share the updated blend of you want someone to take a look.
As for making compatible, I'm not sure what that entitles since I'm not knowledgeable with how those sliders work.
|
|
Ashmodan
Member
I have too much free time.
Posts: 46
|
Post by Ashmodan on Oct 7, 2018 9:15:20 GMT -5
|
|
|
|
Post by inabadromance on Oct 7, 2018 12:24:00 GMT -5
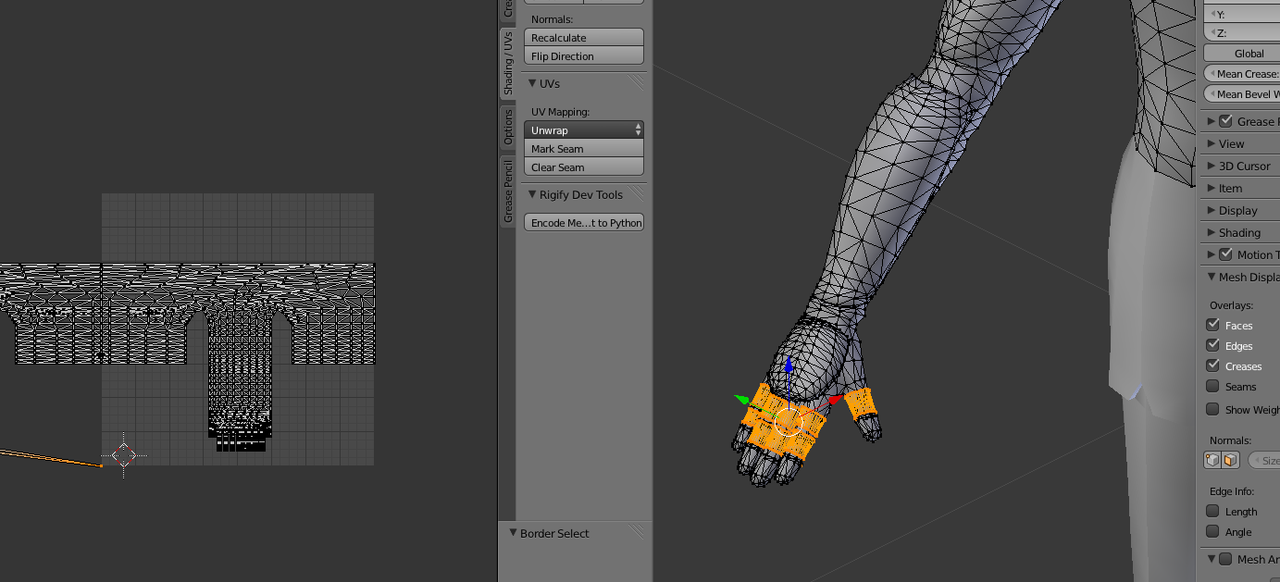 Your custom parts aren't mapped at all. Please follow the suggestion i explained above, and stop before you join everything. Share that blend so i can see what you've done. Also, please pay attention to everything that's being shown in the video, specifically selecting the UV (minute 2:54) box on the data transfer section. |
|
Ashmodan
Member
I have too much free time.
Posts: 46
|
Post by Ashmodan on Oct 7, 2018 14:03:23 GMT -5
i think it'll be easier that i remake them by using finger parts (like i did for the tips) so they'll already be mapped
|
|
|
|
Post by inabadromance on Oct 7, 2018 16:42:45 GMT -5
You can try that if you feel it's easier but not understanding what you're doing differently from the tutorial will not help you in the future since uv_1 is crucial in CAS items and your future projects.
|
|
Ashmodan
Member
I have too much free time.
Posts: 46
|
Post by Ashmodan on Oct 7, 2018 17:28:59 GMT -5
i finally fixed everything!  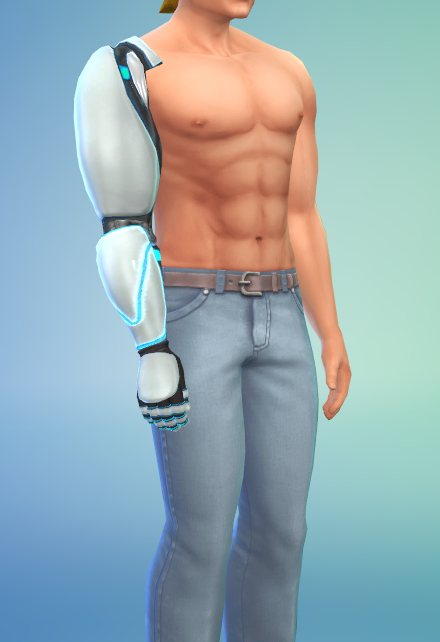 thanks for advices. |
|
|
|
Post by inabadromance on Oct 7, 2018 18:22:48 GMT -5
yay! good job! :D
|
|


