|
|
Post by Ricival on Sept 28, 2021 15:32:38 GMT -5
Hello, excuse my rude English. I have a problem with weights.. I use Blender 2.70 for what is weight transfer and use a mesh from the base game of the sims, the complete costume with the name of ymBody_EF20Firefighter to be more exact. I have transformed a model from a video game to sims 4 but since the pants are so close together when doing the weight transfer, I color one part of the other leg and it looks like this  I tried to detach one side of the pants so that I could color them separately manually but when I press L the whole mesh is selected   here you can see how close they are  Could someone give me some advice or tell me what can I do or how to fix it? I am blocked. And this is my "only problem". When the sim walks, these parts of the legs are deformed! Of course this is a weight problem (that's what I think from what I've seen) but I don't know how to fix it!  . I hope someone has time and can give me a hand ... |
|
|
|
Post by mauvemorn on Sept 28, 2021 16:18:17 GMT -5
Hi. You need to manually remove the weights like this Hi. This is a problem with weights. Select right trouser leg either in UV Editor ( with Keep UV and Edit mode mesh selection in sync ( 1 ) ) or in 3d view ( with Limit selection to visible off ( 2 ) ). 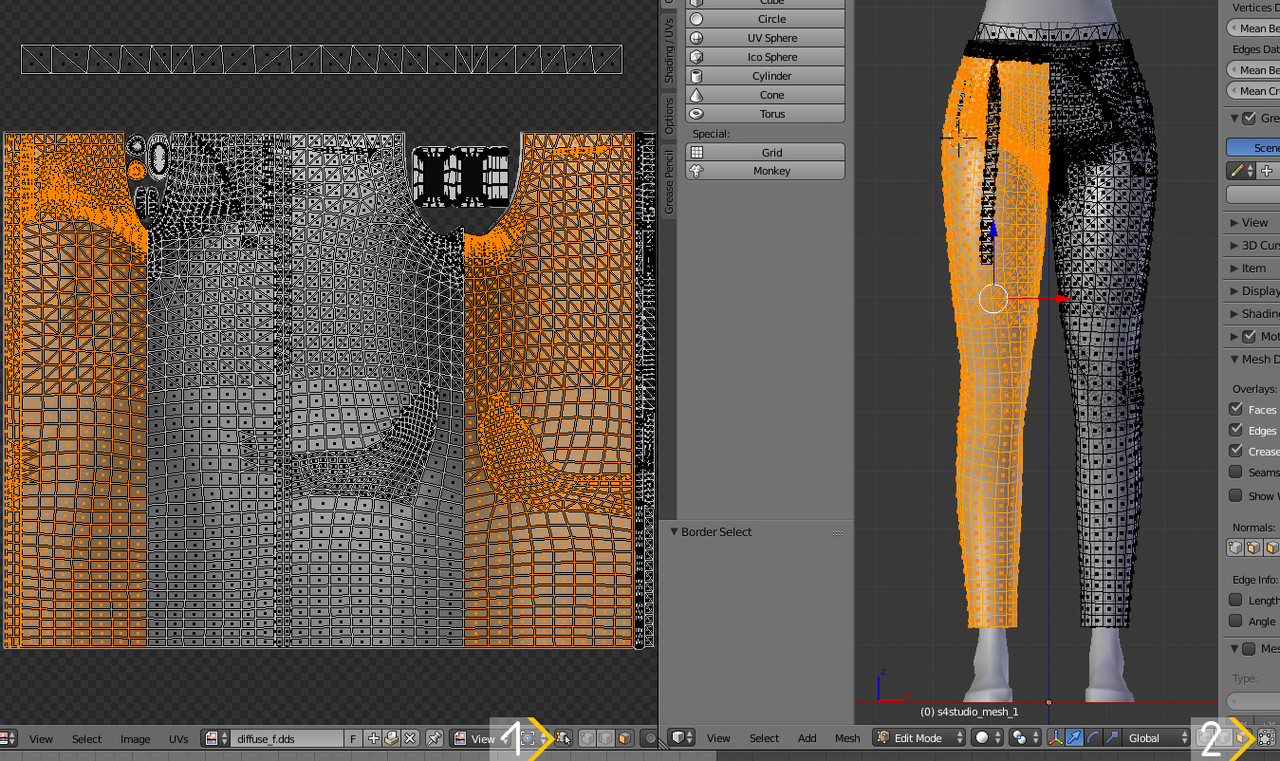 Enable Show Weights ( 1 ), click on + and type in calf ( 2 ), choose b__L_Calf__ ( 3 ), click remove button ( 4 ) to clear selected area from that group. Repeat for b__L_Foot__ and b__L_Thigh__. 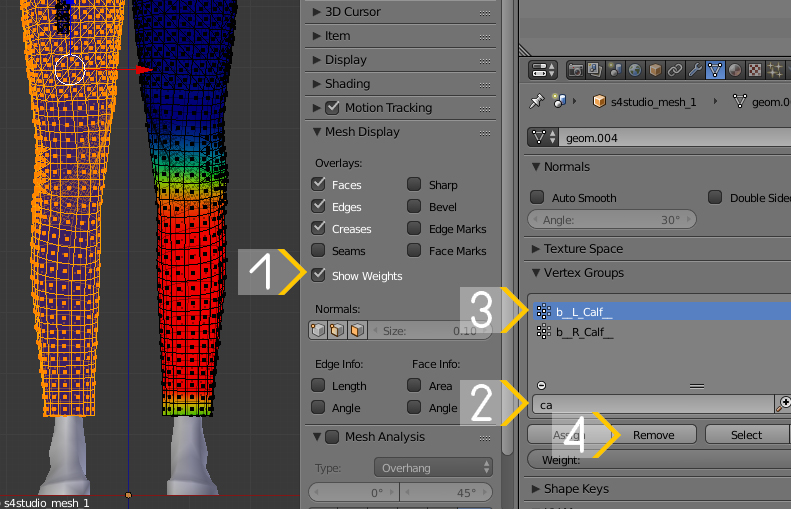 Then press Ctrl I to inverse selection and repeat the same for b__R_Calf__, b__R_Foot__, b__R_Thigh__. Switch to Weight Paint mode and click Normalize all ( 1 ). If the areas where you removed vertex groups had weights from the right groups, they will be normalized automatically. If not, you can enable Face Selection masking for painting ( 2 ) and using Blur brush ( 3 ) just run ( 4 ) through these areas with the right groups selected ( 5 ). It should normalize itself if Auto Normalize is enabled. 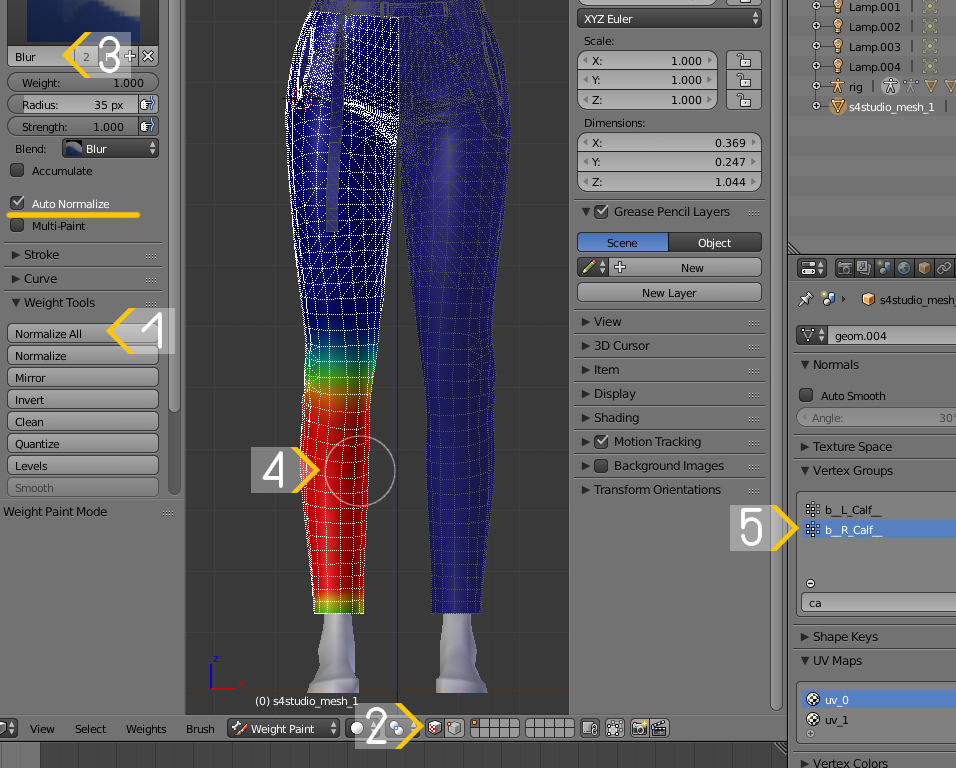 |
|
|
|
Post by Ricival on Sept 29, 2021 6:21:50 GMT -5
It worked !!! Thank you very much for taking your time to resolve my issue. It is very well explained hahaha! Since you answered I have been doing it (Ignore the brightness, then I'll see how I solve the specular map) ![]()  However, I had trouble with step 1 and still, even though I have selected ( Keep Edit Mode Mesh Selection and Synchronized with UV), the entire mesh is still selected, not just the leg. Apart from that, in the UV space one leg is on top of the other (I don't know if I explain it well) so when choosing one leg both are chosen, this problem I have not been able to solve ...  ![]() What I did was quite an odyssey and a bit bungler hahaha, in 3D space I was choosing the correct part of the pants by sections and separating it. ![]() Thank you again for your help!!!  |
|
|
|
Post by mauvemorn on Sept 29, 2021 6:53:36 GMT -5
For the future, press T to open the panel on the left, then select a face, then press Ctrl L, then choose UVs in the options. It will select the whole uv island.
So you can select half of the leg whichever way, then press Ctrl L - UVs and the it will select them by uv islands
|
|
|
|
Post by Ricival on Sept 29, 2021 9:55:12 GMT -5
¡Ohhhh, está bien! ¡¡Muchas gracias por sus soluciones y consejos !! 
|
|


