|
|
Post by lamaisonsims on Dec 27, 2021 18:08:51 GMT -5
|
|
|
|
Post by Fwecka (Lolabellesims) on Dec 28, 2021 8:18:09 GMT -5
You posted this 14 hours ago and no one answered?! That's no good. The problem is that the mesh has a uv_0 and a uv_1. The uv_1 is for CAS items so they can work with the sliders. But, in your mesh, not only is there a uv_0 and uv_1, but the uv_0 contains nothing while the uv_1 contains your UV layout. Select the uv_0 and press the minus key to remove it, then double-click the uv_1 and rename it to uv_0. This screenshot isn't exact but it will show you where the UV maps are located and what buttons you use to add or remove a map.  The flat plane that is for the wall shadow is clipping into your painting. Select and move it away from the frame with G, and Y to constrain your movement to the Y-axis. Your image is sideways on your mesh so you'll need to rotate your UV island. Select your painting, edit mode, press A to select all (the mesh will turn orange). In the UV editor, press A to select all of the islands (they'll turn orange). Go to image > open image and navigate to your diffuse and open it. Go into texture shading and you'll see how the texture looks on your mesh. You can adjust your UV islands and see how the texture looks in real-time. Another thing I think that helps is to enable keep UV and edit mode mesh selection in sync and enter face select. Do this in the UV editor. That way, you can select your UV island without having to select anything on your mesh. Now that you can see the texture on the mesh, hover your mouse over the...main UV island (the one that displays the artwork), press L to select the UV island, R, 90 to rotate the island 90 degrees. S, X to size the island so that it's more narrow, then S, Y to make it longer. Watch what's happening in the 3D window as you do this.  |
|
|
|
Post by lamaisonsims on Dec 28, 2021 12:07:56 GMT -5
It worked! Thank you so much (ignore the EA's normal map that I forgot to delete hehe) 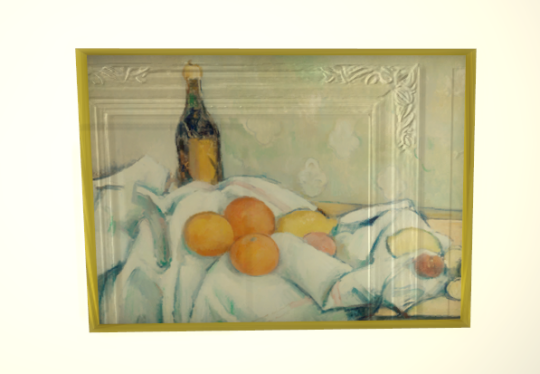 |
|
|
|
Post by Fwecka (Lolabellesims) on Dec 28, 2021 23:11:43 GMT -5
I'm told that all objects will be cloned with a uv_0 and a uv_1. No idea why that is given that objects don't even use a uv_1. Anyway, I think what happened was that you had selected the uv_1 when you unwrapped your mesh instead of selecting the uv_0. Glad it's working for you now! Oh, and don't delete the bump map or specular map! The package requires that they be there. Don't use the "make blank" button either. It'll mess things up. A bump map is super easy to make. You can use your diffuse to make one. Or you can bake one in Blender. Bump maps really improve the final product. A specular isn't that hard either. I have instructions here for baking an ambient occlusion map (optional in your case), baking a bump map in Blender (not necessary in your case; make one from your diffuse), and a specular map. The specular in my instructions was a little complicated because it was A) a CAS specular rather than one for an object, and B) the mesh had more components. A specular for objects DOES NOT include a .mask.dds but everything else is the same. In other words, follow the instructions but don't bother making a .mask.dds. Alternatively, if you want no shine at all on your painting, export the cloned item's specular, open it in Photoshop, paint the RGB layer black. If there's an alpha layer delete it. Fill the alpha with 100% black. Make sure the image has been flattened. Save as a dds using DXT5 Interpolated Alpha. Make sure generate mipmaps has been selected. Import this into your package.  |
|


