|
|
Post by derkus27 on Apr 1, 2022 1:45:57 GMT -5
|
|
|
|
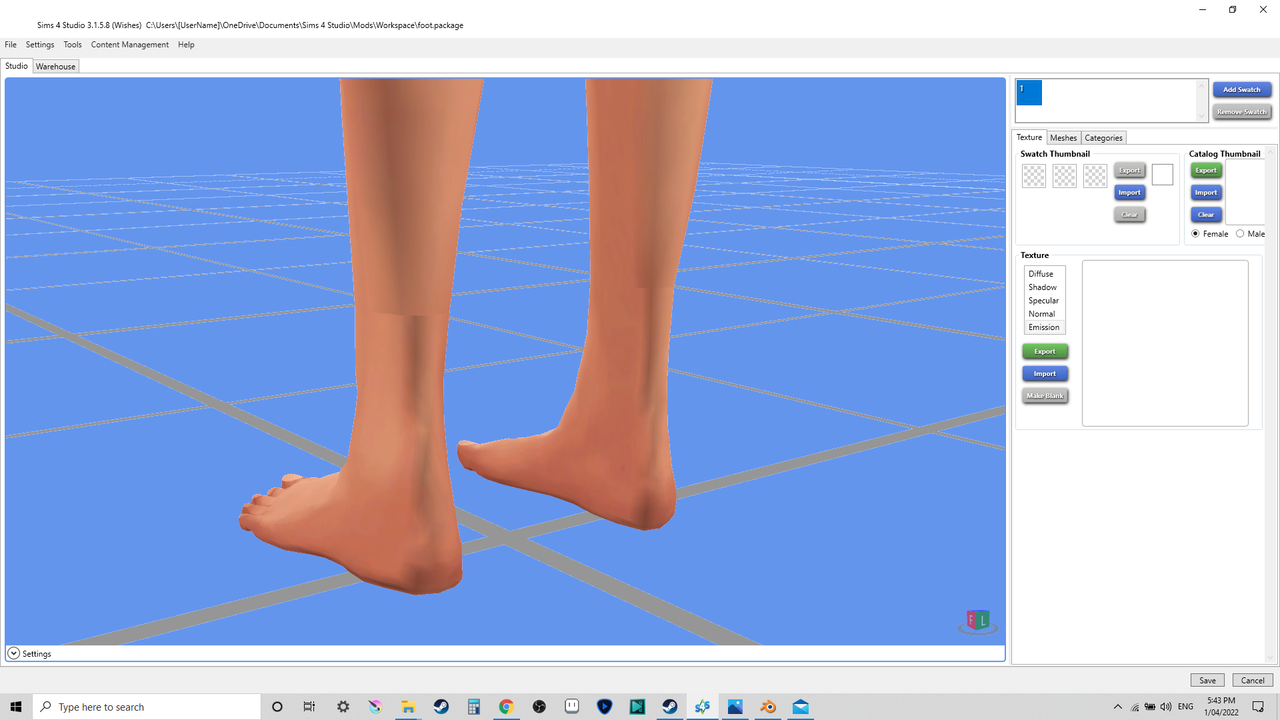
Post by mauvemorn on Apr 1, 2022 5:29:14 GMT -5
Hi. This is just how the mesh is shaded, ignore it. The shadow map is not previewed in s4s, btw.
What you should pay attention to instead is the difference in texture between the legs and the feet. If you duplicated and mirrored the mesh, you need to flip uvs as well in uv_0.
|
|
|
|
Post by derkus27 on Apr 2, 2022 18:14:07 GMT -5
Ah good to know about the shadows probably wouldn't have thought of that. I'm almost a total newbie at blender and s4 studio so I'll probably have a few more questions, I guess I'll post them in this post so you know they're all relating to the same project.
So I've used the mirror modifier and applied it to the second foot, so that it becomes it's own entity and not a 'reflection' of the original. I'll come back to the UVs later but I'm guessing I also have to reassign the weight paint for the second foot? I'm guessing I have to delete the weight paint from the first and then somehow duplicate and mirror the weight from the other one. I'm using blender. I'm finding that when I delete the weight from a vertex group if I click on another vertex group then come back to the original one part of it is still painted from before.
Any idea what's going wrong here? Is there an easier way to do this? Is it something I even have to do?
EDIT: I found the problem and I'll leave it here for anyone else who needs it. Having auto-normalize selected for weight painting seems to cause this problem, so if your weight paint isn't deleting properly try turning auto-normalize off. Additionally you can select the area you want to remove from a vertex group, make sure you have that vertex group selected then simply press remove. Definitely more effective then weight painting because you won't be able to miss any spots accidentally.
|
|
|
|
Post by derkus27 on Apr 2, 2022 20:41:55 GMT -5
![]() Right so, correct me if I'm wrong but the easiest way to reassign the weights is to append the original weights from the model I started with back over the version where one foot was deleted and mirrored. Edit: Was pretty easy to do it that way after mirroring in blender, definitely recommending that. This tut helped me do it: sims4studio.com/thread/81/weight-transfer-blender?page=1It wasn't working originally but that was because I didn't have the vertices selected on the target mesh. So a new problem has arisen,  Pretty sure feet aren't meant to do that last time I checked. |
|
|
|
Post by derkus27 on Apr 3, 2022 2:19:40 GMT -5
|
|
|
|
Post by mauvemorn on Apr 3, 2022 7:35:36 GMT -5
You should never transfer weights or uv_1 to nude body parts because they already are rigged and uv unwrapped to perfection. Because of proximity of certain body parts to each other, this data may not transfer as perfectly as it should. There should be nothing serious with feet but if you still have a version of the file before you transfer weights, go back to it. Anyway, the best way of mirroring shoes or feet is the following: - switch to edit mode, in 3d view disable Limit selection to visible, press B, click and drag to select the left foot, and Delete - Faces; - with - button delete all vertex groups from the list that have L in the name: b__ L_Toe__, b__ L_Foot__, b__ L_Calf__; - in object mode press Shift D, then Esc to duplicate the mesh. Then Object - Mirror - X Global; - select the duplicated mesh, replace all R with L: b__ R_Toe__ ===> b__ L_Toe__, etc. Rigging is done; - select the uv_1 and change the pivot to 2d cursor. Select all uvs with A, UVs - Mirror - X axis. uv_1 is done;  - expand rig, make bottom selectable. Select it, shift-select the left foot, select uv_0, select all uvs, remove the image in the background with x button. View - Draw other objects to see the uvs of the bottom; - change the pivot to Median point, select the front uv island, mirror it, align it with the uvs of the front of the left leg. Do the same with the back. uv_0 done.  - in this order: select the (mirrored) left foot, shift-select the (original) right foot, in 3d view press Ctrl J to join; - switch to edit mode again, select the left foot again, Mesh - Normals - Flip normals. Done. |
|
|
|
Post by derkus27 on Apr 13, 2022 22:24:09 GMT -5
Hi, thanks so much for your help on this, I wouldn't stand a chance by myself. I really appreciate that you don't just do it for me too, the goal is to learn naturally so in time I'll be able to solve problems for myself. I've made it as far as this step: - select the uv_1 and change the pivot to 2d cursor. Select all uvs with A, UVs - Mirror - X axis. uv_1 is done; So I have the UV editor selected in the left hand workspace, I highlight UV_1 in the right hand drop box, but how do I get the UV to appear in the editor? RESOLVED: You have to select the mesh first by pushing A in edit mode of the 3d viewport before anything will show up in the UV editor. There's a drop down box in the UV editor which has base, diffuse and render result. I'm guessing if I were to make a shoe I would UV unwrap the shoe's texture onto the diffuse UV, making it separate from the base? I've noticed that the shoe and the foot in EA's originals are part of the same object, so does that mean one object can use multiple UVs? So I would make the shoe mesh, paint the texture then UV unwrap the shoe onto diffuse (but not the foot because it's texture is handled by base)? I'm struggling to find clear definitions of what things are, I don't only want to know what to do, but I think it's also important to know what something is and what it is used for conceptually. If possible please be as detailed as possible or point me towards a guide that is highly detailed. Sorry for all the questions I'm having trouble wrapping my mind around this all conceptually. What are UV_1 and UV_0 for? Are they a separate entity to the diffuse? What is the cut number used for? Okay I followed your instructions and I think it seemed to work up until the point I tested it in sims 4. Here's what it looks like in game:  Here is the package and blend again drive.google.com/file/d/11zzso_MrUBO_YewYdYGbsCO0fJu5FnPG/view?usp=sharingdrive.google.com/file/d/1f3Gd-t75V_nW48khnFhx7hiHAiJxlCk0/view?usp=sharing |
|
|
|
Post by mauvemorn on Apr 14, 2022 9:52:13 GMT -5
b _L_Foot__ must be named b __L_Foot__. This is the cause of the problem Each CAS item has 2 uv maps: 1). uv_0 is responsible for projecting textures on the surface of the model. Since all CAS items share the same uv space, the uvs of the feet and shoes must go in a specific area meant for them2). uv_1 is responsible for morphing(changing the shape of the body and facial features in cas). Ts4 developers created a set of maps that define how the mesh is going to morph and your job, as a creator, is to ensure that your uvs align with those maps. To do it, you simply transfer uv_1 from a similar maxis mesh. You do not need to understand how any of this works, it really does not change anything for you, but if you're curious, here's a more detailed explanation The textures you're seeing in the drop-down box are: - basetexture is the skin of the model (has nothing to do with your item itself, its just there to be projected on the body); - diffuse texture - exported from your package; - 0 render result - if you will render something, this texture will be filled in. This is purely blender thing You make shoes like this: - model one shoes around one foot(as a separate meshgroup); - uv unwrap it (no need to put in the special space yet), then move outside of the uv space; - duplicate the mesh (in edit mode), mirror it, flip normals; - transfer weights and uv_1 to the shoes from the feet, vertex paint them with 00ff00; - delete the areas of the feet that the shoes cover. If there is a strap, you can split the uvs of the left foot, flip them, and put them on top of the other. This way you will have more uv space for shoes. See how the left foot is unwrapped in my case?;  - join the foot with the shoes; - put the uvs of the shoes in the free space in that area meant for shoes,making sure they do not overlap with feet; - assign the type and the cut, check in-game; - bake textures, make lods, etc |
|
|
|
Post by derkus27 on Apr 15, 2022 6:40:13 GMT -5
Thanks again! Great, this is coming along fairly well so far I think. I've done a fairly basic design for testing, want to see the process through start to finish before investing too much time in making something super detailed.
I've just done the UV unwrapping successfully. just to be sure, the uv is unwrapped into uv_0? At which stage should I do texture painting? My guess is after I duplicate it but before I merge it with the foot.
So I can layer two islands over each other if they use the same textures in the uv editor? So if I wanted to do just a flat color I could just layer everything over each other in a single space? Probably better for organization to utilize all the available space because there's no reason not to.
So the UVs of the foot will share a space with the UVs of the shoes and I have to place the shoes in the remaining available space? Ah but looking at uv_0 there is no available space, so it can't be that right?
|
|
|
|
Post by mauvemorn on Apr 15, 2022 6:56:12 GMT -5
texture painting should be done at the very end, when your items functions as intended in game. If you will model the item in a way that it will not work unless re-done, all the effort you put in texturing or lods will be wasted.
Yes, uv_0 is where you put uvs yourself. Yes, you can put them over each other. There is a space for shoes on the template for uv_0. A portion of it will be taken by the uvs of the feet. Everything else is for the uvs of the shoes
|
|
|
|
Post by derkus27 on Apr 17, 2022 6:09:54 GMT -5
Hi, I've made it as far as diffuse baking. I've made 3 different materials and I've assigned them to different parts of the geometry and scaled them to my liking. I've made my blank image texture under nodes and I have it highlighted, render is set to cycles, but in the properties window there is no drop down for bake in blender 2.70. So I imported it into 2.78 and the option was there but on trying to do so a message pops up saying 'no active image found in 'DiffuseMap'. the diffuse map is the one originally in the file, unedited. First time getting this far so I'm sure I've done something wrong. drive.google.com/file/d/1ZhEOF-Szw3wrSrSQII05etqFolkQa_0j/view?usp=sharing |
|
|
|
Post by mauvemorn on Apr 17, 2022 11:20:25 GMT -5
Image texture must be added and selected in all materials. They all must have the same diffuse map chosen in the drop down menu Save this blend under a different name, separate shoes from the feet, bake the texture for the shoes only. You do not need to bake texture for feet, it will just prolong the rendering process. Also, set Margin to 7. Light paths to 1. When you will bake a final texture, increase samples to at least 1000. You should also create a floor for more realistic shadows.
|
|
|
|
Post by derkus27 on Apr 19, 2022 5:19:16 GMT -5
Okay I done most of that except for light paths to 1, there is a menu for light paths but no variable actually called light paths, did you mean diffuse in the light paths menu? The result turned out pretty bad, the shadows on the image were too strong and appearing in the wrong places, the overall texture resolution was low so I moved around the islands within the designated space to try to increase resolution and part of this blank texture appeared in various places. I am meant to do this in blender 2.78 right? i.postimg.cc/WzKQXXfM/Screenshot-26.pngdrive.google.com/file/d/1QLkcL8qMlFhKFkxjwCe4SX-cHW6oYaF1/view?usp=sharing |
|
|
|
Post by mauvemorn on Apr 19, 2022 14:53:27 GMT -5
1). When uv mapping, your goal is to get more-or-less straight uvs with as little seams as possible. The seams must be in places where they exist in real shoes or are the least noticeable. You also should avoid overlapping uvs at this point. Overlapping uvs are ok but not during baking. In your original mesh there was two instances of overlapping: the underside of the straps in the same place as the rest of them, the uvs of the left shoes on the right shoes. 2). Get the shading right. You want sharp edges to be shaded as sharp or they will create dark shadows on the shoes. You need to split the mesh along them. 3). The underside of the straps is not visible from any angle, so it can be completely deleted. However, i decided to keep it to explain what you should do with it when it is partially visible. 4). Before joining the foot with the mesh, free up some uv space. For example, the soles of the feet are not visible from any angle, you can delete them completely(it is slightly visible from the front, but you can just hide those holes). The portion of the left foot is covered by the strap, you can just place those uvs on the right foot. 5). Once you join them, its time to arrange them in a way that makes the most sense. First, the pattern. If your uvs are stretched, so will be the pattern. The direction of the pattern should also make sense. If the uv islands were scaled individually, the pattern will differ across the shoes in size, which should not happen in something made from the same material. Second, shading. The underside of the strap is obscured, naturally it will receive shadows during baking, so it should not be placed on any other part of the shoe. Third, the quality. The bigger the uvs, the better the quality of the texture. However, you do not need high definition in every nook and cranny.  The highlighted on the image uvs should be as big as you can get them because they are the ones you see from any angle. In your case the soles and the rest have different patterns, but for the sake of explanation,lets pretend they have the same. So, the soles uv islands are big but partially obscured. If you will keep them as is, they will take up a lot of space. If you will make them smaller, there will be difference in the pattern(if it was the same). What to do in this situations? Make them a bit smaller and assign a new material (that uses the same texture but it is scaled down). The underside of the straps most certainly does not need the same definition as the rest. You can make these uvs smaller. 6). Before you bake the uvs, save the blend under the new name. Delete one shoe to avoid overlapping. Separate the shoe from the foot to not waste time baking textures for it that will be deleted anyway. In light paths the main value is Bounce, so you change it from 12 to 1. Everything else can stay the same You must disable rendering for the feet under the rig Increase the samples before the bake to at least 500 Also, i added the floor in the second file
Here's the final blend and the one for baking |
|
|
|
Post by derkus27 on Apr 20, 2022 3:36:00 GMT -5
Thanks for the detailed response. That all makes sense.
I've noticed you've deleted part of the foot in the UVs to add room (I don't mean the underside that makes sense), did you mirror it onto the other side or something or was that part unnecessary?
How did you get the straps to line up straight like that? and get such a proportionally accurate version of the base?
|
|