|
|
Post by Kouukie on Jul 19, 2016 17:37:43 GMT -5
This is just a guess, but it looks like the necklace is set too low. A lot of CC necklaces are elevated a bit to avoid clipping. Try raising the necklace up off of the body a little and see if that helps. Thank you! I tried but that wasn't the issue!  |
|
|
|
Post by Kouukie on Jul 19, 2016 17:36:29 GMT -5
hi! I took a look at the blend file and i noticed that the weight is not correct. The necklace is weighted 1 in all bones.. and that should not be like that. All weights must sum 1 in total. here's a tutorial for weight transferring. Use a nude top as a base. Also, you don't have a uv_1, which will make your item resize depending on the body size. here's a video tutorial for that. Thank you! You're always so helpful! |
|
|
|
Post by Kouukie on Jul 18, 2016 20:05:08 GMT -5
|
|
|
|
Post by Kouukie on Jun 16, 2016 12:44:49 GMT -5
|
|
|
|
Post by Kouukie on Jun 16, 2016 12:44:08 GMT -5
Looks wondeful! Very realistic to have this kind of things in game. Thanks so much! |
|
|
|
Post by Kouukie on Jun 15, 2016 14:40:49 GMT -5
I did! Adding the empty files by OM sorted it out! Thanks so much for the help :D 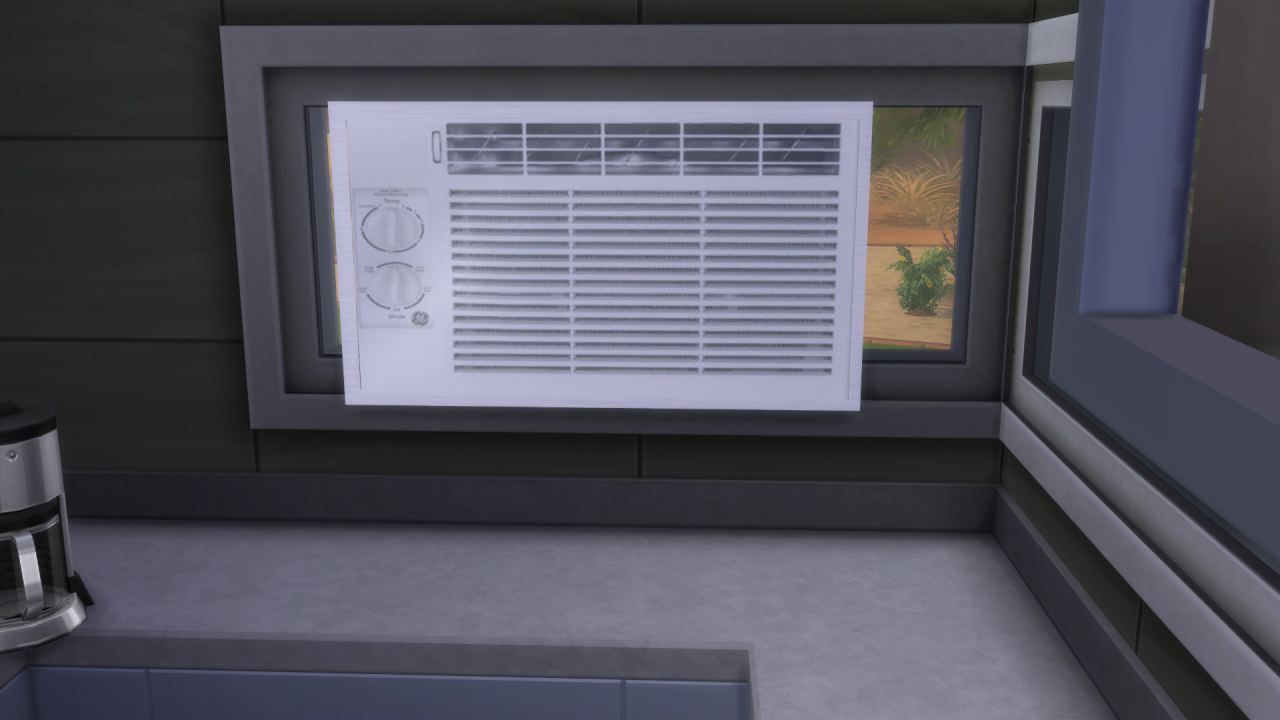 |
|
|
|
Post by Kouukie on Jun 14, 2016 18:50:17 GMT -5
Thanks so much! |
|
|
|
Post by Kouukie on Jun 14, 2016 13:53:42 GMT -5
I am currently working on an air conditioner and for some reason, these black shadow things appear on the mesh in-game, but looks fine in S4S? Sims 4 Studio: 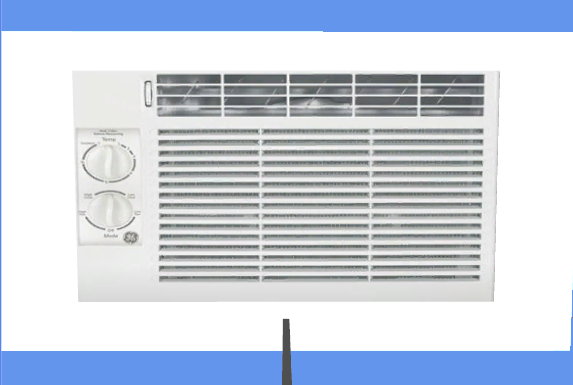 In-Game: 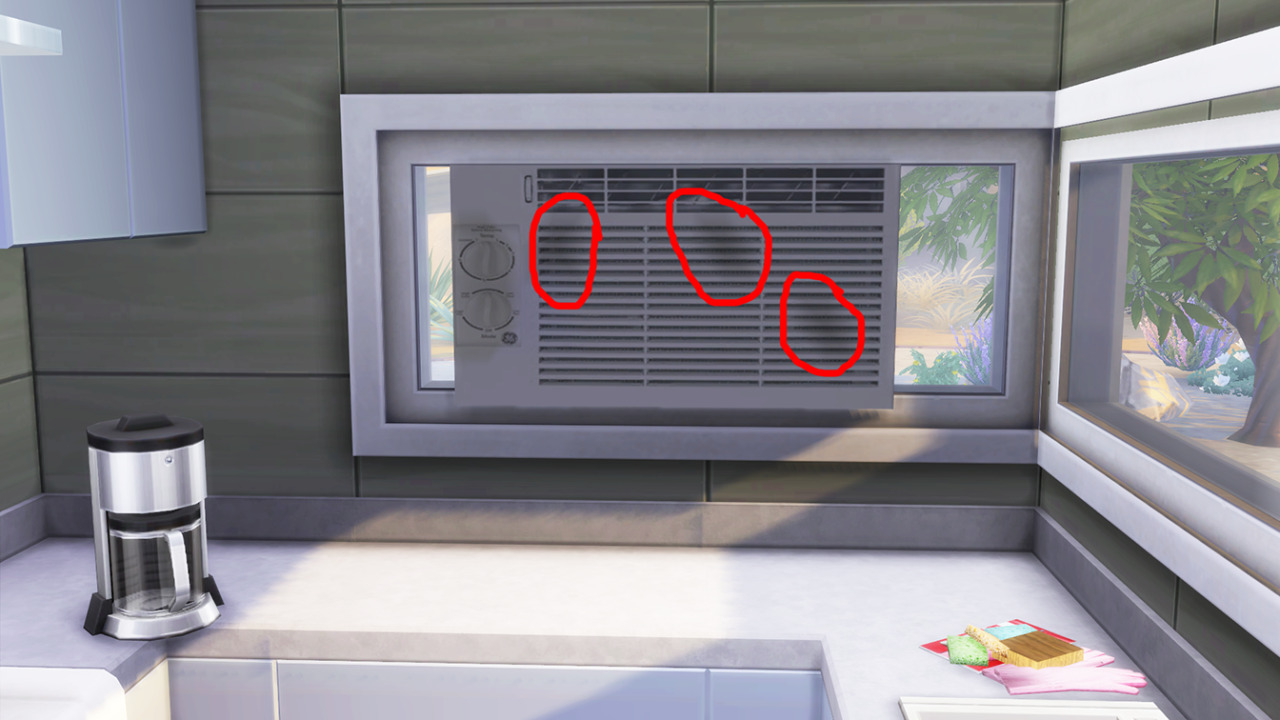 It's never happened before so I am confused. I followed what to do in this thread but no luck unfortunately. .Blend & .Package (I am fully aware all the LODs are the same I will decimate them and fix it when this black shadow is sorted out) Thank you in advance |
|
|
|
Post by Kouukie on Apr 16, 2016 20:23:37 GMT -5
Andrew's guide goes over all the steps to make a uv_1 but, I see that part of the instructions didn't make it into his revised first post (he initially posted basics and later expanded when people asked questions). This post HERE shows where seams are marked on a typical EA garment for guidance in your cylinder unwrap. The post HERE goes over the finalizing steps near the bottom below all the pictures. I've sent him a PM asking if he could move this helpful information up to the top post so others don't run into the same questions you have about his tutorial. I think the issue with using MD is not that you can't or won't be able to generate a mesh that works in Sims 4. The issue is that it does not necessarily generate a low poly mesh and many of the MD generated meshes posted in these forums for help have been extremely high poly (up over 20-50K polys). Any 3D editor capable of producing a mapped mesh can produce a mesh for Sims 4. The creator that's using the 3D editor needs to work with it to learn low poly meshing regardless of what the editor is...this is true of Blender, 3DS Max, and MD. This mesh, although a little high compared to a similar EA mesh, does have a poly count that is within reason for the game imo. Thank you! I do know how to lower the polys in the 3D editor, but just choose to lower it in blender because when I make the particle distance higher, it lowers the poly in MD, but mesh quality is lost. This poly count I can work with. I will take at the provided links! |
|
|
|
Post by Kouukie on Apr 9, 2016 21:50:20 GMT -5
You definitely can make MD meshes work with sims 4 While not perfectly as the topology for EA standard meshes and MD meshes are totally different it still works. Marigold's meshes are occasionally completely different in topology and her stuff works well with sliders. I took a look at your blend's uv_1 and the skirt isn't mapped correctly. Also, Andrew's guide is super helpful. But remember once youre finished it needs to be resized back to the YFbody image template So that one half is on the image and the other half is off. Select it all, press S- then X, then 2. Then confirm. Then press G, then X, then -512. That should have it correctly half off and half on the image. This is just for future reference :3 I'll be making a tutorial on uv_1 mapping at some point. Possibly a video, or at least a written tutorial with pictures ^^ I'd explain what exactly to do here but I'm more terrible at explaining off the top of my head. I kinda have to be doing it to explain :3 Meanwhile though you can look at other's uv_1 maps though  Thank you The uv_1 is probably going to be the bane of my existence :p |
|
|
|
Post by Kouukie on Apr 9, 2016 14:35:19 GMT -5
Is the mesh from Marvelous Designer ? If so its not the best thing to use to make meshes. From what I can tell uv_1 is not the issue (well could be part of the problem) its the mesh itself, it looks to tight on the body. If you export a lod from a ea mesh you will see the differences in how they are made. I have looked already and I have transferred weights, added cut number, made the vertex paint green, etc. A mesh is a mesh. It doesn't matter where it was made. Someone I know made a mesh with Marvelous Designer so it's definitely not MD. I just don't know what I did wrong honestly. |
|
|
|
Post by Kouukie on Apr 8, 2016 23:11:38 GMT -5
Hi! I looked at the unwrapping the uv_1 tutorial for hair and I did the same thing except for clothing and moved the UV down. I used the template Andrew made for the uv_1 but no luck cause my mesh still is wonky with sliders but I noticed a difference when I used Andrews template / tutorial. Thanks in advance .package & .blend |
|
|
|
Post by Kouukie on Apr 7, 2016 21:48:45 GMT -5
Amazing bag! OM always does an amazing job with help! |
|
|
|
Post by Kouukie on Mar 22, 2016 13:19:09 GMT -5
Have you tried editing the .rles (specular) to make the items more shiny in the game? Studio's preview does not composite that in so you will only see the shininess from it in the game. I have actually gone into 3ds Max and rendered a diffuse from there to use as a texture! Thank you for the replies! |
|
|
|
Post by Kouukie on Mar 22, 2016 0:23:39 GMT -5
This is a Marvelous Designer Avatar with arrangement point for The Sims 4.
How to get it into Marvelous Designer: 1. Unzip the file 2. Open Marvelous Designer 3. Click File > Open > Avatar 4. Select the file you unzipped 5. Voila! Enjoy
!!!THIS IS NOT SOMETHING YOU PUT IN YOUR MODS FOLDER. THIS IS FOR MAKING CLOTHING FOR THE SIMS 4 WITH MARVELOUS DESIGNER ONLY!!!
|
|


