|
|
Post by keysmuse on Aug 9, 2016 13:00:18 GMT -5
Welcome to the forum Cayla! I hope you enjoy your time here  |
|
|
|
Post by keysmuse on Aug 9, 2016 12:54:26 GMT -5
I wanted to ask how I would go about unsubdividing this mesh? 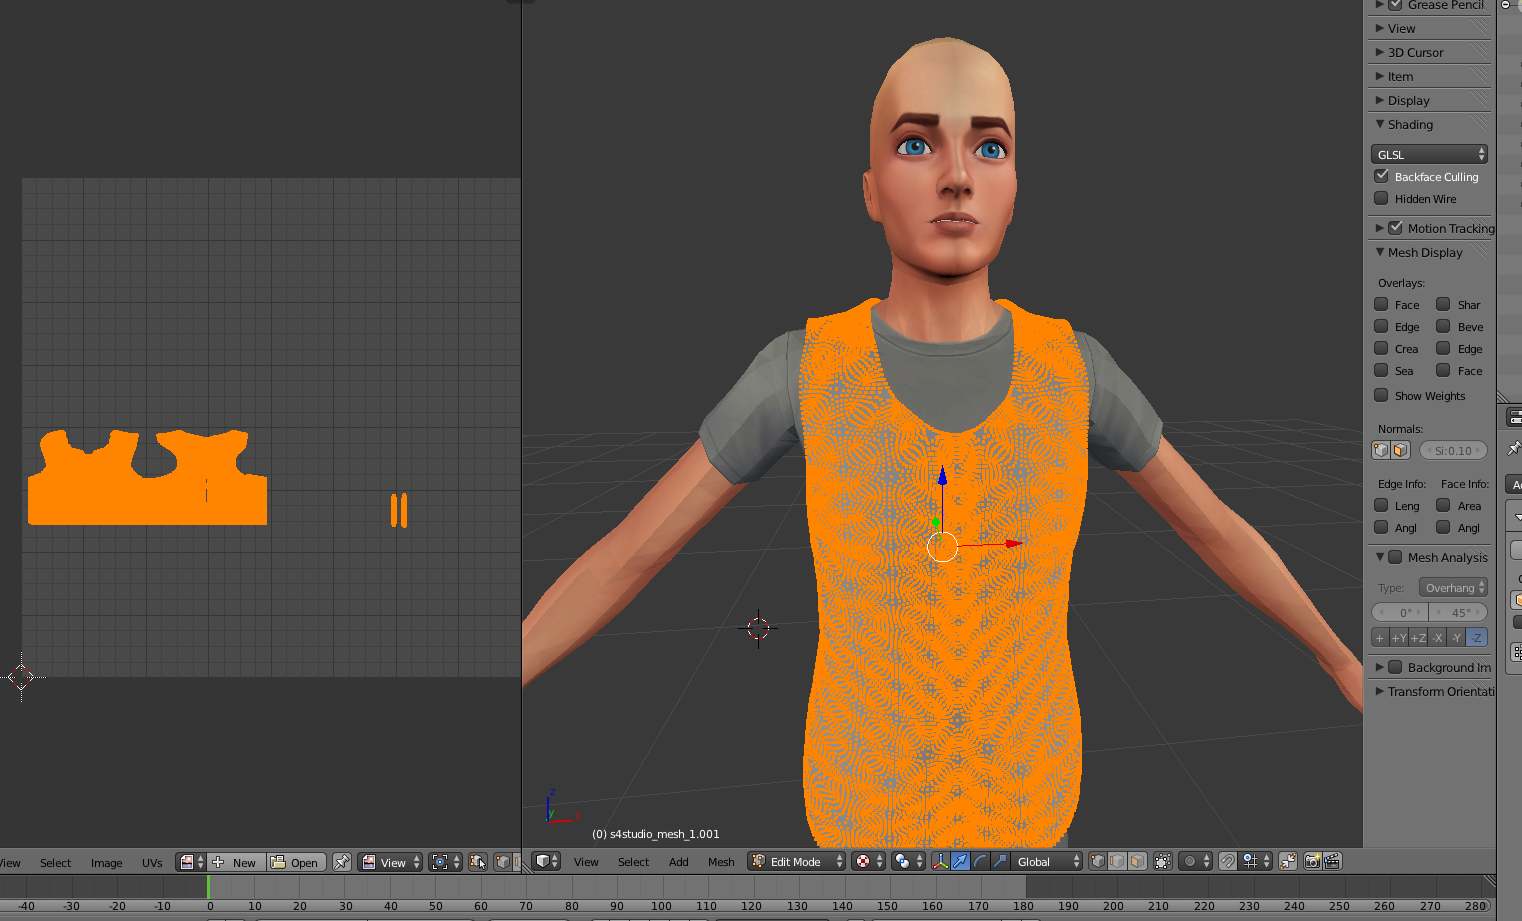 When I use decimate to unsubdivide it results in this weird looking UV map (which for obvious reasons I'd like to avoid) 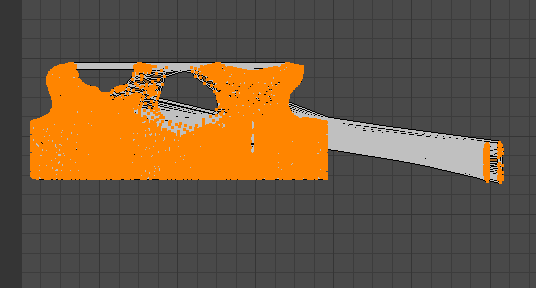 I'd be incredibly grateful for any advice I can get. Thank you! |
|
|
|
Post by keysmuse on Aug 9, 2016 9:34:40 GMT -5
As far I can tell there's no way of doing it the "proper way" unless you put your download in a folder and link the folder. I might be wrong but after speaking to a few people that seems to be how it's done
|
|
|
|
Post by keysmuse on Aug 7, 2016 10:06:53 GMT -5
EDIT: I slightly reduced the clipping but still can't entirely so here's the updated blender file and a shot of the clipping - link

So I've almost finished this mesh but I'm having difficulties with the hand part of the mesh. It's for a request and the example shows the sleeves partially covering the hand in a snug manner. But when I load in after modelling it seems the mesh stays still whilst the hands move freely. Here's the mesh (asymmetrical crop top) being still 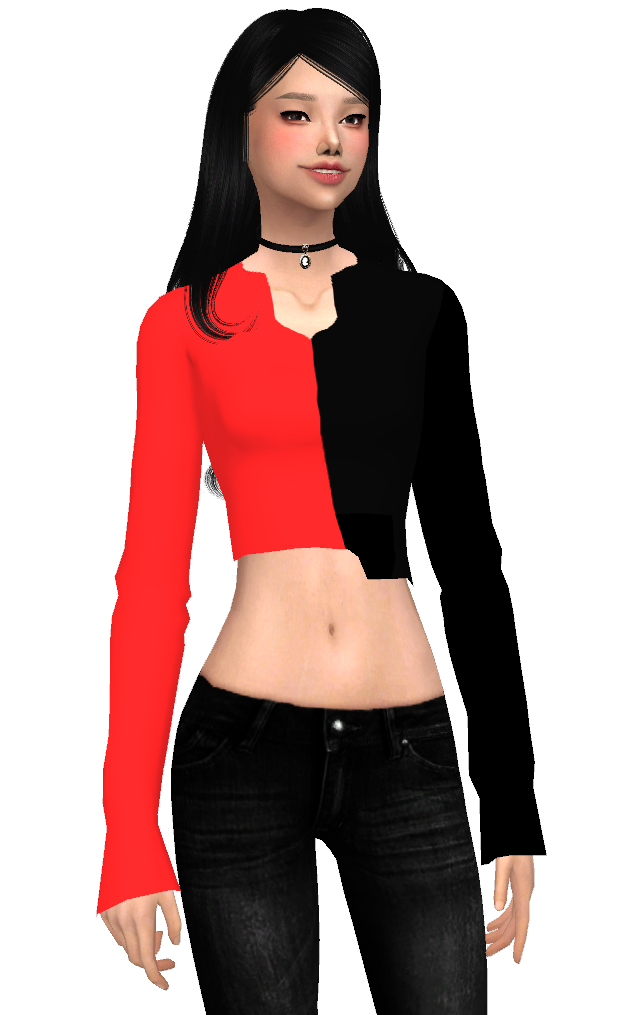 I can't get a preview of the Sim in motion but basically no matter how much I scale, if the hand moves it clips through the sleeve. I don't know if any of that really made sense so if clarification is needed please lmk Here's the package/blender file if someone is willing to take a look - files )Thank you!!
|
|
|
|
Post by keysmuse on Aug 6, 2016 11:03:44 GMT -5
Wow, up until now I'm embarrassed to say; I thought the Sims 4 CC community was a mess free place. I always wondered why she was possessive of recolors but reading about her manipulating packages is just shocking. Who has the time to do all that?
|
|
|
|
Post by keysmuse on Aug 6, 2016 10:50:06 GMT -5
So I found this but it's rather confusing and translating it to Sims 4 and Blender seems difficult for me; as a beginner - www.marvelousdesignerhelp.com/phpBB3/viewtopic.php?t=153I wanted to ask what is the best way to smoothly tuck garments and still retain a smooth and realistic edge? I often when I use the sculpt mode to do this it comes out rather rough and sharp, even if I remove doubles. The kind of tuck I'd like to achieve is like this?  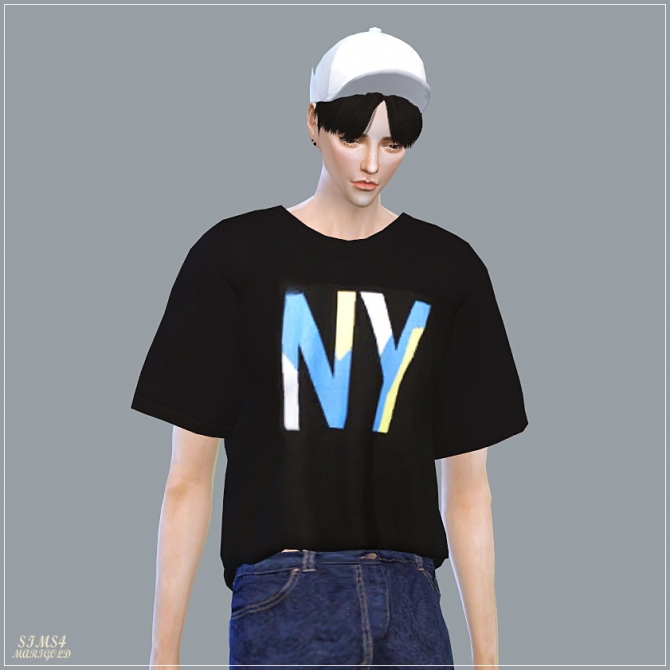 Like that puffiness and volume I'm sorry if this is too much to ask for, any tips or guidance would be appreciated. I completely understand no one will do it for me. Thank you again! |
|
|
|
Post by keysmuse on Aug 6, 2016 10:28:09 GMT -5
All hats and hairs that are made properly work in-sync - the hat causes the hair to switch to the hat chop variation. There are 2 types of hats (the difference is how they sit on the head), which is why all hairs have 2 hat chop meshes, to accommodate 2 types of hats. So if you made your hat in a way that does not adhere to the way it removes the part of the scalp, it won't look right. Same if you don't do a hair chop properly. I had a look at your mesh, I can see you cloned off of the animal hat, which is type 1, whereas your shape is closer to type 2. Because you cloned off of type 1 hat, it makes the hair switch to type 1 hat chop, while you need type 2. So I suggest you reclone it, and also your hat is a bit low on the back. 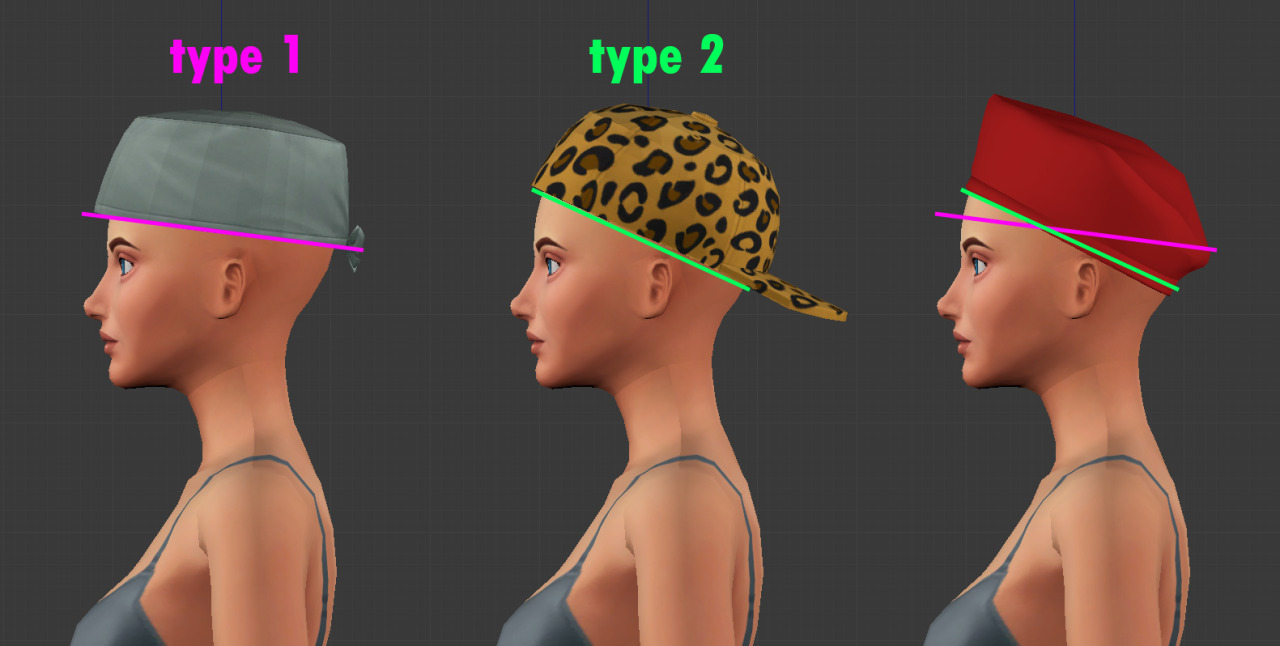 Thank you! I appreciate this so much |
|
|
|
Post by keysmuse on Aug 5, 2016 19:21:38 GMT -5
keysmuse you can scale down uv map of the sleeves and place them between uv map of the arms. Use this body template. Regarding the gap I can't help, it's out of my area of knowledge. Something like this  Okay that makes sense. Thank you for taking the time to explain! I'll attempt it now |
|
|
|
Post by keysmuse on Aug 5, 2016 19:19:43 GMT -5
So I'm making a beret/sailor cap mesh and no matter what I do, size up, size down, extrude -- hair seems to clip through in different ways. I've tried comparing my mesh to other hats that do work and I'm extremely lost and where I'm going wrong Here's what's happening:  1. Hair clipping through hat 2. Hair cropped by hat 3. Hat works fine and fits hair mesh properly Here's the blend/package file in case anyone needs to take a look - link |
|
|
|
Post by keysmuse on Aug 5, 2016 17:51:53 GMT -5
keysmuse don't forget about second uv map, the one that shows the game how object suppose to work with sliders. For main uv you place transparent part in bright blue area, but for the second uv you will have to position it differently. Do you need tutorial or you know what I'm talking about? Also, if there will be problem with the mesh it's better to post in creator's help forum. I work only with the easiest objects like accessories. I think I get the general idea of what I need to do, what I don't know is where to place the sleeves for the overlying dress (the mesh) and what to do with the neck area to get it smooth so there's no rough edges on the the mesh. If that makes sense I mean |
|
|
|
Post by keysmuse on Aug 5, 2016 17:11:12 GMT -5
Hi keysmuse are you asking about how to position your UV map? You would need to use this texture as reference. The main texture should be placed in red area and the top part (the shell of the dress) should be place on the bottom part of the UV map in bright blue rectangle. I suggest exporting the mesh from some of Marigold's dresses to blender and exporting textures, so you will get an idea how this kind of dress can be made. Dress with transparent layer, or this oneSkirt with transparent layer
Thank you!! I was considering taking a look at some of marigold's items to study actually. I'll get back to you if it works out |
|
|
|
Post by keysmuse on Aug 5, 2016 16:40:01 GMT -5
Hi! So I'd like to make a dress with a material mesh over it, but I'm a little bit confused about how I'd go about making it since I wouldn't want UV maps clashing and on top of one another? Here's an example in the style of the dress I'd like to make -  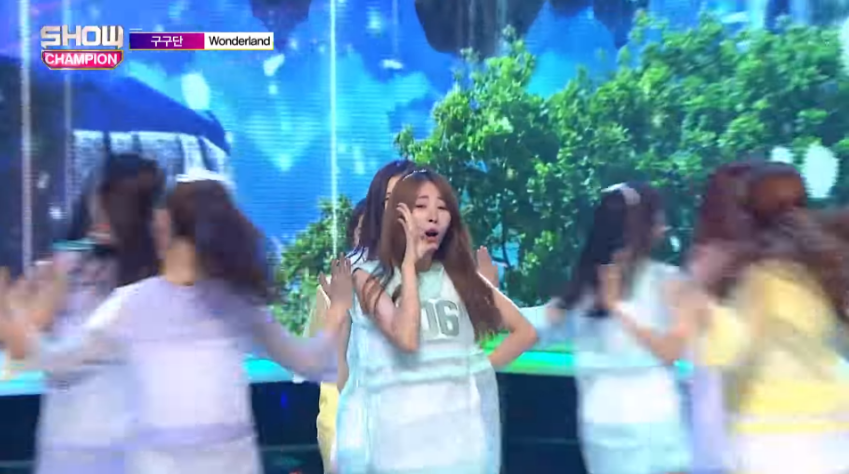 As far as I can tell, in simple terms it's just a plain white dress with an overlying mesh. I assume most of the work would fall in texturing, but the UV mapping is something I'd really appreciate help with. Of course I'd never expect anyone to do the work for me. Thank you!! |
|
|
|
Post by keysmuse on Aug 5, 2016 16:30:15 GMT -5
I saw this too, it's really disheartening. I've supported maysims for years but I'm really unsure whether or not I want to keep her (I use 'her' loosely) content in my game now. :-[
|
|
|
|
Post by keysmuse on Aug 4, 2016 16:34:45 GMT -5
 Okay so I've removed doubles, I assume I need to connect all the vertices or bridge edge loops. Would it be ideal to delete all but the arms and append the arms to another mesh (obviously using the same top) so that the neck stays connected? EDIT: I added the arms to another mesh and it's been going connected vertices but there's no way for me to connect each vertice from the shoulder to the body so I'm think it'd be ideal to start over and this time on my second attempt not the subdivide the arms. I'm still lost on how I can stop the texture from getting stretched though? Thank you again for all your help! |
|
|
|
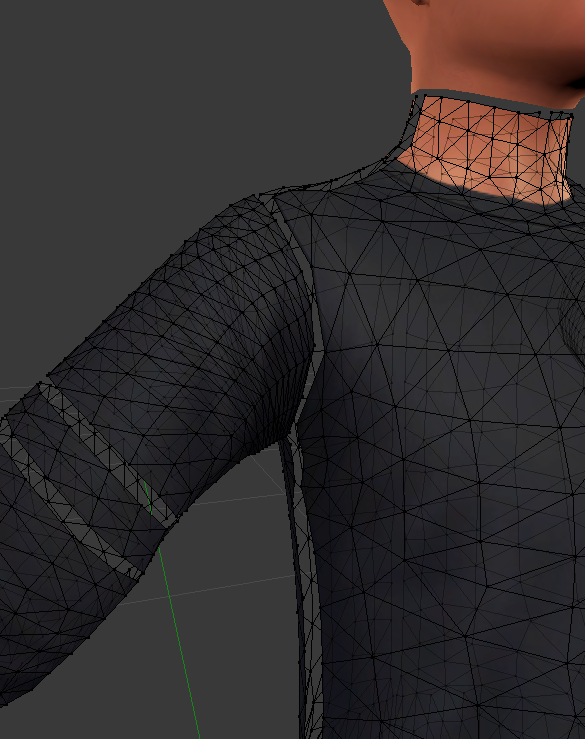
Post by keysmuse on Aug 4, 2016 16:15:09 GMT -5
That means that you haven't removed doubles. In object mode, right click the mesh and on the side bar click "Shading: smooth". Go to edit mode and disable "limited selection" 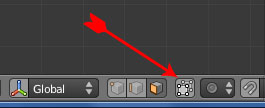 You should select all the top holding L on each part until all the top gets selected. then go to mesh / vertices / remove doubles. Even by doing this... i don't think the shading is going to be fixed. I'm not really sure what you did with the mesh, but some parts look subdivided and some don't.. that's where the wrong shading appears. You either subdivide all , or none. A plane with two vertices on each side is not going to connect well to a plane with 5 vertices in total. I stated what I did in the op but I'm on phone so can't quote properly, if what I stated gives you any indication. I managed to fix the shading by bringing out the mesh away from the body but I'm still stumped on the arms being disconnected. The reason I subdivided the parts I stretched was because I wanted to see if it'd help the texture not look stretched. It was really just a curiosity I acted on; not sure if it helped or hindered the mesh now haha |
|


