Post by orangemittens on Mar 23, 2015 10:47:15 GMT -5
Introduction
This tutorial will show you how to clone an object mesh, open it in Blender, and save the UV layout. This can be used as-is or to create a template to make recoloring easier and more precise. It is assumed you already know how to make a recolor and this tutorial will not go over that process.
What you will need
Sims 4 Studio
Blender 2.70
A 2D editor
Instructions
1. Open Sims 4 Studio and choose Create 3D Mesh under the Object button.
2. Click the Object button.

3. Select your clone and click the Next button. When the model viewer page appears click the Mesh tab.

4. LOD O (High) will be selected by default. Click the Export Mesh button. Name the .package and save it as usual.

5. Right mouse click on the mesh you want a template for. In this case, I'm planning to make a template for the EA bedding. When you right mouse click it the mesh will get an orange border around it indicating it is selected.
6. In the bar below the viewport window where the mesh is there is a small orange box with the words Object Mode next to them. Click where it says Object Mode to get a short pop up list.
7. Select Edit Mode from the list. You will see the words Object Mode next to the box switch to say Edit Mode.

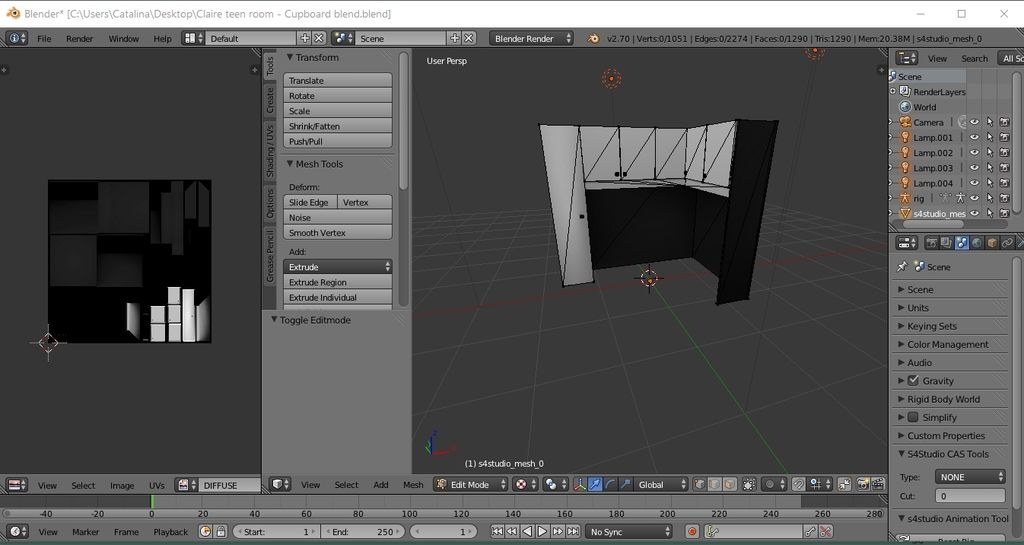
8. Once you are in Edit Mode you will see black lines appear all over the selected mesh. This is the actual mesh itself. Click the letter a on your computer keyboard. This will select the entire mesh causing it to turn orange. When the mesh turns orange you will also notice a map appear over on the left side of your screen.

9. In the bar under the viewport where the mesh map appeared is a small rectangle. Click on that to get a pop up list of all the images that are associated with the .package.

10. Select the image that looks like the diffuse image that you use to recolor this portion of the object. In this case I am working with the bedding so I pick the EA bedding texture image from the list. These can sometimes be difficult to see. Don't worry if at first you select the wrong one. If that happens just click the small rectangle again to get the list back and select a different one until you find the right one. When you select an image from the list it will show up in the same area the map appeared. The map will be resized to fit on it as shown below.

11. Just to the left of the little rectangle you clicked before you will see the letters UV. Click on that to get a pop up menu.

12. Select Export UV Layout from the popup menu. This will cause a large screen to pop up that allows you to name the UV layout (the template) and select a folder to save it in. When you have named it and chosen a place to save it to click the Export UV Layout button in the upper right portion of the screen. Once that's done you can close Blender because you're finished with the Blender part of this tutorial. You don't need to save anything more because you aren't changing the mesh you're getting the UV layout for a template.

13. Open the UV Layout you exported in your 2D editor. I will look something like this. Each section shows where a portion of the mesh actually sits on the image. Put another way each shows what part of the mesh that part of the image will be applied to in the game. The edges are very precise. Anything that isn't enclosed by those lines will not appear on the mesh in the game.

14. To make it easier to see what each part is you can open one of EA's textures for that mesh and copy/paste your template over it. For this example it becomes obvious that the large section on the left near the top is for the comforter and sheet while the smaller sections to the right of that are the pillows (upper and lower parts of each pillow). Below that are the white sheet material that shows up under the blankets.

To use this in order to make a template just cut out each section individually and bucket fill it with a solid color. Make each section a different color so they can be selected using the magic wand. Save in whatever format you like. The more carefully you cut each section out the more precise the edges of your template will be.
If you have any questions about the process of obtaining the UV Layout please post in the thread. 


