|
|
Post by sisselin on Dec 4, 2018 19:20:36 GMT -5
I'm having a problem with this skirt I'm making, it has two patches in the back that are all funky looking but i can't see anything overlapping in the uv map and I deleted doubles =/ The patches looks differently depending on what top I use with it which makes me think some pieces of the uv is in the wrong place but they are right where they should be >//< blender: www.simfileshare.net/download/838975/package: www.simfileshare.net/download/838974/ps. I'm sorry for all the posts reccently  |
|
|
|
Post by mauvemorn on Dec 5, 2018 4:56:43 GMT -5
Hi. It happens because top's texture and uvs overlap bottom's. 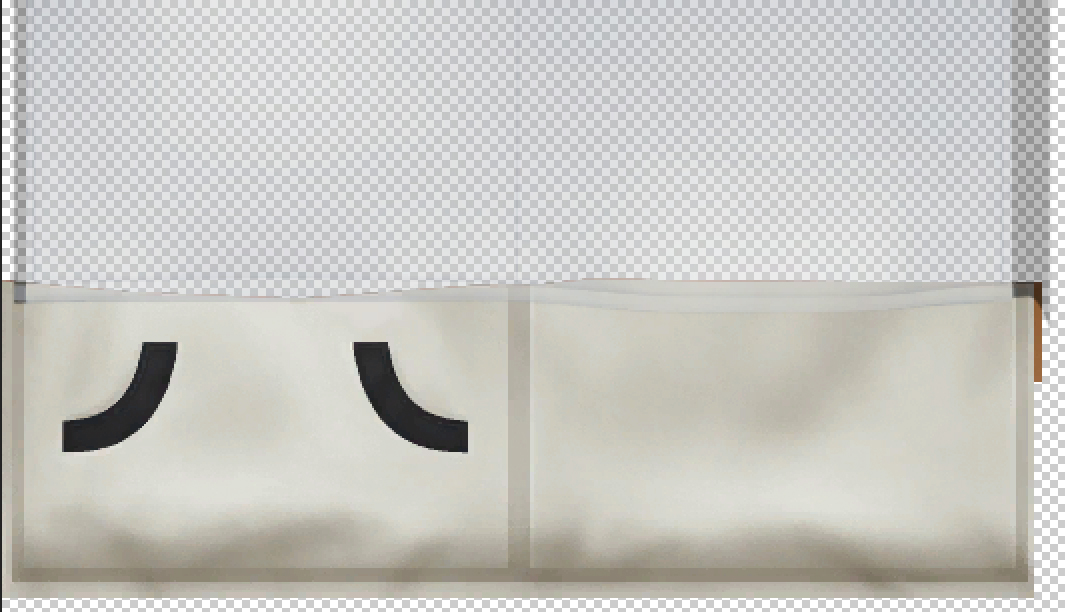 There is also an issue with longer tops 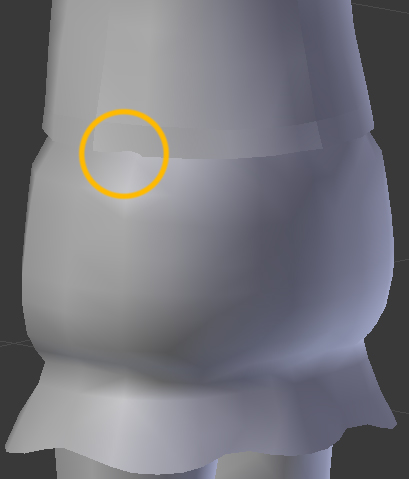 I suggest to use nude body's uvs and mesh as a reference when laying out or moving around the uvs, not a texture from some other top bc the length will differ. For example, the uvs of the shorter top on the first pic end lower than the uvs of the longer one on the second. |
|
|
|
Post by sisselin on Dec 7, 2018 15:05:47 GMT -5
Hi. It happens because top's texture and uvs overlap bottom's. There is also an issue with longer tops I suggest to use nude body's uvs and mesh as a reference when laying out or moving around the uvs, not a texture from some other top bc the length will differ. For example, the uvs of the shorter top on the first pic end lower than the uvs of the longer one on the second. I'm sorry I don't completly understand. When I check with the base texture or the nude bottom mesh and append the skirt the uv is still under the shirts texture |
|
|
|
Post by mauvemorn on Dec 7, 2018 18:18:18 GMT -5
Oh i was wrong again. I'm not sure how exactly the position of vertices could have been accidentally changed quite like this, but somehow it happened... and the only way is to change it back manually. - find this top ( 1 ), export the mesh, append it; - select a skirt, in Texture tab select the second texture( 2 ) and change the file to top's texture ( 3 ); - do the same for the background if you want( 4 ); 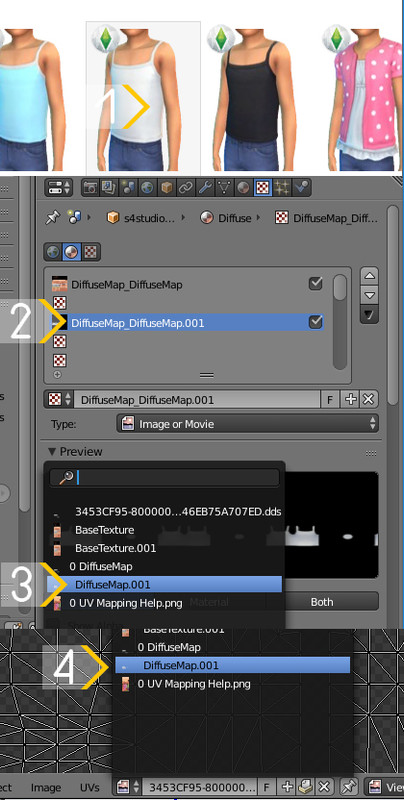 - in 3d window select these problematic faces ( 5 ); - switch to edges and select each edge of a triangle, you're looking for mutual orange ones ( 6 ) where faces are connected; - disable sticky selection mode, switch to faces, rotate ( R ) faces in a way that these mutual edges are facing each other ( 8 ); - turn on Snap during transform ( 9 ), select everything in 3d window, move each vertex into place ( 10 ) 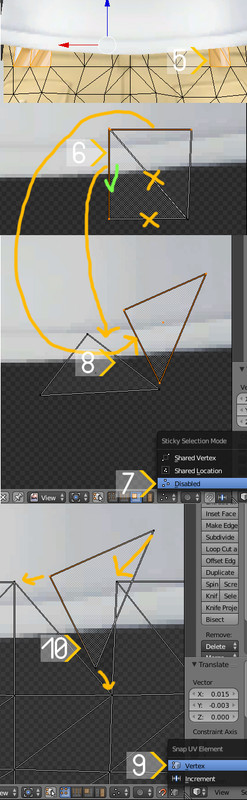 I can't think of an easier way to do this unfortunately |
|
|
|
Post by sisselin on Dec 8, 2018 14:39:11 GMT -5
mauvemorn Thank you soo much you are truly a life saver!! also I really wonder how this could have happened ^^;
|
|
|
|
Post by mauvemorn on Dec 10, 2018 11:40:46 GMT -5
sisselin 10 years later it came to my mind that i could have just deleted these faces and created new ones by selecting parallel edges and bridging them with F in like 20 seconds.........
|
|
|
|
Post by sisselin on Dec 17, 2018 2:18:04 GMT -5
sisselin 10 years later it came to my mind that i could have just deleted these faces and created new ones by selecting parallel edges and bridging them with F in like 20 seconds......... Ahahha Oh my god I didn't think about that either but it's so obvious now when you say it xD |
|


