|
|
Post by tigger3336 on Feb 28, 2019 23:10:14 GMT -5
I'm totally at a loss here with this recolor of a base game dress. I've created a new Normal (bump map), didn't need to change the Specular or Shadow texture files, and there was no Emission file to do anything with. Everything looks great in S4S, and amazing in CAS ... except when I rotate to a straight frontal view. That is when I see these "smarties", which were on the original texture. I even managed to correct the greenish hue after my first attempt at the new Normal file. I don't have a clue what I am doing in Blender, but I tried to look to see if they were a part of the original mesh (they were buttons originally), but when I open Blender, my sim is clothed ... and clicking to try to rotate earned me the ability to separate her body from her head. ROFL ... I found the undo button, and closed the file without saving. I've loaded the screenshots to show you what I mean, and the package is HERE, in case anyone knows what I need to do. I humbly appreciate any help to figure this out.  |
|
|
|
Post by inabadromance on Mar 1, 2019 4:22:54 GMT -5
hi! are you saving the texture correctly? it needs to be saved as dds dxt5 with alpha. you need to edit the alpha layer as well.
|
|
|
|
Post by tigger3336 on Mar 1, 2019 7:34:28 GMT -5
Hi inabadromance, this is just a recolor of the base game dress, I've only the ability to save as .png with my Paintshop Pro program (which is all I have ever done with recolors). This is the first time I have had left overs, and I don't understand why ... unless it is part of the original mesh. There isn't an Alpha to edit. My only options are Diffuse, Shadow, Specular, Normal, and Emission; of which the dots are nowhere to be seen. Here is a side by side of my original export and my recoloring base: 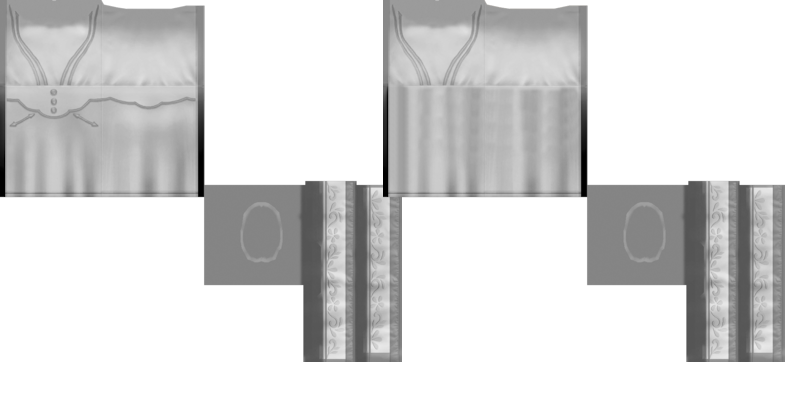 |
|
|
|
Post by Mathcope on Mar 1, 2019 14:41:11 GMT -5
Hi tigger3336 . The problem is the specular map. The buttons are detailed in this map as you can see here:  Working this map in .png file is a bit tricky but it still can be done: 1. Go to the original .package, export the specular as a .png file. Studio will export 2 files, one for the "mask" which determines where the specular map is applied, and another file that controls the shine in different channels of colors. 2. As you didn't edit the mesh or the Uvs you don't need to edit the specular.mask.png file that gets exported with Studio, but make sure to have it in the same folder when you import your edited specular. 3. Open the specular.png file that you exported. I'll show the process in Photoshop because it's what I have, but you can use any editor. When you open it, you probably won't notice anything because the buttons are very small and the opacity is very low as well. Create a new layer, move it back in the list and fill it with black. Then you will see this:  4. Go to the layer where you have the specular and erase the buttons. Remove the background layer and save the file as .png. 5. Import back to Studio, save the package and test in game. ---- As a side note, creating a bump map in .png format is even trickier because you have to play with the channels and an alpha channel is required. As shown HERE. You can still try to make it as .png, but I'd recommend you to lower the opacity of the layer containing the details, save and import back. For example, I take your bump map and lower the opacity to 50%, this gives this result:  When Studio converts it to .dds it gets this: 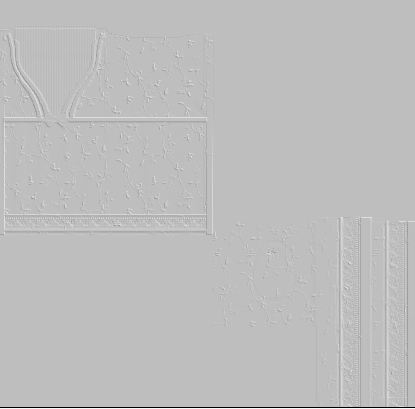 Instead of this: 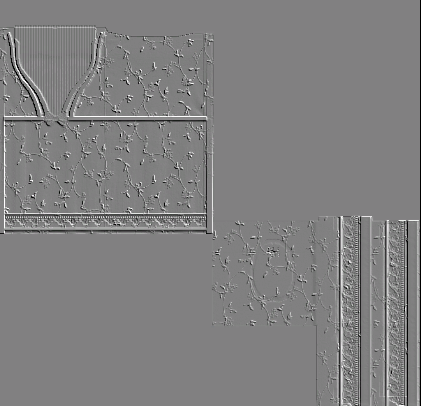 This last one is not similar of how EA's bumps maps look and it's a bit to strong. This could lead to lighting issues in the mesh. (Like the one in your picture with the sim wearing the dress. There's a line when the outfit connects with the head because of difference in shading of light.) |
|
|
|
Post by tigger3336 on Mar 1, 2019 15:43:36 GMT -5
Mathcope ... thank you!!! I hadn't even thought of the specular as the "map", and I do know better! LOL. I know mapping in Paintshop Pro, so that is really easy and I will fix that directly when I get home from work (pffft ... like I'm so not working at the moment! I will also fix the transparency of the bump map. I did create the alpha channel, but got so frustrated with those buttons. (rofl) I should have known it was just my overlooking something. I thank you so much for the help.
|
|
|
|
Post by tigger3336 on Mar 2, 2019 5:11:20 GMT -5
Mathcope I figured it out!!! Remember that conversation we were having the other day about tutorials, well, not only did you help me with the buttons, but I also figured out how to get the Alpha layer using Paintshop Pro! I will repeat it in both a written and a video tutorial so everyone keeps their hair. Phew ... 6 hours later I have learned more about this program than I had ever thought I needed. The end result is that my "recolor" turned out far better than I had even thought it would, and it's done correctly. (Forgive the extremely rough cut-out ... )  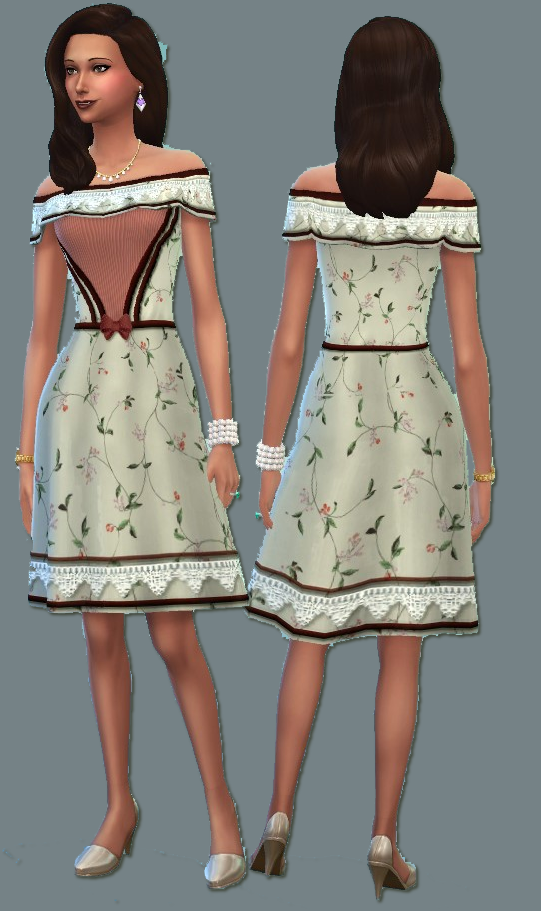
|
|
|
|
Post by Mathcope on Mar 2, 2019 12:56:37 GMT -5
Glad you could figure it out! It's a lovely dress!
|
|


