|
|
Post by archieonic on Apr 22, 2019 3:01:00 GMT -5
|
|
|
|
Post by jwofles on Apr 22, 2019 7:05:14 GMT -5
Make sure you save your normal map as dds.
How are you changing your original normal to the sims 4 style?
|
|
|
|
Post by archieonic on Apr 22, 2019 10:24:13 GMT -5
Make sure you save your normal map as dds. How are you changing your original normal to the sims 4 style? By increasing the brightness and exporting only the highlights to convert to nornal maps instead of the entire diffuse texture which resulted in a gray background and then darker grey textures. |
|
|
|
Post by jwofles on Apr 22, 2019 12:13:36 GMT -5
Make sure you save your normal map as dds. How are you changing your original normal to the sims 4 style? By increasing the brightness and exporting only the highlights to convert to nornal maps instead of the entire diffuse texture which resulted in a gray background and then darker grey textures. Not 100% sure what you mean. Do you start from a normal map that looks pink/purple and then convert into the sims format? The final normal map should be a .dds file with transparency. |
|
|
|
Post by Mathcope on Apr 22, 2019 13:27:13 GMT -5
If you start with a regular pink-blue normal map the steps to make a BUMP map for Sims is the following:
1. Go in the channels tab on your 2d editor.
2. Copy the red channel and paste it in your alpha channel.
3. Copy the green channel and paste it in both the red and blue channels to replace them.
Save as .dds and import to Studio.
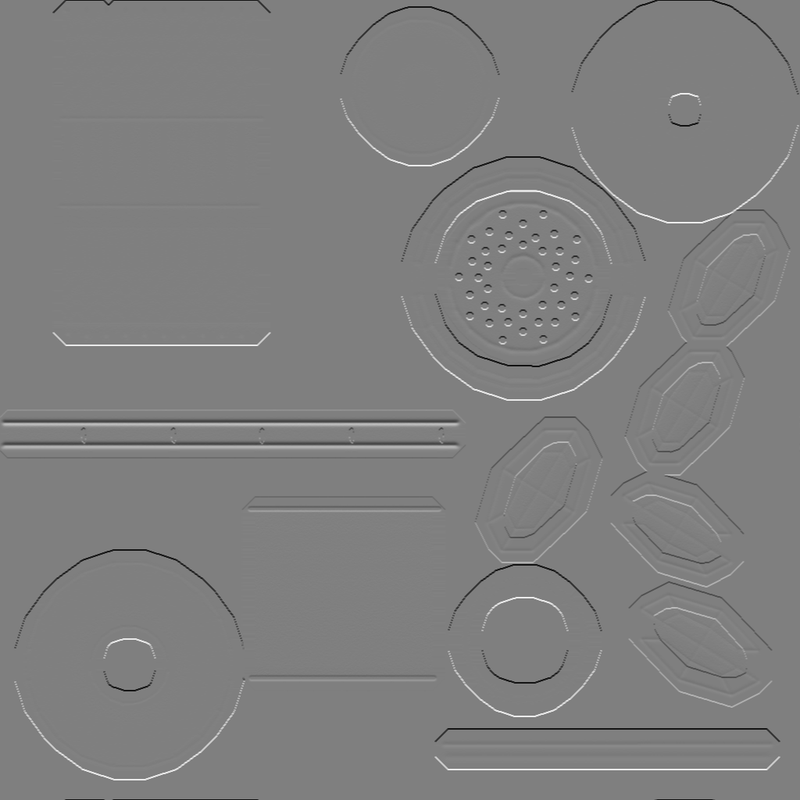
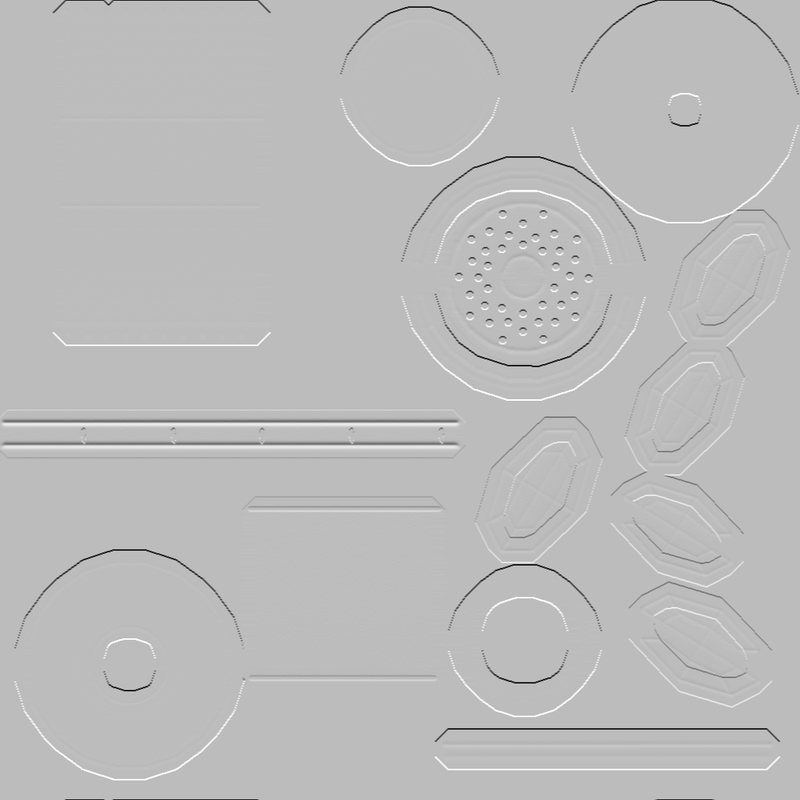
If you do not use an alpha, or your alpha is fully white this could lead to the first image you posted, where the bump map looks darker. Following this steps and starting from a regular normal map will get you the right brightness for the map. You don't need to tweak brightness.
|
|
|
|
Post by archieonic on Apr 22, 2019 13:30:17 GMT -5
By increasing the brightness and exporting only the highlights to convert to nornal maps instead of the entire diffuse texture which resulted in a gray background and then darker grey textures. Not 100% sure what you mean. Do you start from a normal map that looks pink/purple and then convert into the sims format? The final normal map should be a .dds file with transparency. Ah, sorry! I have tried 2 ways: 1-Load my highlight diffuse file (so instead of the texture, I hide the AO and colors and only leave the highlights) to an online normal map generator, getting the blue map and then doing the whole "create alpha, copy red to alpha, then green to red and green to blue). 2-In Photoshop, load my highlights, go to Filter-Stylize-Emboss, then add the alpha at 50% gray. Is it 100% necessary to use DDS for bump maps? For Photoshop and GIMP it's been a trip trying to find compatible plugins. I got one working for GIMP that has DXT5 but none for PS. Maybe I should upload my normal maps :P Thanks for all the help btw! |
|
|
|
Post by archieonic on Apr 24, 2019 2:05:30 GMT -5
Thanks everyone! I managed to get it fixed!
I have however seen most diffuse textures (and bump maps) at resolutions of things like 512x1024 or 1024x2048 or the opposite aspect ratio, is there a specific reason for this? I usually work with 1024x1024.
|
|
|
|
Post by menaceman44 on Apr 24, 2019 9:38:34 GMT -5
Most EA objects just tend to be mapped on a rectangular canvas. Mapping on a square texture is fine for objects though.
|
|
|
|
Post by Mathcope on Apr 24, 2019 13:57:06 GMT -5
They do that to save space in the UV map and therefore the image size when you don't need a square map. If you only use a part of the square and can fit your UV in a rectangle it saves half the image size for each diffuse, specular and normal map making the .package lighter. It is just a minor difference and optional as menaceman44 posted above. |
|
|
|
Post by archieonic on Apr 24, 2019 20:28:57 GMT -5
Makes sense, thanks for all the help! It's very much appreciated. I actually just saw an interesting object CC creation video ( ). This user drew the highlights in a way that they make the object look like it has a bump map (dark and white contrast), quite interesting to see. (He doesn't use bump maps) I'll have to compare how it looks with and without. Thanks again! |
|
|
|
Post by Mathcope on Apr 24, 2019 21:22:31 GMT -5
Makes sense, thanks for all the help! It's very much appreciated. I actually just saw an interesting object CC creation video This user drew the highlights in a way that they make the object look like it has a bump map (dark and white contrast), quite interesting to see. (He doesn't use bump maps) I'll have to compare how it looks with and without. Thanks again! Great video. Making a normal map is also optional, you can always use a blank one. But I have to agree that texturing is where the real magic happens for most items. The details he adds in the video are just simple black and white lines giving the effect of depth. There's a tutorial in the forum (for clothing) that uses this technique. HERE. Even if the details painted in the diffuse are enough for the object you can always use a filter to convert that details to a normal map-bump map. For example the Nvidia Normal map plugin. (Or other programs, webs, etc, there is a lot of options around). This way your details won't only be in the diffuse but also in the normal map. |
|
|
|
Post by archieonic on Apr 25, 2019 3:54:44 GMT -5
Good point, thanks!
Now if I can get around creating circular highlights lol. I've tried exporting parts of the UV and erasing the extra edges, by hand, but damn it's hard. Maybe if I unwrap it as a lightmap to get it as a square it'd be easier.
|
|
|
|
Post by archieonic on Apr 27, 2019 18:18:04 GMT -5
I've been toying around with an idea. I've been doing the highlights for depths with just one line, then converting it to a normal map, re-importing to the diffuse as an overlay. Seems to work pretty well. I'm still having issues with circle highlights but so far I've been using the path tool in GIMP to create a border following the UV layout. This is the result so far (missing specular map): 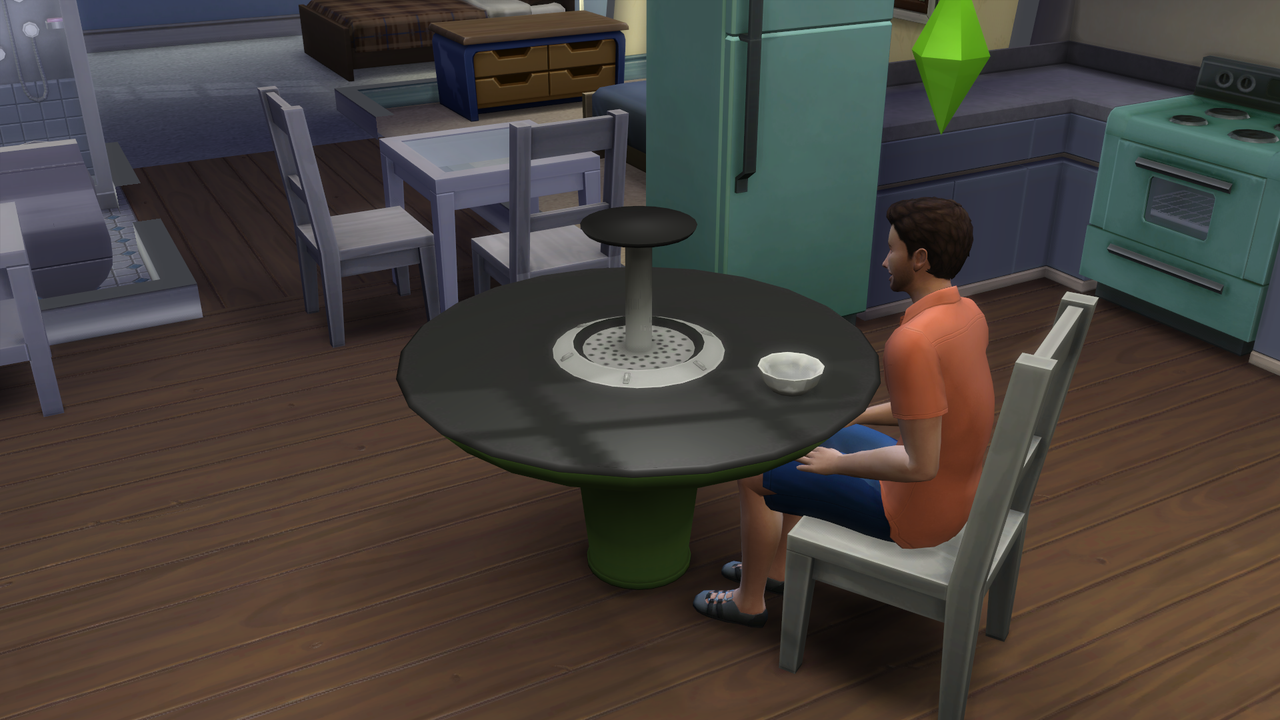 Does that look more like a proper Maxis Match object? |
|