|
|
Post by starmorgana on Nov 9, 2020 20:50:44 GMT -5
This is my first time trying to edit meshes in any form so I might have bit off more than I can chew ^^' (This is also my first time posting so forgive me if I mess anything up here!) I'm trying to create a Bungo Stray Dogs world for my own personal use and am making this character 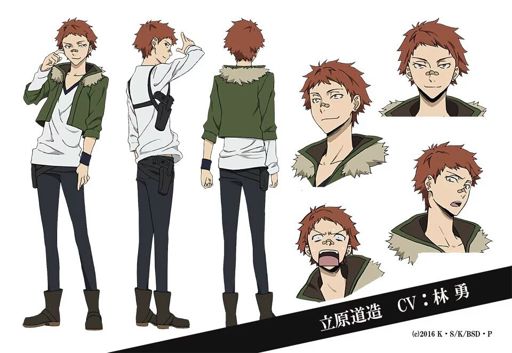 Some how I decided this would be easiest done by mashing together bits and pieces of other things. In blender I managed to come up with this, which I think looks decent considering I had no idea what I was doing!  When I put it into S4S over the base Jacket I used (Purple and Black Zip up hoodie with a white v neck under) I got this  So I think that all I need to figure out it the UV mapping and texture stuff? I've read through a lot of tutorials about it but I can't seem to figure it out. I thought it would be as easy as saving all the original textures and combining them but I guess it isn't. When I tried to just paste in the textures from each bit onto the UV map template I downloaded S4S showed me this  How do I go about getting my textures to show up where they should? I thought I laid them all out in the right places |
|
|
|
Post by Silerna on Nov 10, 2020 6:50:08 GMT -5
First , you can delete the Rig.002 and Rig.003 files in your layer menu. You only need one  . Then how many blender layers do you have? It could be a problem with the cut numbers because S4S recognize only a few for the top part. Upload the package and blender file just in case so we can take a look. |
|
|
|
Post by starmorgana on Nov 10, 2020 12:43:31 GMT -5
|
|
|
|
Post by Catnipsims on Nov 10, 2020 12:53:03 GMT -5
Try using the nude male top uv as a guide.
|
|
|
|
Post by starmorgana on Nov 10, 2020 13:09:08 GMT -5
|
|
|
|
Post by Silerna on Nov 10, 2020 13:59:29 GMT -5
Try using the nude male top uv as a guide. I've been using this one as my guide. Does that work? ![]() ![]() ![]() ![]() ![]()  Working on the mesh to correct some problems and looking for the actual one . I think what Catnip sims means is export a Nude male top via S4S and use that as your guide. |
|
|
|
Post by starmorgana on Nov 10, 2020 14:30:45 GMT -5
I've been using this one as my guide. Does that work? ![]() ![]() Working on the mesh to correct some problems and looking for the actual one . I think what Catnip sims means is export a Nude male top via S4S and use that as your guide. Oh, instead of using the hoodie that I used for all the cut numbers and things? I hadn't tried that yet. Thank you so much for taking the time to help! |
|
|
|
Post by Silerna on Nov 10, 2020 15:30:32 GMT -5
Working on the mesh to correct some problems and looking for the actual one . I think what Catnip sims means is export a Nude male top via S4S and use that as your guide. Oh, instead of using the hoodie that I used for all the cut numbers and things? I hadn't tried that yet. Thank you so much for taking the time to help! I'm also totally new to this and want to share what I've learned. Anyway to me a nude cas top wasn't needed. A nude top only has 1 group and you need 5 for this mesh. I cloned this mesh.
 Assuming you had the same one. Because the layers are different then yours (sleeve was 5 and yours 1 for example) I had to figure out which part was the correct one for each layer. This is what I've done : - I appended all clone meshes into Blender 2.77. You need a higher version level for Data transfer tools. Deleted all UV_1 from your layers and transferred them from the clone mesh. Using this guide to do the same as me.
- I changed the vertex paint from the whole top to #00FF00.
- Appended the same clone mesh again. Transferred weights on all parts. More info here about Weight transfer.
However it does look messy in game, I think that's because the polygons are way to much. I didn't want to decimate the mesh but most tops are around between 1000 and 10000 polygons. Yours is over 35000. It can also be the incorrect clone mesh. Try a few ones with the same group by transferring their weights and test it out in game. It always takes a while for me  - Removed double verticles.
- I corrected your uv_0 also. Many parts were overlapped and still are. This is going to be a problem when you are going to texture it. The top part was on the incorrect location. Using the same guide as you (the male UV picture) I rotated and scaled down the top part so it fills the torso. moved the sleeves to each arm and added all extra parts to bottom right.
The UV_0 looks like this now:

To test if everything is in place , just upload the uv in the diffuse section in S4S. As you see the textures are different shapes and located elsewhere. Most creators don't follow the parts EA does with their clothing. Especially those using Marvelous designer and such. Use this UV to make your texture.  |
|
|
|
Post by mauvemorn on Nov 10, 2020 17:24:22 GMT -5
Hi. All CAS items share the same uv space. All items within a specific category share the same designated area within the uv space. You combined two tops that were uv unwrapped within the same area. Naturally their uvs will overlap. What you should have done was create a separate uv map, place them in the designated area without overlapping, re-bake the texture as explained hereMost CAS items are made of multiple meshgroups for a reason, which is to tune each of them differently. For example, your mesh would need to be made of 6 meshgroups: 1 for transparency, 2 to hide armbands, 2 to hide bracelets, 1 for the base. If you do not want to make the mesh work properly with accessories, clone a tank top, add a new meshgroup in the warehouse, assign simglass to it, import a blend with two meshgoups ( everything with cut number 0000, fur with cut number 0001 ). If you want to make it work with accessories, clone a sweater with no collar, check if it has 5 meshgroups, split your mesh the same exact way into the same exact number of meshgroups, remove unused vertex groups from each, assign corresponding cut numbers, in the warehouse duplicate the biggest one ( the whole body ), add it in lods and region map, change shader, import your blend I explained how to add meshgroups hereThe outfit should be vertex painted with 00ff00. The jacket is not rigged at all. The uvs in the uv_1 should be transferred with Nearest face interpolated. I suggest you to watch a frankenmeshing tutorial and remake everything from scratch, that would be faster than trying to salvage this. |
|
|
|
Post by katarinamartian on Nov 22, 2020 21:57:17 GMT -5
I hope you'd solve your problem. I loved your mesh.
I'm wondering if you could say how did you create this kind of fur collar. If you know any tutorial, it would be very helpful. thanks ♥
|
|
|
|
Post by mauvemorn on Nov 23, 2020 4:12:48 GMT -5
I hope you'd solve your problem. I loved your mesh. I'm wondering if you could say how did you create this kind of fur collar. If you know any tutorial, it would be very helpful. thanks ♥ Hi. As i understood from the description, this is a frankenmesh, so the fur piece must have been made by someone else.
Usually it is made the following way: you create a hair system, adjust it's dynamic properties, then you either convert the hair cards to polygons or its guides to curves and add geometry to them.
This is a common technique for making game ready hair, so there should be many tutorials on youtube that cover this process. Just do not search for ts4 related tutorials
|
|
|
|
Post by katarinamartian on Nov 23, 2020 19:55:34 GMT -5
I hope you'd solve your problem. I loved your mesh. I'm wondering if you could say how did you create this kind of fur collar. If you know any tutorial, it would be very helpful. thanks ♥ Hi. As i understood from the description, this is a frankenmesh, so the fur piece must have been made by someone else.
Usually it is made the following way: you create a hair system, adjust it's dynamic properties, then you either convert the hair cards to polygons or its guides to curves and add geometry to them.
This is a common technique for making game ready hair, so there should be many tutorials on youtube that cover this process. Just do not search for ts4 related tutorials
Thanks! I'll try to find tutorials with those keywords. You always save me lol |
|


 . Then how many blender layers do you have? It could be a problem with the cut numbers because S4S recognize only a few for the top part.


