|
|
Post by magicghost on Feb 9, 2023 14:06:10 GMT -5
Hello again. I am having an issue with the fit of the dress I made on larger-bodied sims. Here is the item on a slimmer-bodied sim: 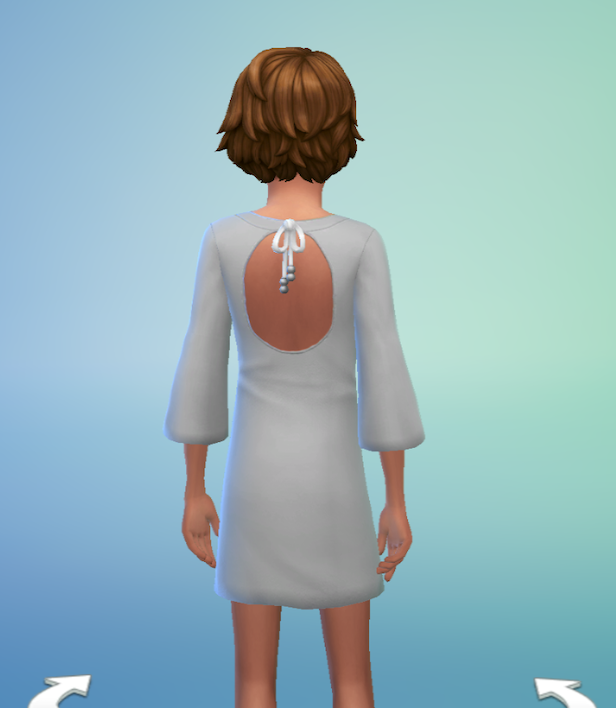 While here is the dress on a larger-bodied sim: 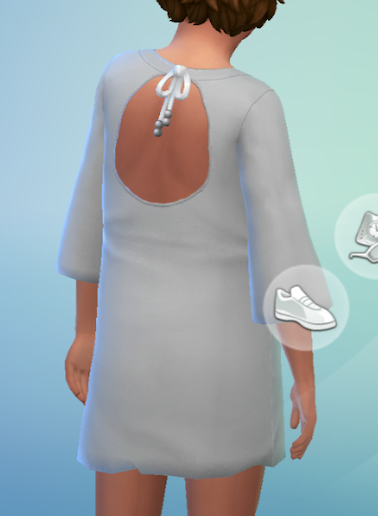 As you can see, the bottom hem looks as if it is glitching out. Do you know what might be causing this? |
|
|
|
Post by mauvemorn on Feb 9, 2023 14:36:20 GMT -5
Hi. We would need to see the blend file. Probably something is wrong with uv_1 is those areas
|
|
|
|
Post by magicghost on Feb 9, 2023 17:14:03 GMT -5
|
|
|
|
Post by mauvemorn on Feb 10, 2023 11:34:51 GMT -5
- Choose uv_1, enable sync, press B, click and drag to select the uvs at 0,0 coordinates. You'll see that those are uvs of those vertices that do not morph right; - You can put them in the right location but it will be faster to just delete and create new ones. So switch to uv_0, select the oval uv island of the geometry that covers the bottom of the dress, in 3d view press Delete, choose Faces; - cover and unwrap the hole like this, then split the edge How to close holes: - Switch to Edit mode ( TAB ), switch to Edge select ( 1 ), select the border edge loop ( 2 ) by Alt-RMB-clicking on it; - Press E to extrude, S to scale, scale it down ( 3 ); - Press Alt M and choose Collapse ( 4 ); - Switch to Vertex select, select the vertex in the middle of created geometry, optionally move it up a bit, press Shift NumPad7 to align the view parallel to it; - Select - Select More/Less - More ( 5 ); - Shading / UVs - UV Mapping - Unwrap - Project from view* ( 6 ); - In UV editor scale it down ( S ) and put somewhere in the extra area; - Select the same border edge again and mark it as Sharp ( 7 ); - before baking textures, select one edge marked as sharp, Select - Select similar - Sharpness, then split all of them with Mesh - Edges - Edge split.  |
|
|
|
Post by magicghost on Feb 10, 2023 21:33:14 GMT -5
- Choose uv_1, enable sync, press B, click and drag to select the uvs at 0,0 coordinates. You'll see that those are uvs of those vertices that do not morph right; - You can put them in the right location but it will be faster to just delete and create new ones. So switch to uv_0, select the oval uv island of the geometry that covers the bottom of the dress, in 3d view press Delete, choose Faces; - cover and unwrap the hole like this, then split the edge How to close holes: - Switch to Edit mode ( TAB ), switch to Edge select ( 1 ), select the border edge loop ( 2 ) by Alt-RMB-clicking on it; - Press E to extrude, S to scale, scale it down ( 3 ); - Press Alt M and choose Collapse ( 4 ); - Switch to Vertex select, select the vertex in the middle of created geometry, optionally move it up a bit, press Shift NumPad7 to align the view parallel to it; - Select - Select More/Less - More ( 5 ); - Shading / UVs - UV Mapping - Unwrap - Project from view* ( 6 ); - In UV editor scale it down ( S ) and put somewhere in the extra area; - Select the same border edge again and mark it as Sharp ( 7 ); - before baking textures, select one edge marked as sharp, Select - Select similar - Sharpness, then split all of them with Mesh - Edges - Edge split. Thank you! This worked. While I have you, I am having another problem with the dress where shoes interfere with it. Here are some examples: 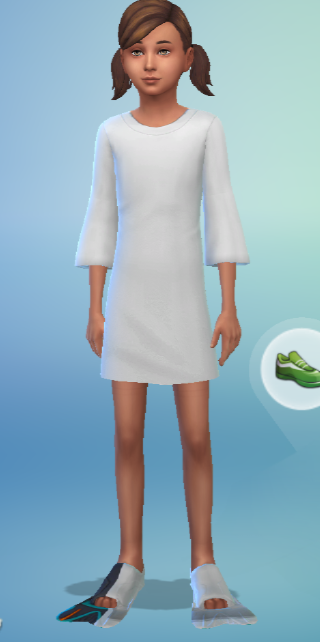 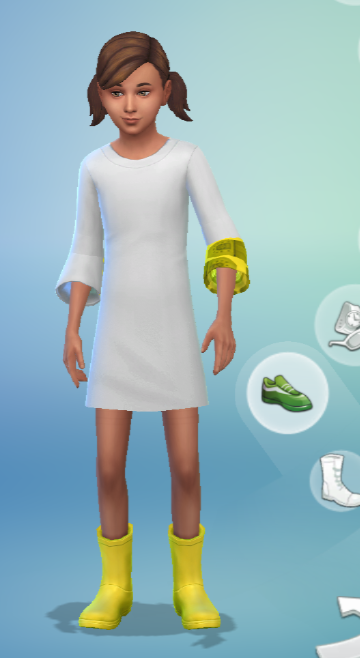 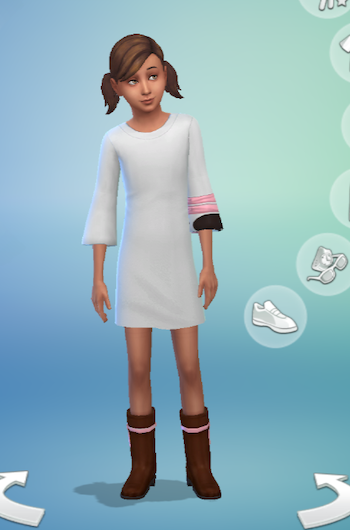 Here is my updated blend file btw: share.internxt.com/d/sh/file/acf8386b5363686075a5/74f2621fac7a5097881a919747c2b00a94b65ae9bf56649ecdbf93349617d444 |
|
|
|
Post by mauvemorn on Feb 11, 2023 11:21:15 GMT -5
The uvs and textures of the sleeves are in the space meant for shoes. Its best to put them where the sleeves are meant to be and move the uvs that are currently there elsewhere |
|


