(Solved) Windows Image file. (Mini-tutorial inside)
Jun 17, 2016 19:06:56 GMT -5
inabadromance, Mathcope, and 1 more like this
Post by AdonisPluto on Jun 17, 2016 19:06:56 GMT -5
So in windows and doors meshing for the Sims 4, Ea have two different meshes. The first is the mesh for the high and medium mesh and the second for the low detail. So the high and the medium have the normal mesh for the window and its the same just like the door. But the low detail mesh is just a box the same size as the normal mesh but mapped differently depending on how you want it.
This is from a window made
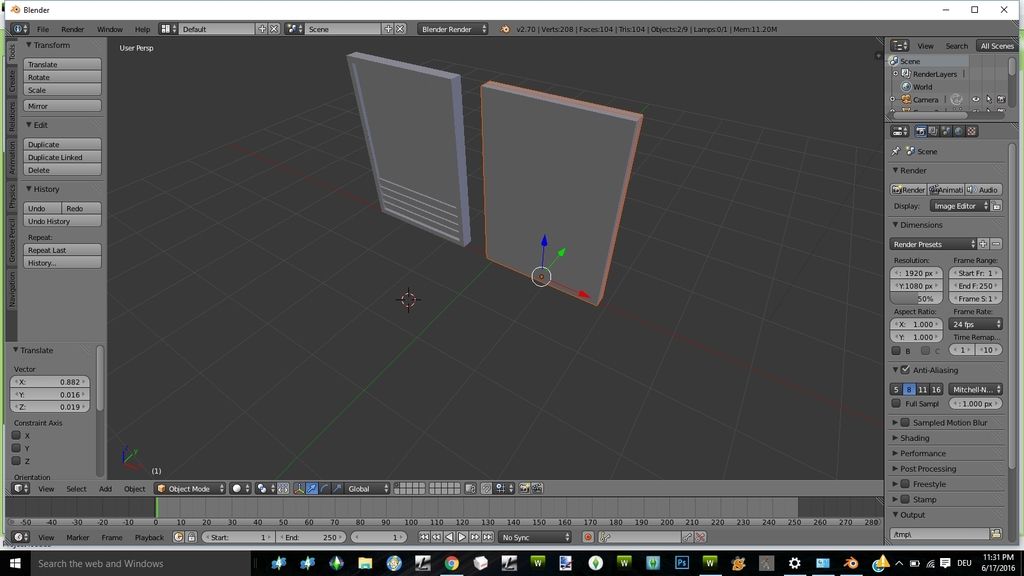
This shows the high compared to the low detail mesh. The high is on the left and the low on the right
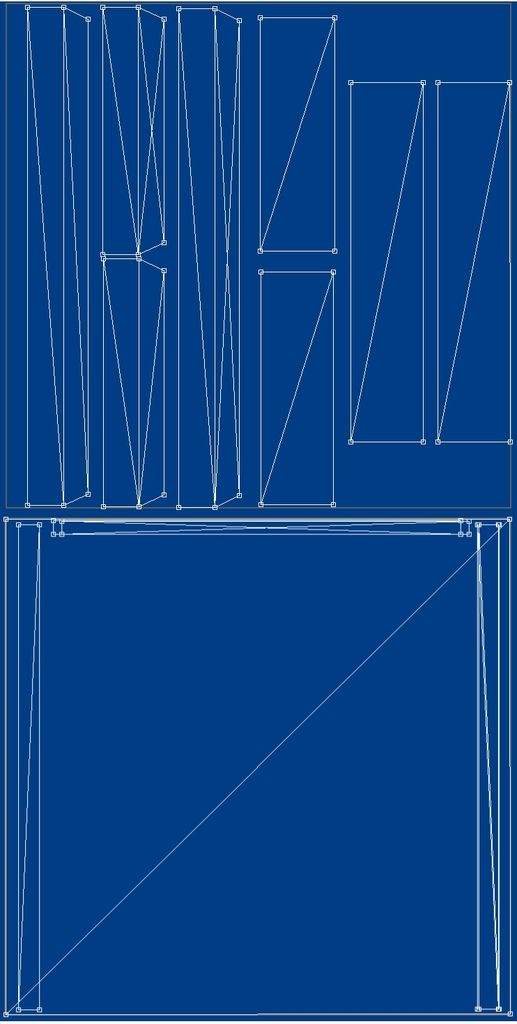
This shows the mapping of the high and low mesh, the high is at the top and the low at the bottom. Now the trick to getting that mesh to show up exactly as the window or the door on the low detail lies on you mapping it in a square or circular form depending on the shape of the window or door you are making. Then import the low detail into your mesh tool.
Next export the uv map of the low detail of the mesh and open it in an image program of choice.
Move back to the high and low detail mesh and import the textures that you made for them. This is what mine looks like after the textures are applied
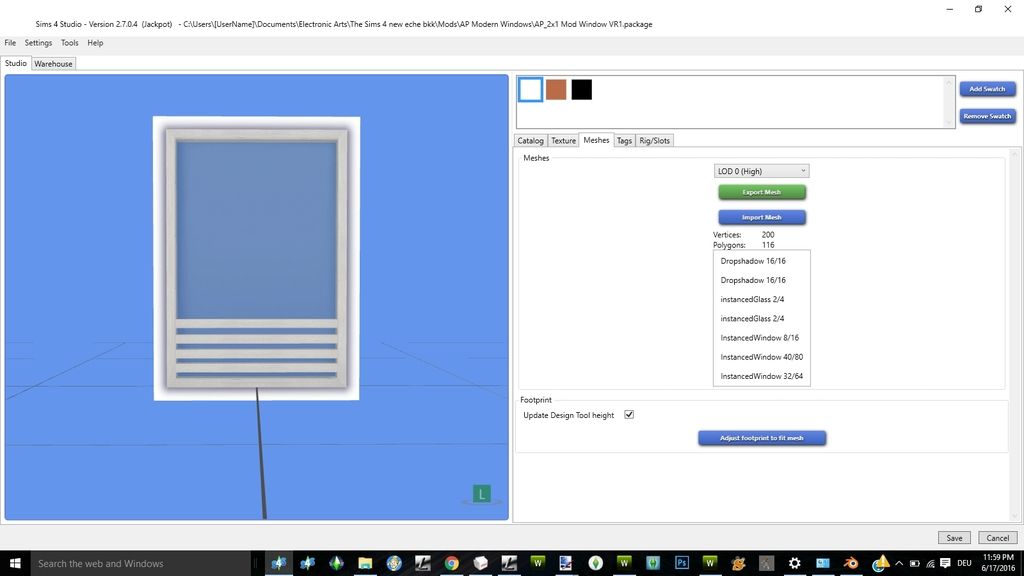
Now zoom in the high detail mesh a bit and make sure it is straight and take a screen shot of it and open your image program and paste it there. Then crop out the portion shown here
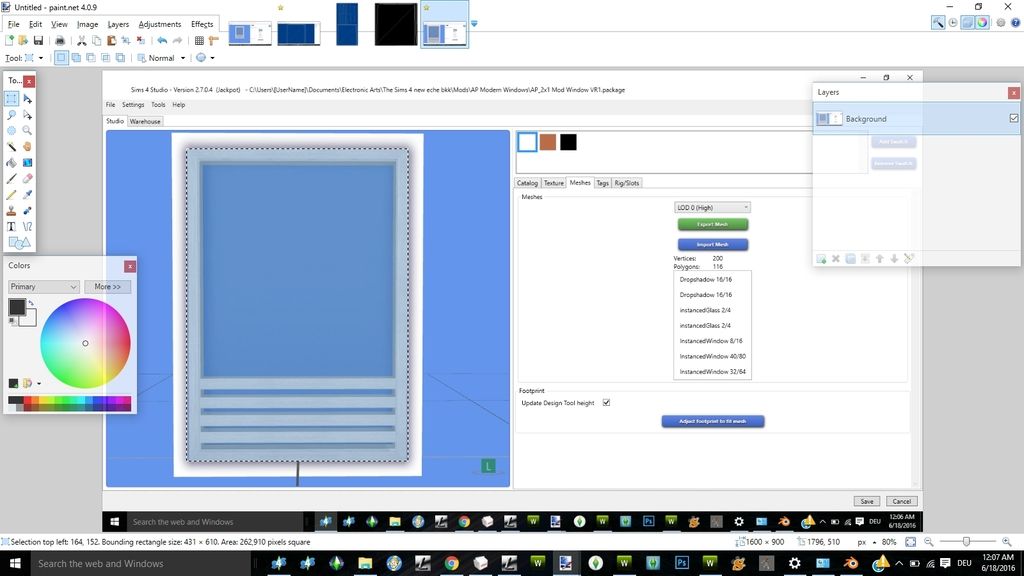
After that you should have something like this
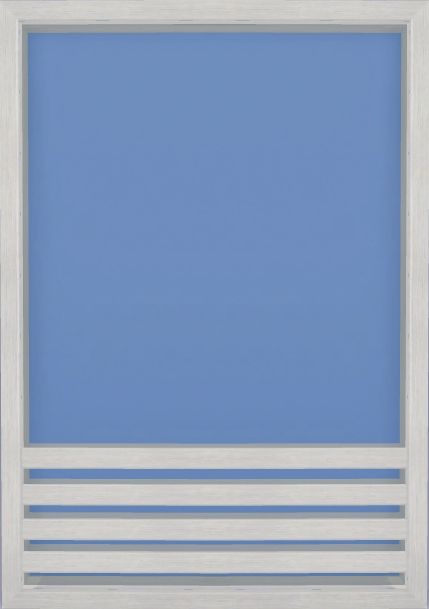
Depending on the way your low detail mesh is mapped you can resize the above image to fit your uv map. So because my uv is mapped to the edge of the uv screen and saved as a 512x512 image, I resize my cut out image above to 512x512 to fit my image(Note that this can take any size you want but must conform to and of the texture size that Ea uses. The size you use depends on you). Paste it over the uv map of the low mesh, lower your transparency and adjust the image till it matches the edge of the uv map
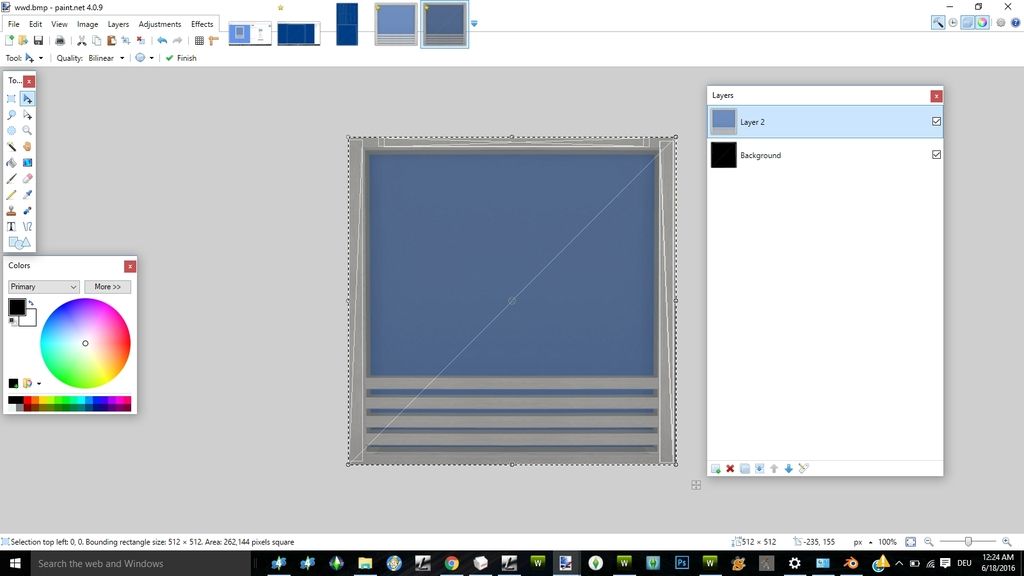
When you see it is ok, move transparency back to normal and save your image as a png or dds. Then go back to your mesh and open the low detail mesh, and click on its material tab and import the texture you just saved into it. If you should have something like this
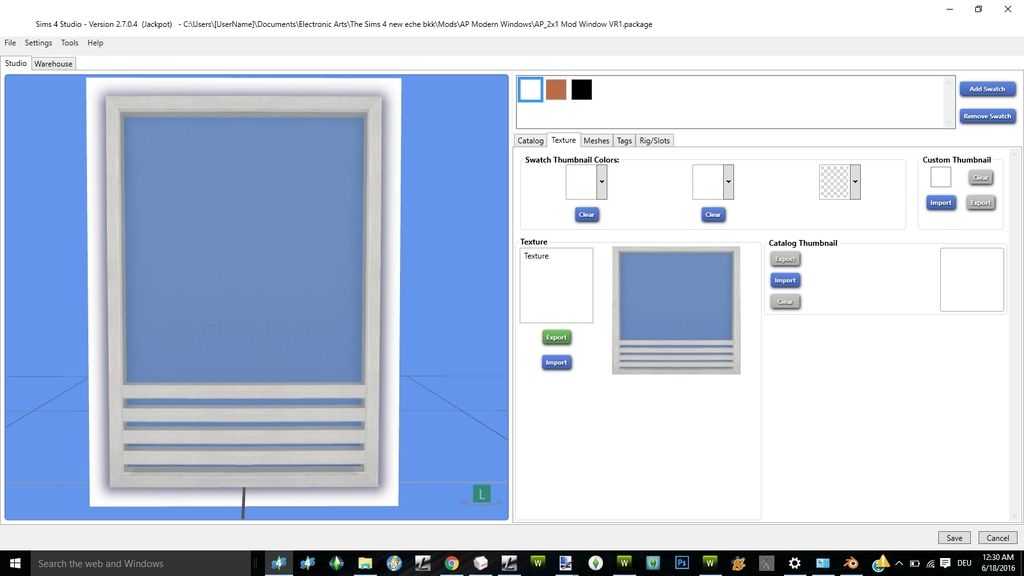
For each swatch you make for the window or door you have to do the above with respect to the low detail texture for that swatch.
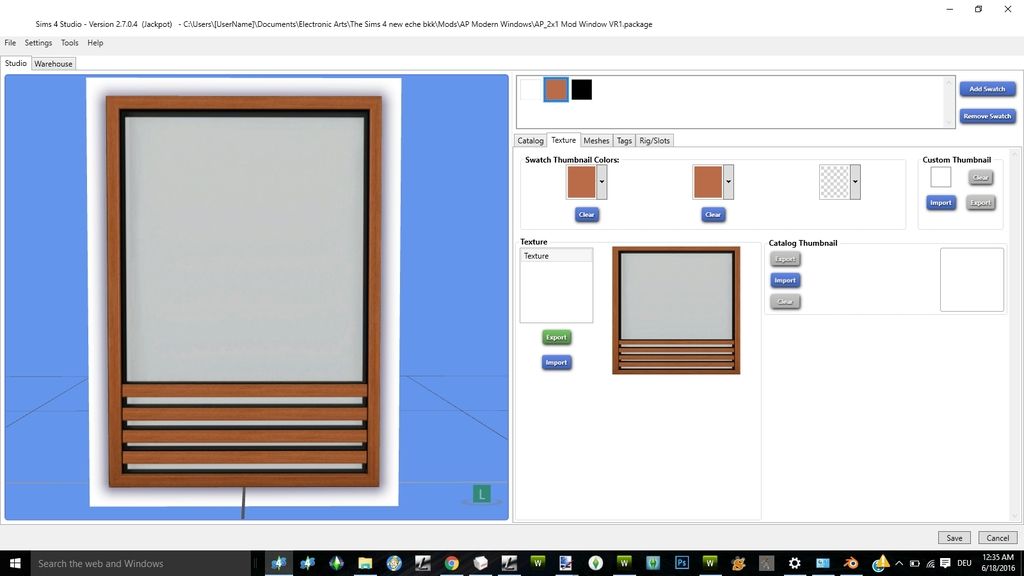
The cut out for the glass will be the same for all the swatches with respect to the low detail mesh.So just open one of the textures for the low detail mesh and select the part where the glass shows
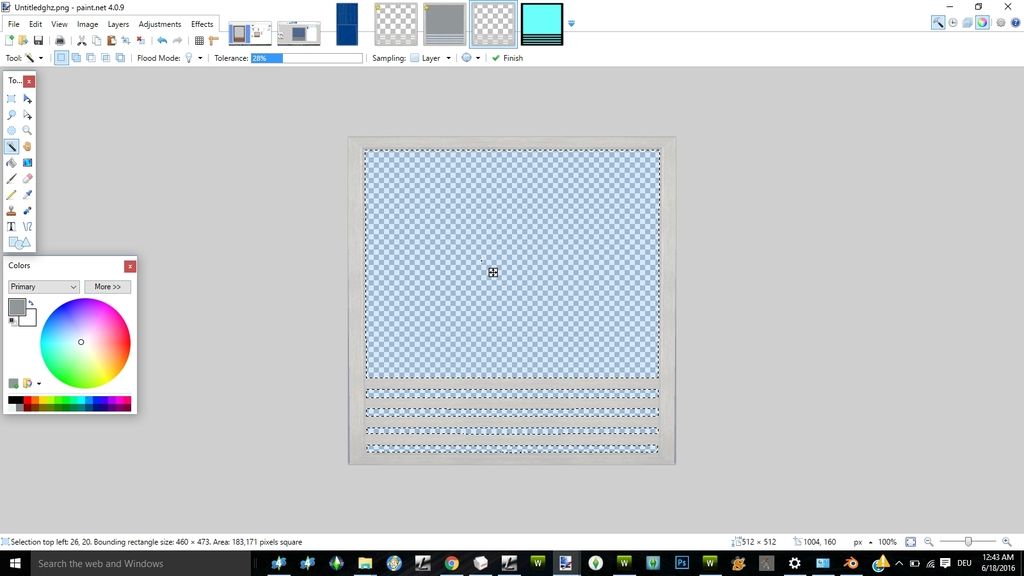
Use the following RGB code 107:255:252 or this values for the hex 6BFFFC and paint over the glass part. After this invert your selection to select the wood part and paint it all black. This is what I have
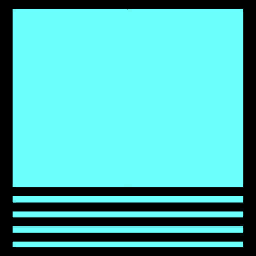
You can save it in any image size you want but I recommend to always save it as the same file size as the one you are replacing. Now open your warehouse tab, locate that image file with the light greenish colour and replace it with the one you just save above
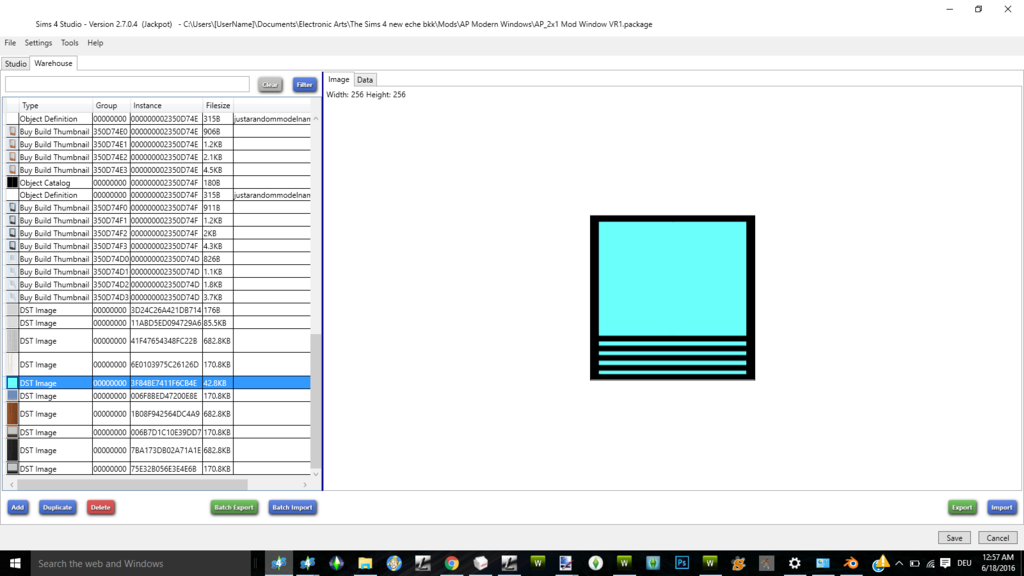
The process for getting the image for the low detail is the same for doors, windows and door arch. The process for getting the greenish image is the same for doors and windows and also for the arch door if it has glass on it.
Please do remember that the way you map you low detail mesh of the door, window or arch will determine how your image for the low detail will look like.
This is the process I have used for all my doors and windows and archs and I hope this is helpful


 This will surely help people about this images.