|
|
Post by keysmuse on Aug 2, 2016 14:09:28 GMT -5
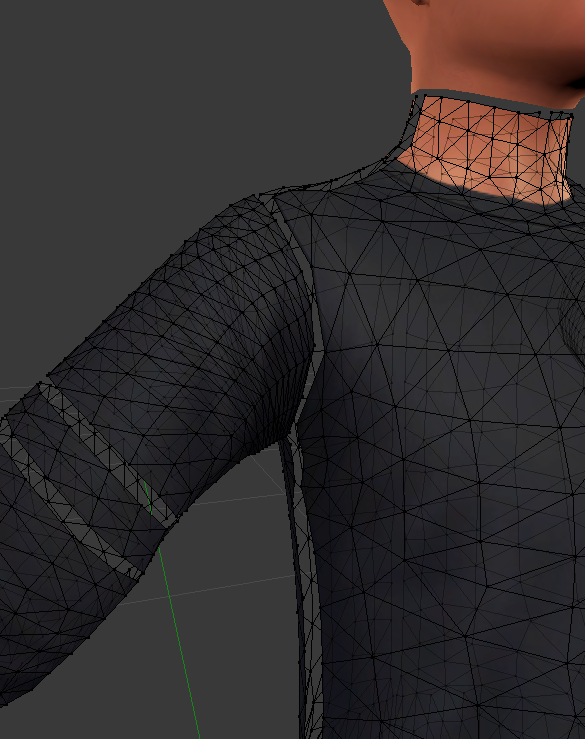
Hi, so I finished editing an EA mesh (turning it into a baggy oversized top) and I had everything done and ready to test but when I loaded into CAS I noticed the arms were disconnected, the stomach was glitchy as was the lower back of the mesh? Here's how the mesh looks in S4S / Blender   Mesh in CAS (compilation of problem areas)  As far as I could tell nothing seemed like it needed fixing. The only things I did were scale the bottom of the mesh for length, use sculpt mode to add volume in the sleeve area and subdivide the areas I edited (arms lower shirt). But in CAS plenty needed to be fixed. I guess what I'm asking for help with is how to solve this issue? I tried bridging edge loops but that left the UV map looking bizarre and frankly I'm too scared to keep going in case this can't be fixed.. Here's the package file - ( x) I'd be incredibly grateful if somebody could take a look at it and tell me the mistake I made? Thank you!!  |
|
|
|
Post by eliavah on Aug 3, 2016 2:47:03 GMT -5
GOing to give a few maybe potential solutions here.
For the gaps, you probably need to remove doubles. Select all, goto Mesh --> Vertice --> Remove doubles
Did you try reassigning the weights, I know it was just a mesh edit but may help.
At the bottom the weird cutoff of the top could be the normal map. Did you edit that.
Also the jeans clipping through the bottom could maybe be solved by pushing the bottom more outward. Unfortunately clipping, espeically with other CC isn't always a issue that can be fixed. But the only thing I can think of is pushing the bottom of the mesh more outwards.
I know bethesda does this with their long dress skirts to avoid clipping.
uv_1 looks fine to me, and since its a mesh edit i won't say to redo it c:
|
|
|
|
Post by keysmuse on Aug 3, 2016 5:40:22 GMT -5
GOing to give a few maybe potential solutions here. For the gaps, you probably need to remove doubles. Select all, goto Mesh --> Vertice --> Remove doubles Did you try reassigning the weights, I know it was just a mesh edit but may help. At the bottom the weird cutoff of the top could be the normal map. Did you edit that. Also the jeans clipping through the bottom could maybe be solved by pushing the bottom more outward. Unfortunately clipping, espeically with other CC isn't always a issue that can be fixed. But the only thing I can think of is pushing the bottom of the mesh more outwards. I know bethesda does this with their long dress skirts to avoid clipping. uv_1 looks fine to me, and since its a mesh edit i won't say to redo it c: I really appreciate you taking the time to list these solutions! I tried all of them and managed to stop the weird texture glitching but unfortunately I just can't fix the sleeves being disconnected. It's so odd honestly. I think I might just start over and pay closer attention to what I'm doing this time. Thank you again!! |
|
|
|
Post by inabadromance on Aug 3, 2016 15:22:53 GMT -5
If you hover one sleeve and press L, does the sleeve only get selected or the whole object?
Can you please share the .blend file too? thanks.
|
|
|
|
Post by keysmuse on Aug 4, 2016 1:26:56 GMT -5
If you hover one sleeve and press L, does the sleeve only get selected or the whole object? Can you please share the .blend file too? thanks. Yes if I hover and press L only sections of the sleeve I'm hovering over gets selected. Here's the .blend file - www.sendspace.com/file/jjh8ff |
|
|
|
Post by inabadromance on Aug 4, 2016 15:24:26 GMT -5
That means that you haven't removed doubles. In object mode, right click the mesh and on the side bar click "Shading: smooth". Go to edit mode and disable "limited selection" 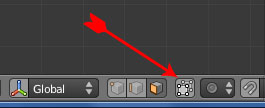 You should select all the top holding L on each part until all the top gets selected. then go to mesh / vertices / remove doubles. Even by doing this... i don't think the shading is going to be fixed. I'm not really sure what you did with the mesh, but some parts look subdivided and some don't.. that's where the wrong shading appears. You either subdivide all , or none. A plane with two vertices on each side is not going to connect well to a plane with 5 vertices in total. |
|
|
|
Post by keysmuse on Aug 4, 2016 16:15:09 GMT -5
That means that you haven't removed doubles. In object mode, right click the mesh and on the side bar click "Shading: smooth". Go to edit mode and disable "limited selection" You should select all the top holding L on each part until all the top gets selected. then go to mesh / vertices / remove doubles. Even by doing this... i don't think the shading is going to be fixed. I'm not really sure what you did with the mesh, but some parts look subdivided and some don't.. that's where the wrong shading appears. You either subdivide all , or none. A plane with two vertices on each side is not going to connect well to a plane with 5 vertices in total. I stated what I did in the op but I'm on phone so can't quote properly, if what I stated gives you any indication. I managed to fix the shading by bringing out the mesh away from the body but I'm still stumped on the arms being disconnected. The reason I subdivided the parts I stretched was because I wanted to see if it'd help the texture not look stretched. It was really just a curiosity I acted on; not sure if it helped or hindered the mesh now haha |
|
|
|
Post by keysmuse on Aug 4, 2016 16:34:45 GMT -5
 Okay so I've removed doubles, I assume I need to connect all the vertices or bridge edge loops. Would it be ideal to delete all but the arms and append the arms to another mesh (obviously using the same top) so that the neck stays connected? EDIT: I added the arms to another mesh and it's been going connected vertices but there's no way for me to connect each vertice from the shoulder to the body so I'm think it'd be ideal to start over and this time on my second attempt not the subdivide the arms. I'm still lost on how I can stop the texture from getting stretched though? Thank you again for all your help! |
|


