|
|
Post by kitty44 on Oct 8, 2016 17:14:47 GMT -5
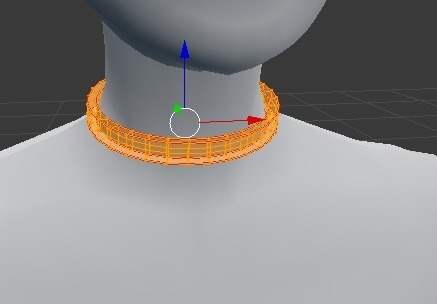
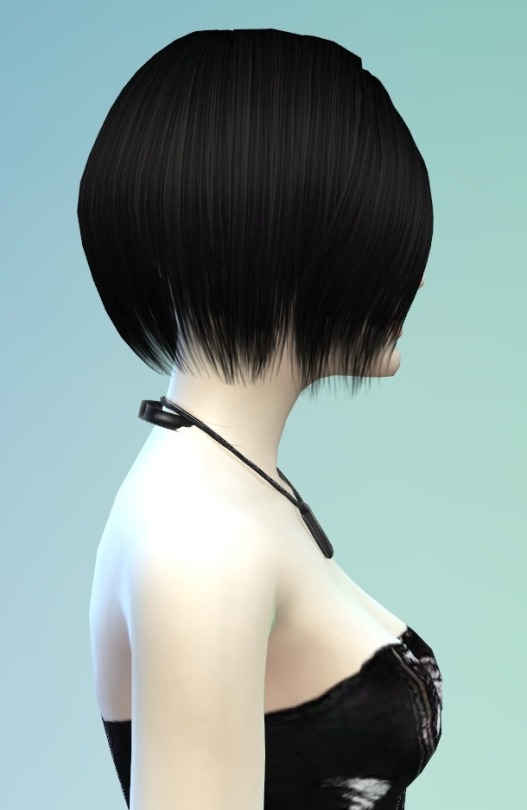
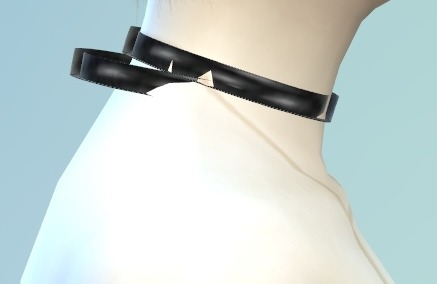
 I created this mesh importing the EA dog tag necklace and deleting it from Blender, then working from there. I merged it with the s4studio_mesh_2 file when I was mostly happy (did some UV map adjusting after however).  I'm wondering how to get rid of the dog tag necklace here..?  And why the choker shows up like this in-game/CAS. Thank you! (Also, for future reference - I'm happy with the texture but if I wanted one to look more like I create in photoshop, where would you recommend placing seams for UV mapping?) |
|
|
|
Post by Spirashun on Oct 8, 2016 18:47:23 GMT -5
Hi- did you correctly assign the cut number to your mesh? See Step #9 here: sims4studio.com/thread/10/tutorial-using-sims-studio-accessory. Also, if the original dog tag had multiple meshes (s4studio_mesh_1, s4studio_mesh_2, etc) you need to have the same amount in your own mesh, each with the correct cut number. If you only have one mesh you can just make a single vertex and hide it in the sim to count as the second mesh. For the issue of clipping into the neck, did you assign your mesh to the correct bones and vertex paint accordingly? As for seams, I think it would be easiest to work with if you used them to separate the four sides: outer, top, inner, and bottom. |
|
|
|
Post by kitty44 on Oct 8, 2016 21:16:29 GMT -5
Hi- did you correctly assign the cut number to your mesh? See Step #9 here: sims4studio.com/thread/10/tutorial-using-sims-studio-accessory. Also, if the original dog tag had multiple meshes (s4studio_mesh_1, s4studio_mesh_2, etc) you need to have the same amount in your own mesh, each with the correct cut number. If you only have one mesh you can just make a single vertex and hide it in the sim to count as the second mesh. For the issue of clipping into the neck, did you assign your mesh to the correct bones and vertex paint accordingly? As for seams, I think it would be easiest to work with if you used them to separate the four sides: outer, top, inner, and bottom. There's just the one mesh and the cuts/type are the same. The clipping is likely as you suggested - I didn't know about that step. I'll look up how to do so. I think that's about as I did with the seams, if you can see the red in the first picture. Thank you c: |
|
|
|
Post by Spirashun on Oct 8, 2016 22:10:00 GMT -5
Totally didn't see the seams in your first pic, woops! So you just gotta create the placeholder vertex for the second mesh to remove the dog tags, and in later steps for tutorial I linked there are instructions that go over the basics of what you need to do to fix the neck clipping!
|
|
|
|
Post by kitty44 on Oct 8, 2016 23:17:40 GMT -5
Totally didn't see the seams in your first pic, woops! So you just gotta create the placeholder vertex for the second mesh to remove the dog tags, and in later steps for tutorial I linked there are instructions that go over the basics of what you need to do to fix the neck clipping! Alrighty, I did the vertex painting and it seemed no area was weighted red in regard to the bones. After that I gave it a try in-game and it still didn't turn out right. I came back, saw your post/realized a bit moreso what you were saying and created a placeholder mesh. I renamed it too in case it would help, but there was no difference. :c Here's how it looks now:  The shadow below is shaped like the tag. I'm not quite sure why it has that slightly transparent look either.. |
|
|
|
Post by Spirashun on Oct 9, 2016 6:16:33 GMT -5
That leftover image from the dog tags is a shadow from the bumpmap, you should be able to replace it in the warehouse to remove the shading to remove that shadow  For checking your vertex painting/bone assignments it would be easiest if you just uploaded your package/blend file, so someone can see exactly what needs to be fixed! I haven't worked with accessories before so I dont know exactly how it should be off the top of my head but I'll do my best (or someone w/ more experience in that area can check) |
|
|
|
Post by kitty44 on Oct 9, 2016 14:50:08 GMT -5
|
|
|
|
Post by Zelrish on Oct 10, 2016 3:45:44 GMT -5
Well, I am no expert with accessories either (never did any so far) But from what I can tell, you need to delete the existing uv_0 and rename your UVmap in uv_0 (or transfer the uv data from the UVmap to the uv_0 but I think the first solution is easier/faster) You need to flip the normals of the whole mesh as they are all facing inward. You need to apply the weight paint. (you can follow this tutorial to have it easy) Otherwise I find the hidden pieces in the mesh disturbing but I suppose it's normal for accessories xD |
|