|
|
Post by fursims on Oct 16, 2016 10:34:09 GMT -5
I understood that if the poly count is too high, the mesh wont load in the sims 4 studio, but i dont understand why my mesh would have high poly.  For this chair, I basically used two cubes, a few cylinders and for the legs of the chair, i had to subdivide (in 3 cuts) to bend them. Before that i even extended it with the array modifier, so what is the problem here? Im afraid its somehow the subdivision, but i dont see another way how to bend a cylinder properly. Why is this a problem? I have seen far more complicated meshes that seem to work fine. Hoping for some help, thanks. |
|
|
|
Post by Mathcope on Oct 16, 2016 12:25:29 GMT -5
For some reason your mesh is over 7000 vertices and 8000 polygons. I don't know what you made for this to happen, since the mesh looks quite simple in shape to have that amount of polygons. Post your .blend file for someone to look. I cannot tell what you did from the picture...
|
|
|
|
Post by fursims on Oct 16, 2016 13:11:38 GMT -5
I will upload it  thanks. One question though.. where do you see the number of vertices and polygons? EDIT: found it already |
|
|
|
Post by fursims on Oct 16, 2016 13:29:18 GMT -5
uploaded my file here: www.mediafire.com/file/z17c99nco79xjwb/CHAIRFINISH.blendI deleted one leg for example and the polygons dropped down with 3000. I felt that subdividing is the problem, but i dont see another way how to bend something properly. I created a new mesh where i only subdivided 2 times and used the array modifier again. Main questions is: What would be a better way to bend an object without creating so many polygons? |
|
|
|
Post by Mathcope on Oct 16, 2016 14:07:04 GMT -5
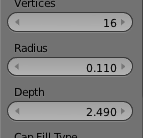
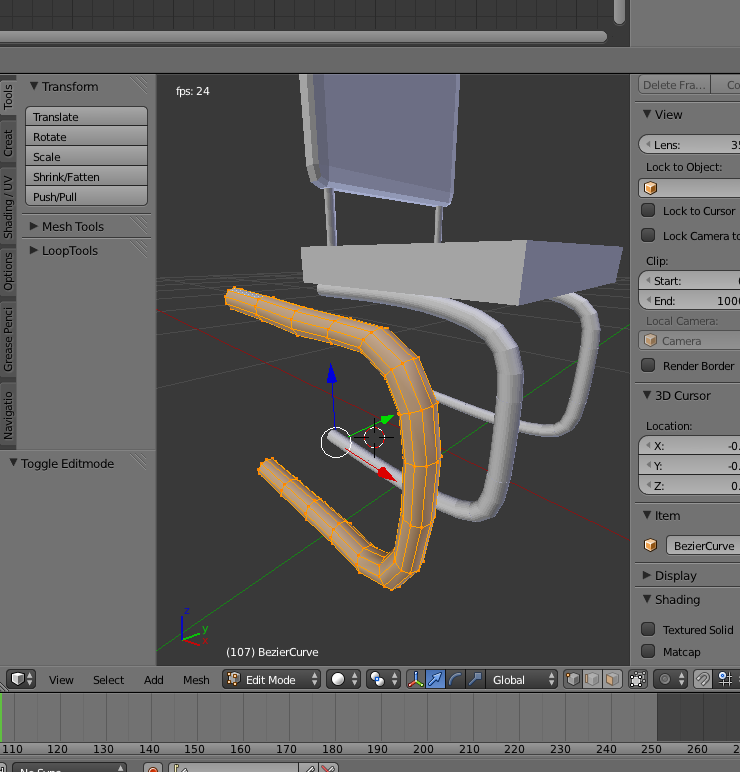
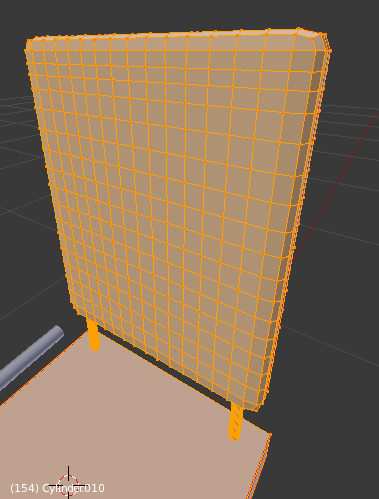
I can see the verts and faces here: In the top of the 3d model view.  As for the meshing part, I would recommend you to watch some blender tutorials about curves. Your cilindres have a lot of vertices to make it round, many people does that to make the mesh more fine in render porpouses, but as for the game, you shouldn't do that since increments the poly count a lot. Most of the time a cilindre with 16 vertices would do.  Now, what I would do for the modeling in this case is using blender curves. There are many tutorials out there showing how to make a curve, edit it and then convert it to mesh. Generally curves are really high poly by default for the same reason i told above, but you can edit those values to make it more simple... Then you can end up with a base for the curve and edit it afterwards. For example I ended up with this:  As you see it is less heavy in polygons and still looks decent. Another thing i see no reason in your mesh is the back of the chair. You said you used a box, but there are several faces and polygons in the middle of the back that doesn't make any sense. The back is stil flat and with high poly count. You can try to decimate that part with decimate modifier if you don't want to start over it.  |
|
|
|
Post by fursims on Oct 17, 2016 8:21:37 GMT -5
Thanks for looking at it.
I watched several tutorials for bending an object and they all showed me to first use the array modifier to expand the object (dont know if this makes a different in lower polygons?) and then the curve modifier. After that, they never showed me you can edit the object so it would have lower vertices and polygons. I dont know how to do that and not sure how to find a video for that specific. Do you know a link or could you explain how to do that maybe?
Also for the back of the seat, i used a multi resolution modifier to make the edges more round. What would be a better way to do it? Or can i use the same editions for the vertices/polygons as for the curve afterwards?
|
|
|
|
Post by fursims on Oct 17, 2016 10:20:20 GMT -5
I played around with the decimate modifier and changed the angle. The faces are now down by:
1200 vertices and 800 faces. Is that still too much? What would be the ideal amount for a simple chair like this actually? So that i can take this info for my next meshes.
|
|
|
|
Post by orangemittens on Oct 17, 2016 10:31:47 GMT -5
One thing to keep in mind when viewing Blender tutorials is that a large number of them are written for people who are making things for rendering rather than for gaming. Items for rendering can have a lot of polys because they aren't intended to be used in a complex game. These tutorials will use many of Blender's special features and modifiers and most of those were not developed for low poly meshing. The game requires low poly meshes. The challenge of low poly meshing is making something that looks good while staying within the poly count limit that the game can deal with.
There is a tutorial in the tutorial section that shows how to use Blender's decimate modifier to reduce poly count. But, as Mathcope said, beginning with cylinders that have fewer vertices is an important first step. Anything round or curvy requires more vertices than something that is straight. Also, for straight items, like the back of a chair, if you begin with a cube you can make a shape like the one you have without all the extra polys on the flat parts. Flat and straight parts of a low poly mesh should have only the vertices necessary to outline the shape.
The best estimate for poly count is a similar EA item. Look at one of those and make your poly count roughly the same. This is especially so for things like chairs that a player is likely to use more than one of at a time. For a special item, like a sculpture they will place only one of at a time, the poly count can be a bit higher without causing too many issues.
|
|
|
|
Post by fursims on Oct 17, 2016 10:40:39 GMT -5
thanks for all the help guys, i have edited the number of vertices and faces in my post before. I would appreciate it if you could take a look and tell me if that should be ok for my mesh  |
|
|
|
Post by inabadromance on Oct 17, 2016 12:55:12 GMT -5
hi! You can share the updated .blend for someone to take a look at it. 1200/800 sounds much better than how you started with. Usually it takes a lot of time and practice to end up with these numbers. It's always trial and error, some thinking before doing the item to see how you can work around having the parts low poly and still keep the overall feel you want to give to it.
|
|