|
|
Post by stephantom on Aug 4, 2017 19:15:49 GMT -5
Hi. A friend of mine made a custom hat for me to use in TS4 using Maya and gave me the .obj, .ma, and .mtl files for it (both a higher and lower poly count version). I tried to import the mesh into TS4 Studio by exporting a hat mesh, opening it in blender, appending my friend's hat object and rescaling it to fit the Sim model. Then I deleted the hat mesh I'd append it to and saved the whole thing as a .blend file. When I try importing it into Sims 4 Studio, it looks like nothing happened. I've looked around at some tutorials and other posts here and I think it must have something to do with the cuts? Weights? Geoms? Sorry, I've never created a custom mesh before, super new to Blender and meshing, and I always had trouble when I try to apply what's going on in CAS tutorials to what I'm trying to do. Here's a link to the blend file as it is right now, if anyone wants to take a look. I'd really appreciate any help. |
|
|
|
Post by annabluu on Aug 4, 2017 20:19:30 GMT -5
hi! this looks like a cut problem. for anything to show up in studio, it has to have a cut. your hat doesn't have a cut number assigned to it. also, you don't need the extra hat that you have in there. all you need to do is make your mesh's cut number 0000 and make the type GEOM. it also looks like you haven't done anything with the uv. you need to place it in the right place where sims 4 will recognize it as a hat. here's a template that you can import into blender's uv map to put your uv in the right place. uv templateafter that you can just bake the uv so you know where it is.. then import it into studio and you're good. but the strings are inside the body if you wanna fix that lol here is the updated blend and package file if you want it. zip |
|
|
|
Post by stephantom on Aug 4, 2017 20:28:29 GMT -5
Thank you so much! Yeah, I knew the strings were going to be a problem, but I figured I'd deal with that once I knew I could get it into the game at all. And I might have trouble with the uv but I'll see what I can figure out on my own. Thanks for the template.
The blend and package file link seems to be wrong--it's just taking me back to this post.
|
|
|
|
Post by brujah on Aug 4, 2017 20:36:03 GMT -5
annabluuIf you decide to help someone else, please do not just fix their item and send their completed project back to them. People post here because they want to learn to do the project themselves. It's fine to make fixes to something and test it before answering but let the OP go through the steps you took yourself on their own. Providing a little boost in the form of a partially fixed item that can serve as an example so the OP can continue forward is fine too but just doing the whole project for someone isn't the idea of the Creator Help section. Read more: sims4studio.com/thread/255/creator-help-faq-updated-2017#ixzz4oqAiLZdv
|
|
|
|
Post by inabadromance on Aug 4, 2017 20:37:30 GMT -5
Here's a guide you should read about how to import items properly. It goes over cut numbers and weights.
|
|
|
|
Post by stephantom on Aug 5, 2017 0:07:58 GMT -5
I don't know that I agree with that assessment of annabluu's response. They explained what needed to be done such that I was able to do it on my own even though the link to the dl didn't work (and it was just a simple change, like they said) and they gave some advice on the next problems to work on. Which I'm still stumped on. When I go to uv edit move, there's no "unwrap" option, for one, like there is in tutorials I've seen. Ah, finally fixed! I just needed to select everything?! Anyway, yeah, still struggling. And even though the object is linked to DiffuseMap which has a texture in the hat area for CAS, when I import the mesh, it still seems to just use the default sim-skin texture, and importing other textures doesn't make a difference.
I guess maybe I'd better move this post to the requests forum, since I really would like to get this item completed to show my friend.
|
|
|
|
Post by inabadromance on Aug 5, 2017 0:41:24 GMT -5
Would you like to share the updated blend?
On the file you shared on your first post, the UV of the hat covers the whole texture map. You have to resize it and move it to the appropriate place such as anna suggested.
|
|
|
|
Post by stephantom on Aug 5, 2017 1:31:40 GMT -5
Sure! Here's what it looks like now: blend file. I actually did manage to get the UV and push it all up into the corner the hat texture should be in. But it doesn't map very well onto any of the existing cowboy hat textures, so I'm going to have to figure out how to make a nice one myself. Or just make it solid brown for now. And of course, there's still the problem of the hat's strings being too far back and going into the body, so I'll still need to fix that too. Here's some screenshots. The first image is from before I did anything with the UV. That's a little better now, at least. 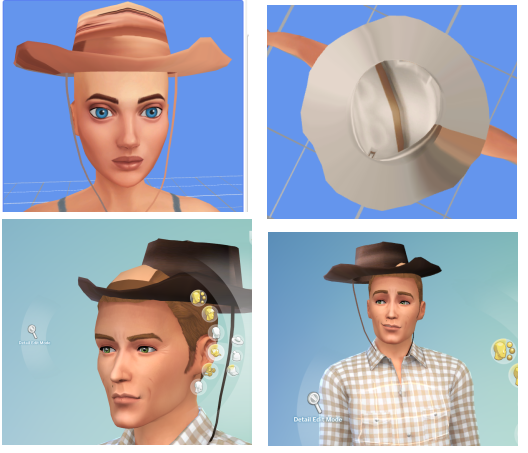 So as you can see, I tried to import it into the game and try it out on a Sim... and it's sort of just floating around his head strangely. It this maybe a weight problem? I didn't do anything about weights--should I have? Any idea what's going wrong? |
|
|
|
Post by annabluu on Aug 5, 2017 14:53:23 GMT -5
lol yeah this is a weight problem. and yes, you need to do a weight transfer. here is a link that will take you to a tutorial. |
|
|
|
Post by inabadromance on Aug 5, 2017 15:09:32 GMT -5
Mesh, uv mapping, weight transfer, vertex paint, uv_1. All of these things are in the tutorials for a reason, without any of them your item will not work properly. Not doing any of them or doing them wrong will cause you problems. The hat that your friend made is very similar to one already in game i believe. I feel that it would be much easier to use that hat instead and leaving only the strings to work with. I say this because the item would be already weighted, textured, and ready. That leaving the strings that need to be weighted and molded to the body. |
|
|
|
Post by stephantom on Aug 5, 2017 16:20:55 GMT -5
Thank you both very much for the tutorial links and advice! And the hat is designed to look like the hat that belongs to an old TV show character. (I've been making sims based on the whole show, and there's a lot of cowboys, so a lot of cowboy hats, so little differences go a long way.) 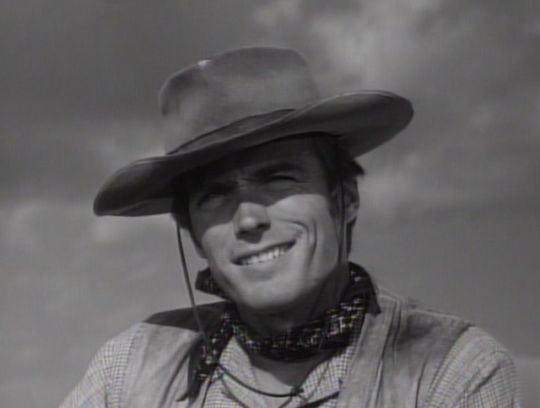 Rowdy with his hat ^ Anyway, I will try to work through the weight transfer issue and see how it goes. Thanks again. |
|
|
|
Post by stephantom on Aug 19, 2017 1:38:15 GMT -5
Ok, so, I stepped away from this for a few days just came bac kto it. The tutorial by orangemittens that inabadromance linked to was VERY helpful and made the weight issue really clear (and it turned out it was a very simple fix). And I continued with the tutorial for the vertex paint steps, but I'm not sure what difference it made? Also really having trouble with the UV mapping. 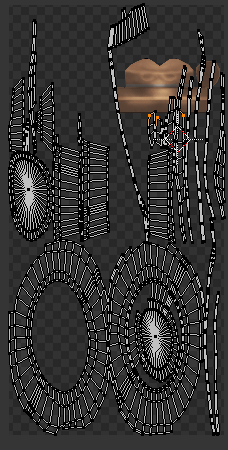 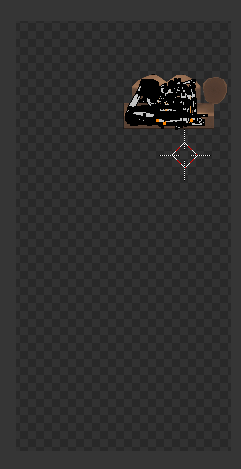 I'm just kind of smooshing it all into the hat area, but it doesn't come out looking great. (I tried to align it meaningfully to the different parts of the map but.) And a less detailed texture (in other words, just a brown square) really doesn't look better. 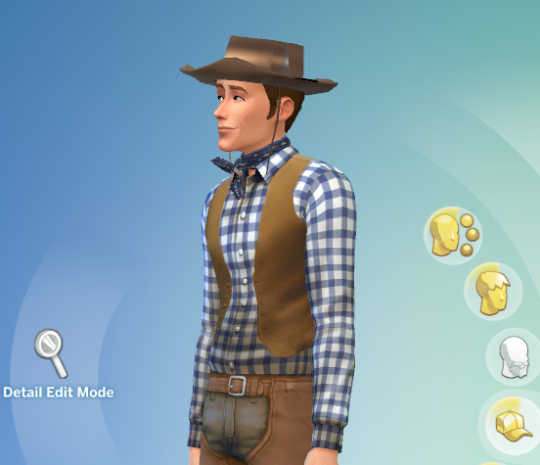 And of course, the strings are still going into his body--I'm going to work on that. But does anyone have any advice on either working out how to line up a mesh to an existing texture or creating a texture to work with a mesh, or anything about UV mapping I'm not aware of? I'm going to read through Elia’s Quick Sims 4 UV_1 Help Mini Tutorial as a starting point. |
|


