|
|
Post by simour on Jun 1, 2015 2:29:48 GMT -5
No, the utilities is the one you should have gotten. Browse your program files C:\Program Files\Adobe\Adobe Photoshop CS5.1 (64 Bit)\Plug-ins\File Formats and look for dds64.8bi, note the 64 bc my system is 64bit, or dds.8bi for 32bit. These should have been installed when you installed utilities. It did BUT it installed into my old Photoshop PS7 folder oddly enough and completely avoided Photoshop CS6 for whatever reason. Not entirely sure why. Though I do see the file format for it and it saved when I went to test it in PS7. I don't mind using the older version. (CS6 is only good for photo editing for my pictures anyway.) This will still be really helpful though. Thank you~ |
|
|
|
Post by simour on Jun 1, 2015 2:00:16 GMT -5
Had to export two textures as a PNG and layer it over in photoshop and merge it before taking it to paint to save as a DDS file, but it worked! Thank you very much for walking me through it. I learned a lot of what to do if a mesh doesn't come with a texture. The only thing is it didn't come with the texture for the wood part of the little end table next to the chair, but not a problem if I have to add my own. You can save as .dds in Photoshop with the nvidia plugin so you wouldn't have to save as .png then convert it. Get the plugin HERE. Just thought I'd share  Oh thank you Brujah! It was getting real repetitive saving in photoshop only to open the psd in paint.net to save it as a dds file. Though I downloaded it and restarted photoshop I didn't seem to get the option to save as a dds file at all. Was I suppose to pick a particular one opposed to the utilities one to download? Also, worked with the texture to bit and got it as close to the original texture as I could. Had to make my own wood grain texture for the little table to the side. Did anyone want to test this item in their game for me? It seems to work very well in my game. It can be found in Comfort under Living Chairs. DownloadAttachments:
|
|
|
|
Post by simour on May 31, 2015 23:58:00 GMT -5
now click edit and you should be able to export it as PNG or DDS Had to export two textures as a PNG and layer it over in photoshop and merge it before taking it to paint to save as a DDS file, but it worked! Thank you very much for walking me through it. I learned a lot of what to do if a mesh doesn't come with a texture. The only thing is it didn't come with the texture for the wood part of the little end table next to the chair, but not a problem if I have to add my own. Attachments:
|
|
|
|
Post by simour on May 31, 2015 23:34:18 GMT -5
I can't seem to find it. Is there a button that says Mesh or do I click on the mesh itself? I did have group 2 selected but I can' t seem to find the diffuse map. Found the little button that said material, so I'm not entirely sure this is where I'm suppose to be. He is referring to in TSRW FTTTT--ORZ Sorry! I hadn't even realized. I was wondering why I couldn't find this thing. Thank you guys for clearing that up for me. I found it now. Though do I just save it as a wst file or export certain individual files. I definitely see two images that can be exported to a dds file. One has some color in it while the other doesn't, but it's the texture none the less. Attachments:
|
|
|
|
Post by simour on May 31, 2015 22:42:02 GMT -5
I thought I replied! The forum must have ate my reply. I took a look at the chair - you are right. No texture files to speak of, no multiplier. I have no idea what to do from there. You could bake it in blender and then use that as the multiplier. The internet is good at eating replies. Never tried that method before I'll have to look up a tutorial for that and attempt it. Never heard of baking, but the more options I have the better I can see which one works for me. <3 Thought it was weird that the item had no texture to it, but had a mesh. |
|
|
|
Post by simour on May 31, 2015 22:37:49 GMT -5
to get the texture etc for this object click on MESH, select group 2 and click the (...) where it says materials than select diffuse map. if a sims 3 object has no textures in the textures tab than this is where they will be found instead. I can't seem to find it. Is there a button that says Mesh or do I click on the mesh itself? I did have group 2 selected but I can' t seem to find the diffuse map. Found the little button that said material, so I'm not entirely sure this is where I'm suppose to be. Attachments:

|
|
|
|
Post by simour on May 31, 2015 17:15:06 GMT -5
I made things for Sims 3 the whole time the game was out and never once used tsrw.  The way that Sims 3 items were made is somewhat different than Sims 2 and Sims 4 in terms of the textures because Sims 3 items needed to use the in-game create a style feature. There is, however, at least one image in the .package of a Sims 3 item you can use and that is the multiplier. It will look grey and black. Export that out of the .package. You will need to convert the image from a .dds DXT5 image to a .dds DXT1 image before using it. Once you've done that you can import it into Studio as you would any other texture. This will make the chair show up with appropriate shadows on it. Obviously you don't want a grey and black chair at the end though. So, once you have imported the grey and black shadow image into Studio re-export your mesh the same way you did the first time you exported it. This time when it shows up in Blender it will have its shadow texture on it. Then follow the tutorial I wrote on how to get the UV map from Blender. Use that UV map to make your recolors of the chair. Import those in place of the EA textures for each swatch. You can overwrite the plain black and grey one so that you don't have a plain grey and black version of your chair in the game. Also, if you want to, you can follow the tutorial I wrote on how to use a baked shadow map to add to your diffuse image. That tutorial is here: sims4studio.com/thread/1540/create-shadows-objects-blender-editorSince you already have the black and grey baked shadow texture from the .package you can skip to step 18 where it shows how to use that to make your recolors. Another feature of Sims 3 items is that they use the same "blob sheet" to make the shadow show on the shadow plane beneath the chair. If you don't plan on making changes to the chair mesh you most likely will not have to do anything to the shadow plane or its map for it to be compatible with Sims 4. And I completely forgot your video tutorial when I was writing all the above LL. Me bad...I think that's the link needed here. Yeah I probably wouldnt have bothered with tsr but sg5150s tutorial seemed easy enough to follow in combination with yours. The only problem is that there was no texture under the tab where it should have been. I dont know why but I'm sure thats where the multiplier is suppose to be. All i could export was the mesh itself. Is there any way to get this items particular package without tsr? Or can i find this in my game folder for the item? |
|
|
|
Post by simour on May 31, 2015 17:07:56 GMT -5
Is this a TS2 or TS3 conversion? Its the ts3 tattoo chair from ambitions actually wanted to convert it into a chair to sit on. Since I really miss this item. Yeah i am definitely a visual learner. Sometimes i get confused if at certain steps they seem like they repeat if i have no picure to look at. |
|
|
|
Post by simour on May 31, 2015 12:26:25 GMT -5
 Another project conversion. Getting the hang of this though I do have a question and I don't expect anyone to know if they haven't used TSR, I'm still a newbie. Least from what I read in the forums and such for certain items like this they absolutely have no texture to it since it apparently comes with the mesh from my understanding? IDK., but I'm not sure h ow to better get this working without an accurate texture for it because it looks funky in S4S with the EA red chair texture. Was wondering if it would show with no texture and all I got was an invisible chair with a shadow. Oops, suggestions? |
|
|
|
Post by simour on May 31, 2015 12:21:57 GMT -5
They look totally great, and I love the recolors too. Looks good, works great... congratulations on a successful conversion. Now, go forth, and convert MOAR things :D  Thank you for testing this! I'm happy there were no problems with this which is surprising being my first conversion. Thank you! I SHALL |
|
|
|
Post by simour on May 31, 2015 10:59:21 GMT -5
I'd love to try it out for you but that link doesn't lead to a download. Post the new link and I'll take it for a spin Oops! Thought the link copied to the clip board. Sorry about that. The link should be good now. |
|
|
|
Post by simour on May 31, 2015 4:16:47 GMT -5
 A familiar sign if anyone recognizes it from the Sims 3. I thought I would try my hand at conversion and I thought I'd start with this. I am pleasantly surprised I managed to do this without too much trial and error. Though I didn't see any shadow mesh (or what I assumed it to be), though still not quite sure if I did it right. Feel like it's too big or funky lookin'. This is a decoration that can be found under neath the wall decor section. The middle one is an original color texture and the other two are my colors I added. Would anyone mind testing it in-game to see how it works for them? It seems to be pretty good on my end with no trouble. Though I would also like to make this into a light as well. Not sure if I would have to involve tuning with that or pick a different mesh to clone from? Not sure how to go about that though I looked around can't go to a EA thread since I completely forgot my origin pass to get the file I need to know what to do with the tuning. Here's the file.: PackageThis is actually my first time trying conversion. Followed OM's and sg5150's tutorial. |
|
|
|
Post by simour on May 30, 2015 10:28:33 GMT -5
Lookin good. The clothing looks very nice.
|
|
|
|
Post by simour on May 29, 2015 13:31:52 GMT -5
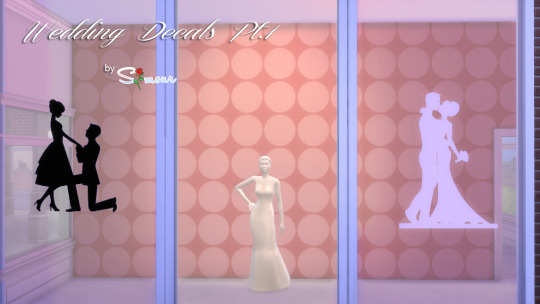 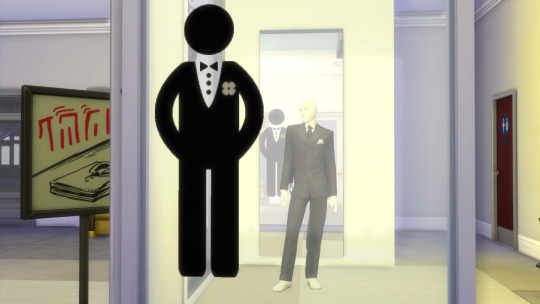 Wedding Decals Pt1. Wedding Decals Pt1.
A set of simple wedding related decals for your boutique to add just that right touch to your windows. Three stickers. The first two come in white and black with each one and then the groom comes as seen. You can find them under the Decoration/Painting tab in the game. Use the Ctrl+ ] to enlarge the decals as you see fit. Download HereMade with Sims4Studio |
|
|
|
Post by simour on May 23, 2015 13:57:19 GMT -5
 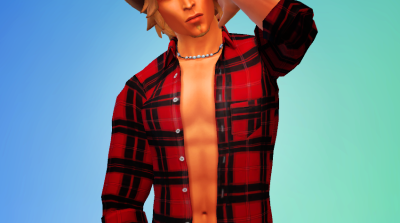   There should be a law against making Sims look this good. Fttt--- He's available to download into your gallery with no CC, so I worked around it since it was mostly clothes. My Origin is ladykynIf you use him in your game I'd love to see pictures either on here or you can tag me on tumblr with mysimour or claystafford |
|


 The way that Sims 3 items were made is somewhat different than Sims 2 and Sims 4 in terms of the textures because Sims 3 items needed to use the in-game create a style feature.