|
|
Post by Kouukie on Sept 9, 2020 13:03:25 GMT -5
Hi. While each CAS item has its own textures, they all still share the same uv space. For example, if you were to put a necklace's uvs in the space meant for the face, its texture will also be displayed on the face. Right now the straw's uvs overlap with the cup's uvs, so the cup will not be transparent since the straw is not. Also, cup's uvs are in the space meant for the nape. Another thing you should keep in mind is that size-wise the uvs will be generated in accordance with the resolution of the background. Yours are currently squished. hi! makes sense about the uv, thank you! however the area that was meant to be transparent just doesn't show up at all, not even with a texture.  |
|
|
|
Post by Kouukie on Sept 8, 2020 17:43:06 GMT -5
hi! so i followed this tutorial step-by-step, ive checked everything and sadly when i get to the part where it says my mesh should show transparent, it does not. i even looked at this thread where someone had a similar problem and followed the steps of the fix, but no luck. if someone could assist me and direct me in the right direction id appreciate it very much! tysm .blend & .package |
|
|
|
Post by Kouukie on Jan 9, 2020 15:56:58 GMT -5
This is a shading issue that is related to the fact that your mesh is split oddly. 1). Even if vertices share the same coordinates, they might get different vertex groups values. So removing doubles before or after transferring weights will not only prevent shading issues but also tiny gaps along seams. Select everything with A, Tools - Remove Doubles with Merge distance set to 0,0001; 2). Click and drag in the corner of 3d view to open a new window, switch the first one to UV Editor. The Sims 4 Studio splits the mesh along UV island border seams, so you should remove doubles there as well. Enable sync, select everything, press W and choose Remove doubles, set Merge distance to 0,0001 again;  3). Since your UVs are laid out in a way that all edge loops that should be sharp will be split by The Sims 4 Studio, you do not need to split them yourself, but I will show just so you know how. Switch to Edge select, Shift-Alt-RMB-click on edge loops/press B to activate Box selection/ Shift-RMB-click on edges to select edge loops or individual edges. Select the bottom of the skirt and sleeves, places where the collar and cuffs are joined with body parts and your sweater; 4). Do not just split them ( Mesh - Edge - Edge split), mark them first ( UVs/ Shading - Edges - Sharp ). This way you will have easier time selecting them again if needed ( Select one sharp edge, Select - Select similar - Sharpness ).  this worked, thank you so much for everything. thank you for taking the time out of your day i really appreciate it so much |
|
|
|
Post by Kouukie on Jan 9, 2020 10:52:20 GMT -5
hello! that looks like a weighting issue to me (although i could be wrong). here's a tutorial on how to transfer weights! i also noticed a few other issues with your mesh. 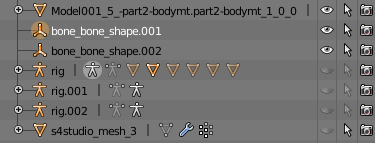 You should delete all "bone_bone_shape" files, and rig files that are NOT named just "rig" (ex; "rig.001", rig.002") & "s4studio_mesh_3" (as that's the reference you used i assume). You should also rename "Model001_5_-part2-bodymt.part2-bodymt_1_0_0" to "s4studio_mesh_1" Do the same thing for both blend files. |
|
|
|
Post by Kouukie on Jan 9, 2020 10:40:14 GMT -5
|
|
|
|
Post by Kouukie on Jan 9, 2020 9:41:44 GMT -5
Hi. The meshgroups in the blend file you import in the package must have the same vertex groups as the ones that are being replaced. You cloned a chemise that has no skirt bones but transferred the wights from something that has them. So what you should do is either clone the same item you used as a reference for weight transfer and import it there or re-transfer the weights. If you choose the later, make sure to delete vertex groups first. Also, it's best to not transfer weights to meshes with hands and frankenmesh them instead.  thank you so much!!! worked like a charm <3 |
|
|
|
Post by Kouukie on Jan 8, 2020 12:52:01 GMT -5
Hi! So, I'm not entirely sure what the issue is at this point... I assume weights? I'm not new to creating cc at all and have created MANY things, but this dress is the bane of my existence. 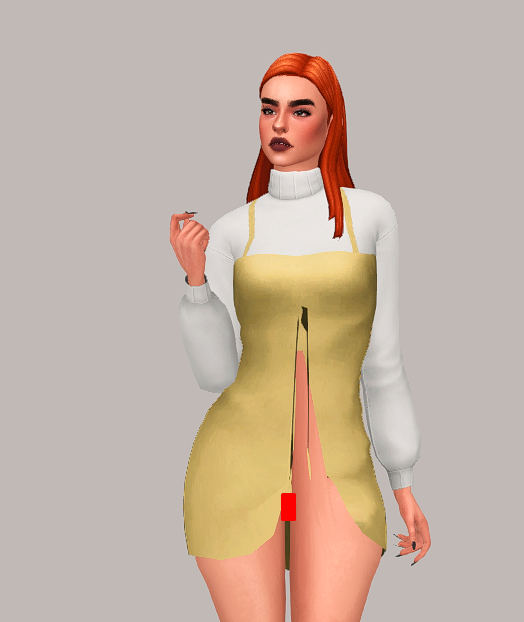 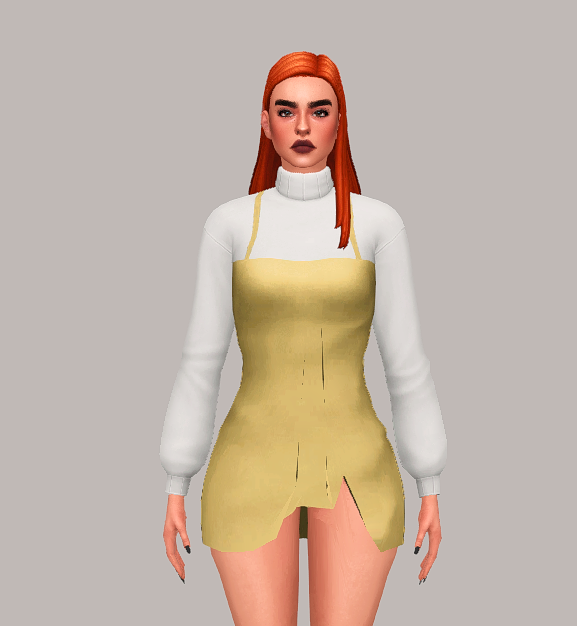 If anyone could point me in the right direction I'd seriously appreciate it. Tysm in advance  .blend & .package .blend & .package |
|
|
|
Post by Kouukie on Oct 18, 2019 11:40:05 GMT -5
Your mesh is currently "underground" as far as the game in concerned. Rotating it the way you did is fine but you need to place it in the same space as the original. The grid lines in blender act as the floor so your mesh needs to be above that. Also you will need to fix the wall cutout texture otherwise the window mesh will have the new rotation but it will still cut out the shape of the old window. hi! thanks so much for the reply! oh my gosh you're totally right that was silly of me hahaha. |
|
|
|
Post by Kouukie on Oct 16, 2019 11:49:49 GMT -5
Hi! This is the first time I've dabbled with windows so I was kind of experimenting, aha. I thought if I rotated the window that it would just work but sadly not the case LOL. It just makes this shadowy outline instead. thank you! in advance 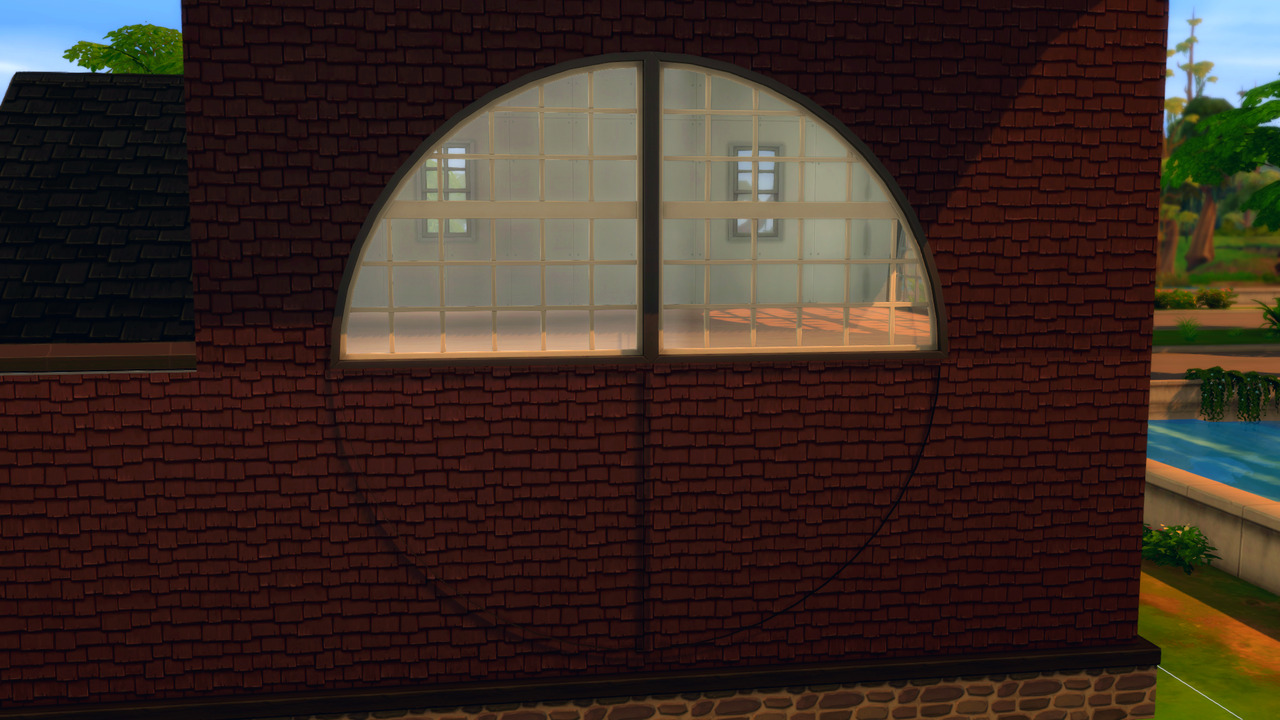 Download: Pack & Blend Files |
|
|
|
Post by Kouukie on Jul 11, 2019 20:01:00 GMT -5
You used b__CAS_LowerMouthArea__ bone to open the mouth. The only bone that should be used to open sim's mouth is b__Jaw__ . Reset b__CAS_LowerMouthArea__ bone by selecting it and clicking ALT+R, and open mouth with jaw bone. Don't forget to loc rot. A few bones on the face should never be used in poses, because game won't read an animation with them. Here is the list: b__CAS_JawComp__ b__CAS_LowerMouthArea__ b__CAS_UpperMouthArea__ b__CAS_R_EyeArea__ b__CAS_R_EyeScale__ b__CAS_L_EyeArea__ b__CAS_L_EyeScale__ b__CAS_NoseArea__ Thank you so much! This is extremely good to know! |
|
|
|
Post by Kouukie on Jul 11, 2019 13:44:16 GMT -5
I’m not sure where to put this post but is it possible to make a batch fix for cc that’s causing sims to be embarrassed? I have over 20gb of cc and I really don’t want to check every individual file. There isn't a batch fix for that. You have to manually find the culprit. Try the 50/50 method! Always the fastest method for me! |
|
|
|
Post by Kouukie on Jul 11, 2019 11:39:42 GMT -5
IF you all having issues with facial poses, share your files (.blend and .package). There is no way to tell why they don't work without seeing physical files. I've seen you reply to about 3-4 of these issues and no one has uploaded their files, I just made a thread with the files uploaded here. Thank you! |
|
|
|
Post by Kouukie on Jul 11, 2019 11:27:47 GMT -5
Hello!
I'm having a problem recolouring Island Living's beach towels. If I just place a new texture on an already existing model everything works well, but if I create a new model and add the texture, this won't show up in game. To be more precise, it shows up but with the wrong design. I hope it's clear enough. In case, let me know if you need further explanations.
Thank you in advance for your help. Would you mind providing further details with photos possibly? |
|
|
|
Post by Kouukie on Jul 11, 2019 11:26:09 GMT -5
Hi! So I've made poses many times and have never run into this issue before. I'm doing a remake of a pose pack from TS3 (with permission) and there's 35 poses in there! All work except the two categories "Shocked" & "Ecstatic", both in which the sim is supposed to have their mouth open. I did LocRot, saved, imported to S4S, an tested in game, & the whole pose works except the facial expression. This is what it's supposed to look like: 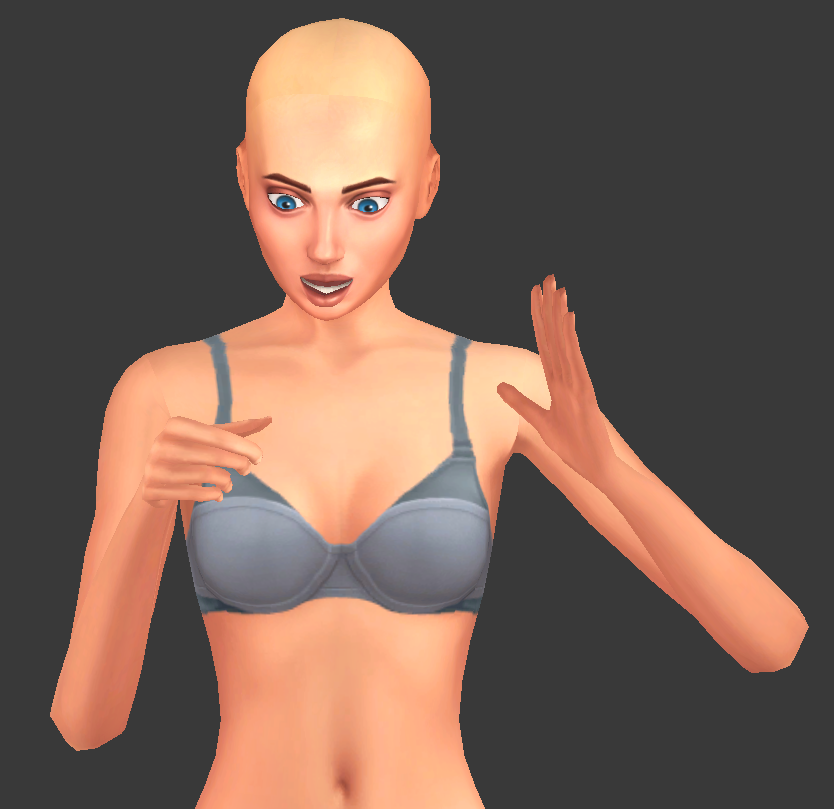 This is what it looks like in game:  I'm really not sure why this is. I tried redoing LocRot & other steps but unfortunately nothing is changing. Any help would be greatly appreciated! Thank you in advance! DOWNLOAD: .Blend & .Package |
|
|
|
Post by Kouukie on Jul 5, 2019 15:59:18 GMT -5
I've managed to fix this issue on my own now with lots of time and frustration (LOL). I set the Blender 2.78 path in S4S first, exported a mesh from S4S, what I did differently was not open the Blender file by double clicking the .blend, instead I opened it manually and it was just there! Hope it helps someone!
|
|


