|
|
Post by orangemittens on Mar 27, 2015 7:41:05 GMT -5
Hi j, sorry I missed your post. If you tell me which item you're using I can go over that one also to show the details that differ from the item I used for this tutorial. The issue is that EA objects have a great deal of variety so a rule that works for one won't necessarily work on another and you have to figure things out on a case by case basis. This tutorial is meant to get you started doing that and if there isn't enough information here to do that I will add more.
Step 11 is where you figure out if the line you're looking at represents a dirty or burnt state. In the game when items become dirty or burnt they still display your diffuse image. EA places an overlay on top of the diffuse image to add burnt or dirty detailing. So if you skip the diffuse for that line in the game your item will lose it's alpha enablement if it becomes dirty and/or burnt. If this doesn't bother you it means that you can skip any MaterialSetEntry that has a hex number in its stateId line.
If your object has 26 MaterialSetEntries you really do need to change them all unless you want to skip the dirty/burnt lines or if you only want alpha enablement for part of the swatches. That would reduce the amount of work a bit. Another way would be to reduce the number of swatch choices you have in the .package.
There is no other way around this at the moment using Studio. The plan is to automate alpha enablement at some point but right now implementing the add swatch feature takes precedence. Writing code that recognizes all the various possibilities presented by EA's object variety is even more difficult than figuring just one out.
Kitkat I'll post up a minitutorial today that shows how to change a surface item into a floor item and vice versa. That process is a good deal quicker than this one. I found the unknown that governs a while back but the Warehouse is not yet updated giving that unknown a name. |
|
|
|
Post by j on Mar 27, 2015 8:54:20 GMT -5
Kitkat, oh really? I know most plants have transparency, but it seems to be an "all or nothing" type of transparency. So either it's completely see-through, or it's completely solid. At least that was my experience. I did clone off of the Succulent at one point in an attempt to make my object semi see-through, but it went from 100% visible to 100% invisible, with nothing in between, no matter the strength of the alpha channel. Thanks OM. I was trying to create a small see-through sculpture. Funnily enough I ended up figuring SOMETHING out that worked! Felt like a blind person walking in a dark room groping things, but hey, it seemed to do the trick. I was looking at various objects in the game and noticed that the large ice llama sculpture that is a reward for something, a party I think, was see-through. So I went to look at it in S4S to see what's so different about it compared to most other objects. I noticed its Shader was set to "GlassSomethingSomething", whereas my original object's shader was "Phong" (whatever that means). So I thought it wouldn't hurt to try changing all shaders I can find in my object to "GlassSomethingSomething", and that's what I did. It ended up working perfectly! I did have to add a sliiiiiiightly grey alpha channel to the textures because without it the object wasn't as see-through as I wanted, but overall I'm really happy.  |
|
|
|
Post by orangemittens on Mar 27, 2015 9:19:59 GMT -5
I'm glad you got it working. There's a large variety of shaders on the list, some more helpful than others, and there's a lot that can be done with them. Phong is an interpolation technique used in 3D graphics and, at least in my experience, it's generally used for solid shaded items although it can be combined with an alpha to allow transparent areas also.
ETA: also I posted a minitut showing how to make a surface item into a floor item and vice versa.  |
|
|
|
Post by kitkat on Mar 28, 2015 20:29:28 GMT -5
Thanks for this tutorial, OM! Using this as a starting point, I was able to clone an end table and make one of the swatches transparent for my OMSP project. In the process, I found out some information about non-rug items that might be helpful for other people: - Step 8: For the end table (and possibly other objects as well), the 3rd modelmesh entry is the one that has "entries" under "Materials"
- Step 10: There was no "AlphaShaded" ShaderData entry for any of the non-rug items I looked at. For my end table, I selected the first ShaderData entry (Normal Map Scale) and clicked the "copy" button. That made a new ShaderData entry show up at the BOTTOM of the list which I was able to edit as indicated in Step 10. (Also change "NormalMapScale" in the "Field" to "AlphaShaded"
- NOTE: I'm not sure if this is required, but I also changed "Phong" to "PhongAlpha" in the "Shader" box for each MaterialSetEntry I wanted to give transparency to.
- I did this for ModelLOD 00000000 AND 00000001. Otherwise, I found that zooming out to LOD1 and LOD2 caused my transparent object to reappear.
- NOTE: Although the end table had a LOD2, no ModelLOD 00000002 appeared in the Warehouse. I was able to edit LOD2 to have the same settings as 0 & 1 through "Model"/"Lods"/"Edit Items" in Warehouse and choosing the ModelLodEntry with the Id "LowDetail" then follow the basic steps starting from step 8.
 |
|
|
|
Post by orangemittens on Mar 28, 2015 20:52:35 GMT -5
You're welcome kitkat. There is quite a bit of variety in the object catalog so it's not really possible to write a one size fits all tutorial for this. Once we get it onto the Studio tab things will be a lot easier  Until then people need to do just what you did and look for the fields I've shown in the tutorial. It is, as you say, a starting point. As the tutorial says if you add a new field it will be added at the bottom of the list. You don't really need to scroll down and edit that one though. I put that in the tutorial just to show people where it's added but since you've made an exact copy of it you can just edit the one you copied without scrolling down each time. That should speed things up for you a bit.  You don't need to change the shader to PhongAlpha and skipping that should also save you some time. Different items have different numbers of LODs. As I showed in the tutorial the only ones you can skip are the ones with numbers that indicate they are shadow meshes. EA gave us a lot of variety here. There is no one size fits all. Only general rules. This will all be added into the Studio tab at some point so it's automated. That should help with any confusion about one item differing from another  |
|
|
|
Post by Moon on May 11, 2015 13:53:43 GMT -5
Hi orangemittens, it's me again *blush*. First thank you so much for this tutorial is very helpful as usual. I have a question regarding this process, I followed this tutorial and also j's "Making objects see-through (glass/ballon effect)", but every this happens:  right behind the basket, a little piece of metal and a screw should be showing like this:  the mesh looks fine in the S4S and I can see the metal piece there but in game it disappears. I thought it was something with the DDS's alpha channel but no, this part is all white there. So, do you have any ideas on how I could fix that? |
|
|
|
Post by orangemittens on May 11, 2015 16:06:37 GMT -5
I'm not sure what the problem is from looking a the picture. If you post the .package or PM it to me I can take a look at it.
|
|
|
|
Post by Moon on May 12, 2015 6:58:34 GMT -5
Ok, I've sent you the .package via PM. thank you again
|
|
|
|
Post by orangemittens on May 14, 2015 15:06:14 GMT -5
I haven't forgotten this basket .package. I've taken an initial look at it and it seems almost as if the alpha transparency is blocking the view of the little screw piece behind the plane that is using it. Have you considered trying to use the trophy case as your clone instead? It already has a separate glass group if a glass effect is what's wanted here. (?) I'm not sure if that's what you want but you had mentioned using J's glass tutorial so I thought I'd mention it.
|
|
|
|
Post by Moon on May 15, 2015 7:14:01 GMT -5
hi again. yes I tried, but the trophy case has 4 meshes in blender while the wall storage I'm trying to clone has only two, the actual mesh and the shadow. I think if I could divide the wall storage mesh it would work because as far as I can tell the trophy case meshes are the transparent parts, the structure (the frame around it) and the shadow. problem is I have no idea how to separate my mesh :(
|
|
|
|
Post by orangemittens on May 15, 2015 8:38:16 GMT -5
In looking at this a little more I'm pretty sure what I said above is what's going on. If you look at the basket face on in the game and then sort of slide right to left you will notice that you cannot see the back metal mesh through the front metal mesh either. I think it's making it so the alpha blend blocks anything else in the same mesh. It's odd because you can see the floor and wall through it. Separating a mesh in Blender isn't difficult. I haven't written a tutorial showing that exact thing but the beginners meshing tutorials should go over what you need to know to get started using Blender to mesh and be sufficient for a straightforward edit to the existing mesh you have. If you give it a go and run into questions there are several people here who know Blender pretty well and others who have recently learned and I'm sure you would receive help if you asked for it  Alternatively, before going that route you could experiment with the shader on the object. Instead of using glass for objects try a few of the others to see if you get a better result. |
|
mabra
New Member
 
Posts: 4 
|
Post by mabra on Jun 22, 2015 9:43:15 GMT -5
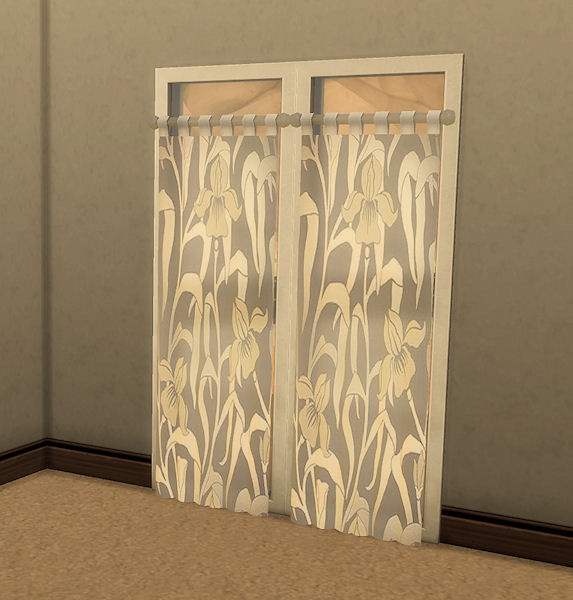
Hello, first of all I want to thank you for your helpful tutorial. I have Version Love 2.4.2.0 installed and tried to make a curtain transparent. But all I got was a light shaded object. ![]() ![]()  Can you help me to make it more transparent, please? |
|
|
|
Post by orangemittens on Jun 22, 2015 13:31:31 GMT -5
Hi mabra, welcome to Studio forums. Without seeing your .package it's difficult to say why you didn't end up with the expected result. It looks like the curtain you're working with is the same one I used for the tutorial. If that's the case, you're more than welcome to use the transparent curtain I posted in the custom content forum to use as the base for your transparent curtain. It's posted here: sims4studio.com/thread/1050/sheer-tab-top-curtain?page=1 If you toss it into your Studio mods folder you can clone it as custom content and it will already have transparency enabled. |
|
mabra
New Member
 
Posts: 4 
|
Post by mabra on Jun 22, 2015 17:47:45 GMT -5
Oh thank you that's wonderful.
In case I want to use another curtain than this one i would like to have a look on my .package what I did wrong.
I'll send it by PM.
|
|
|
|
Post by orangemittens on Jun 25, 2015 13:55:47 GMT -5
Hi mabra, I don't want you to feel I've forgotten your curtain. It is on the list of projects that I need to look at  |
|


