Making objects see-through (glass/balloon effect)
Apr 3, 2015 14:05:26 GMT -5
Dave Rawels, Asyli, and 26 more like this
Post by j on Apr 3, 2015 14:05:26 GMT -5
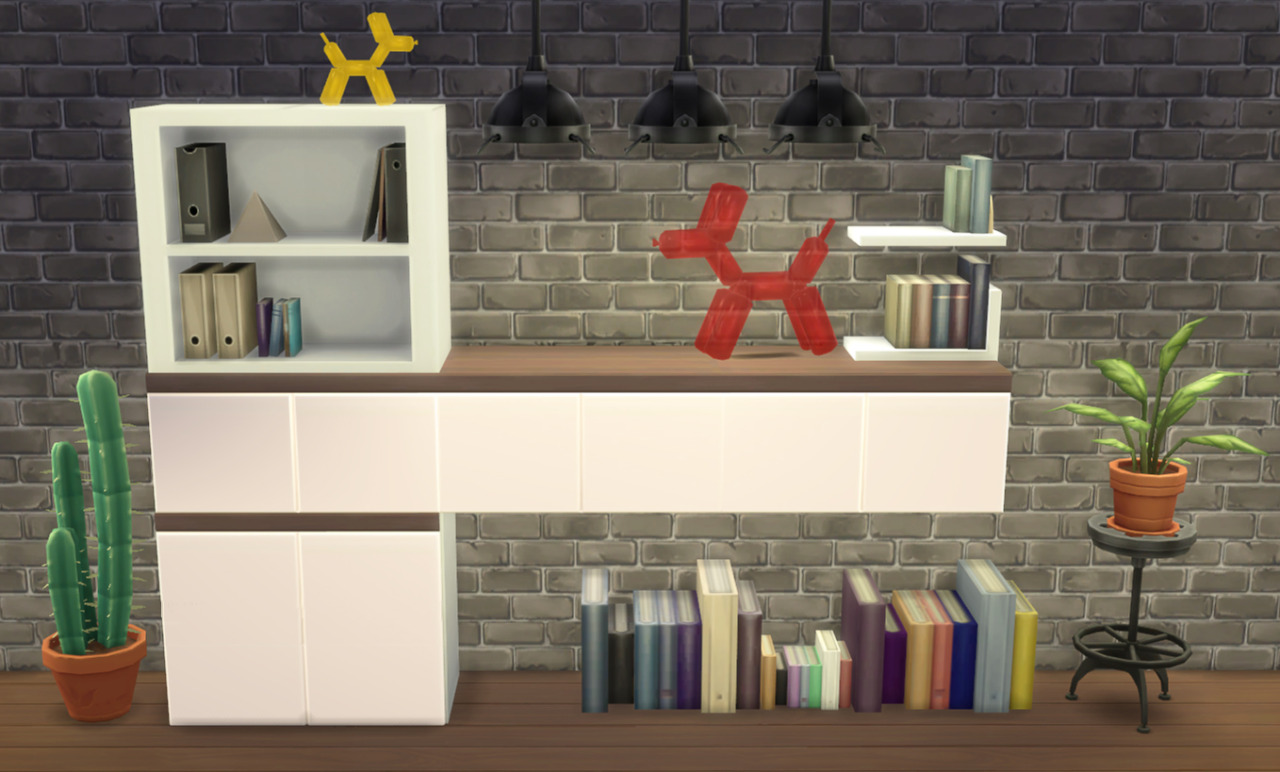
This is a tutorial that should teach you how to give objects a glass/balloon effect.
! This method is not good for objects that have transparent parts (such as leaves on a plant), because the glass shader will emphasize the whole mesh, and will highlight parts that should otherwise be completely invisible.
~
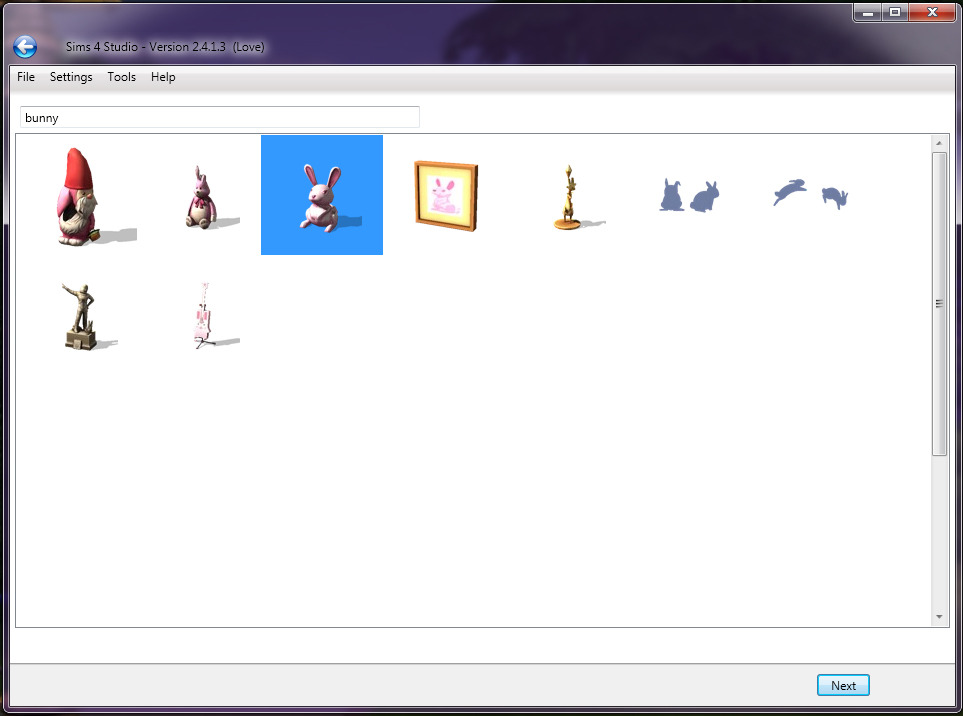
1. Open S4S and choose your object. For the sake of this tutorial, I shall be working with one of the bunny sculptures.
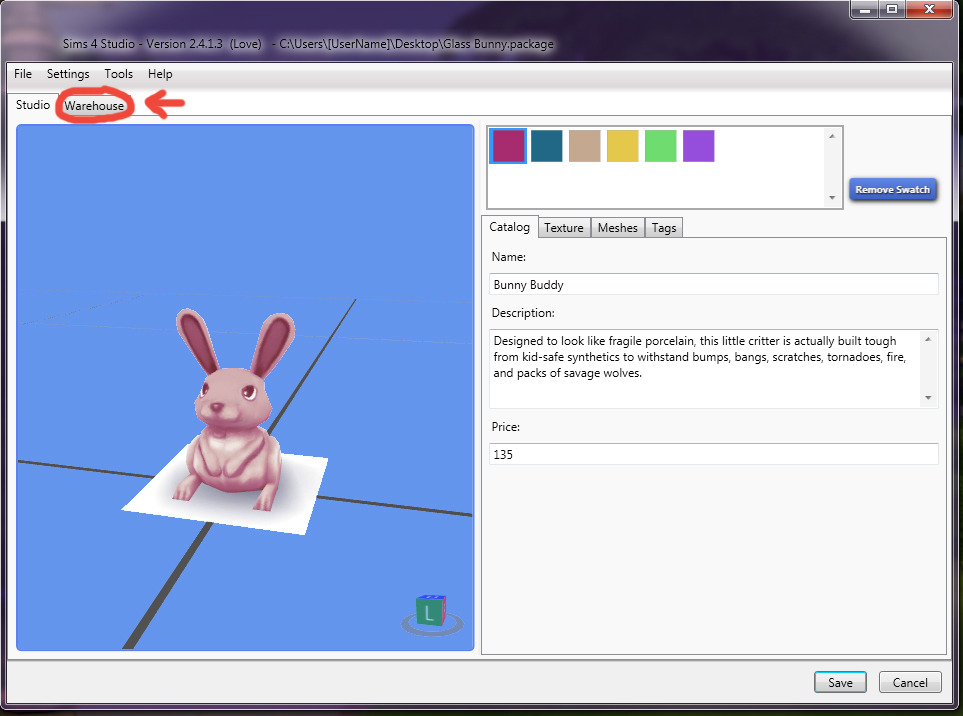
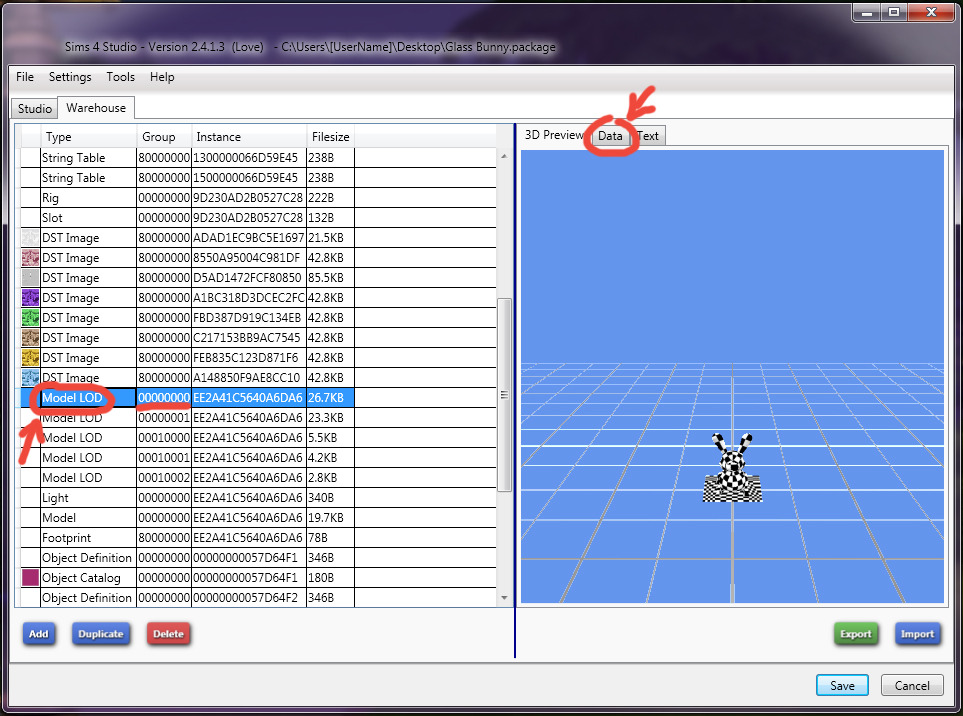
2. Click "Warehouse", find an item called "Model LOD" with all zeros, click it and then click "Data".
3. By "Meshes", there will be an "Edit Items..." button. Click it and a new window will open, with two or more items called "ModelMesh".
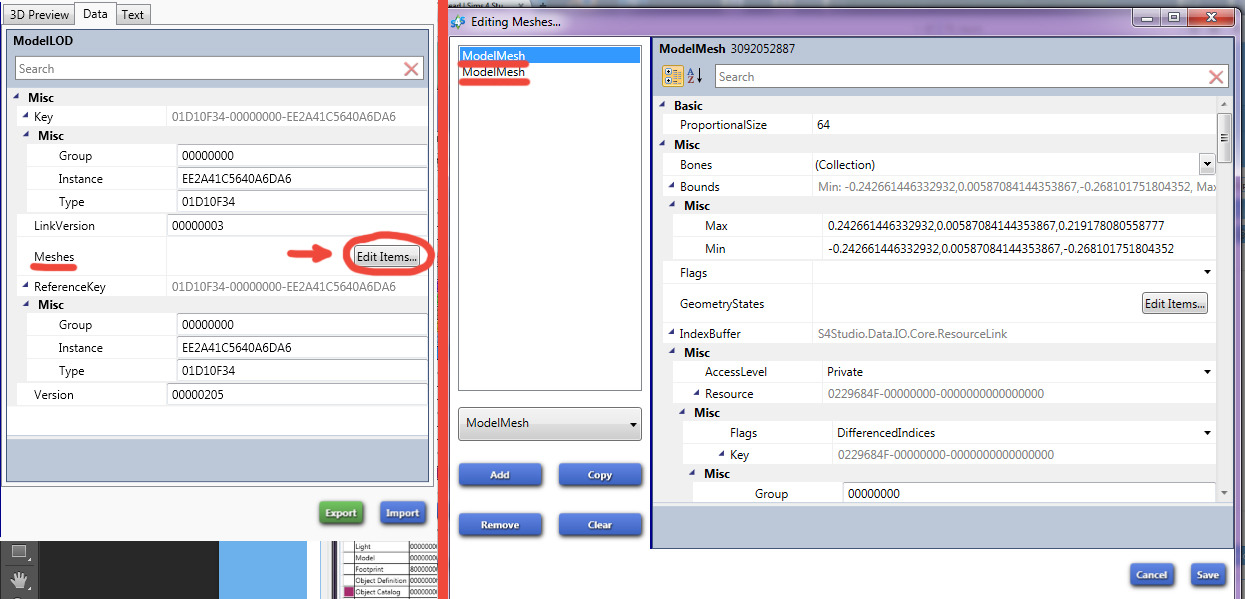
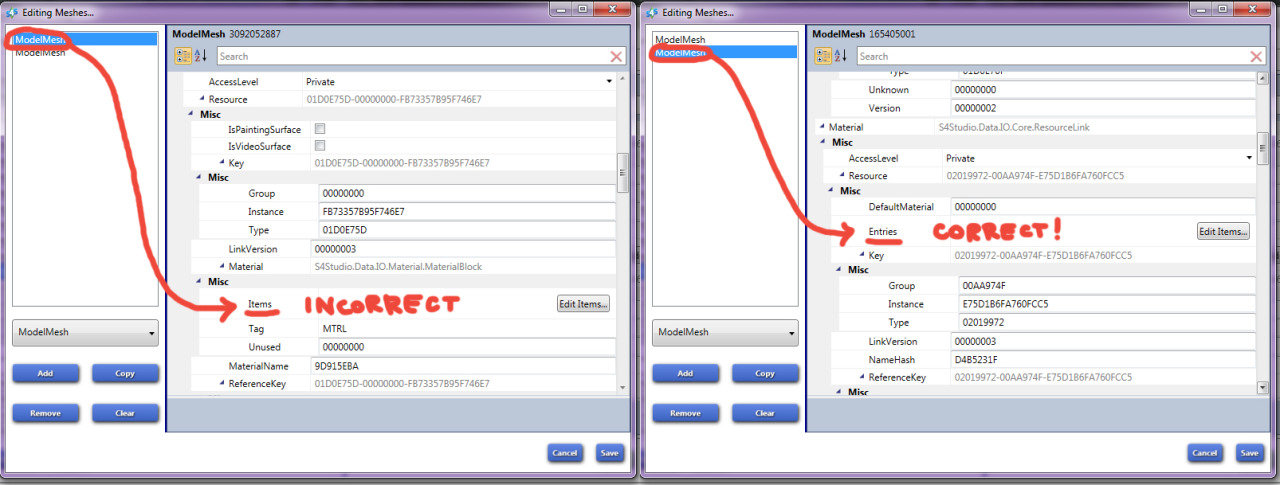
4. You need the one that has "Entries" instead of "Items", normally it's the 2nd on the list. Once you found it, click "Edit Items..." next to "Entries".
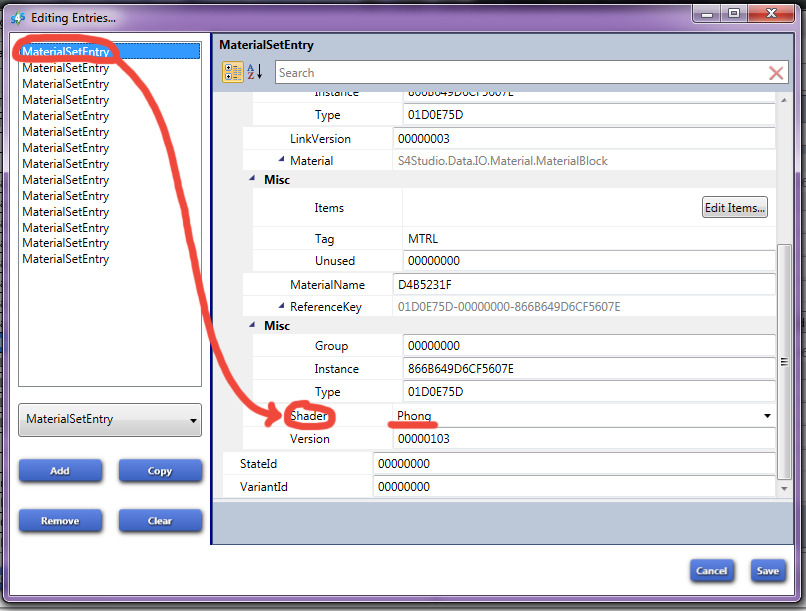
5. A third window will open, this time with a number of "MaterialSetEntry" items on the left. Select the top one and scroll down until you find "Shader". It will likely be set to "Phong".
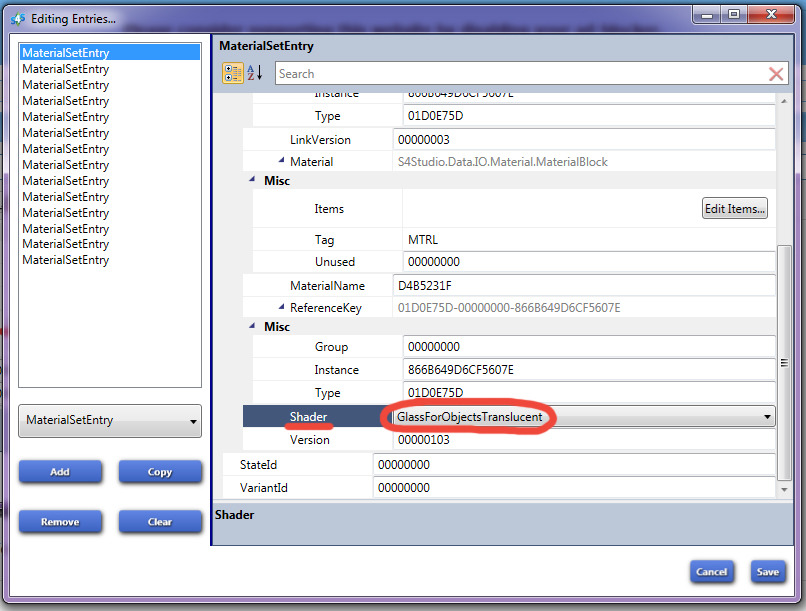
6. Click on the Shader field and press "G". 2nd option for "G" will be "GlassForObjectsTranslucent". Set it as the new shader.
7. You will need to do the same thing for every "MaterialSetEntry" on the list. My bunny object has 14 "MaterialSetEntry"s, so I need to do it 14 times. After you are done, click "Save" on the bottom right corner. You will then find yourself on the old window with two or more "ModelMesh" items on the left. Click "Save" there also.
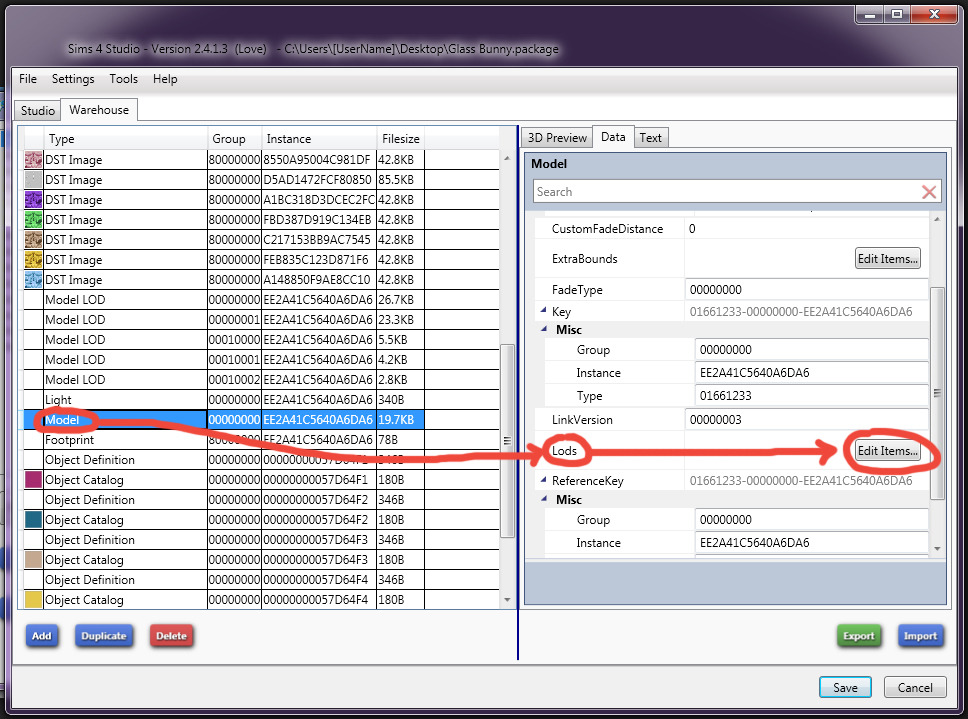
8. Now you should only have your main S4S window left. While still in the "Warehouse" tab, find the item "Model", and on the right, "Lods". Click "Edit Items..." next to "Lods".
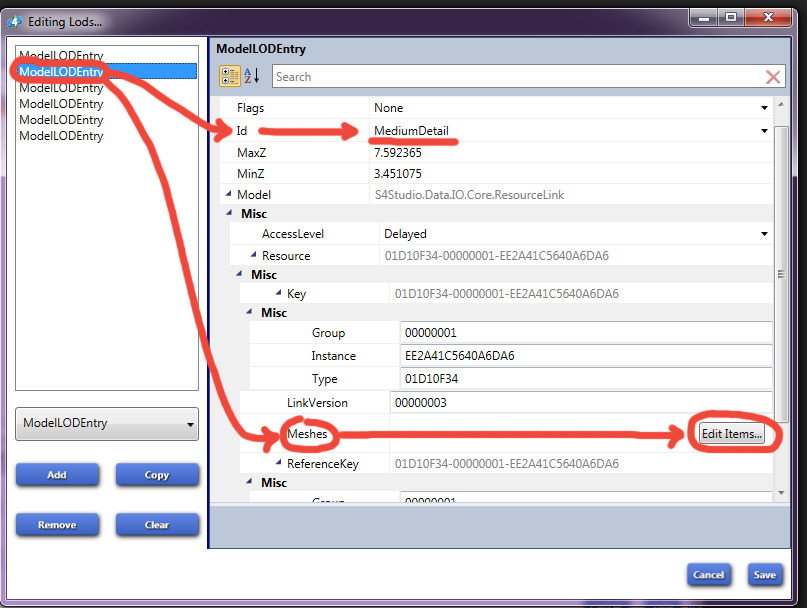
9. A new window will open with a bunch of items called "ModelLODEntry". If the the top one's ID is "HighDetail", you do not need to touch it, because you've already changed the shader for your highest detail mesh in the previous steps. Click the 2nd "ModelLODEntry" on the list, its ID should be "MediumDetail". Scroll down until you find "Meshes", click "Edit Items..." next to it.
10. A new window will open with two or more "ModelMesh" items on the list. Now you will need to repeat everything you've done in steps 4 to 7. That is find the correct "ModelMesh" with "Entries" instead of "Items", and change every single shader of every single "MaterialSetEntry" to "GlassForObjectsTranslucent". After you're done, click "Save". Click "Save" again on the "ModelMesh" window.
11. Back in the "ModelLODEntry" window, click the 3rd "ModelLODEntry" on the list. If it says "LowDetail" in its ID, you will need to do the exact same you've just done to "MediumDetail". If it says "ShadowHighDetail", that is the shadow mesh and you do not need to touch it. Once done, click "Save".
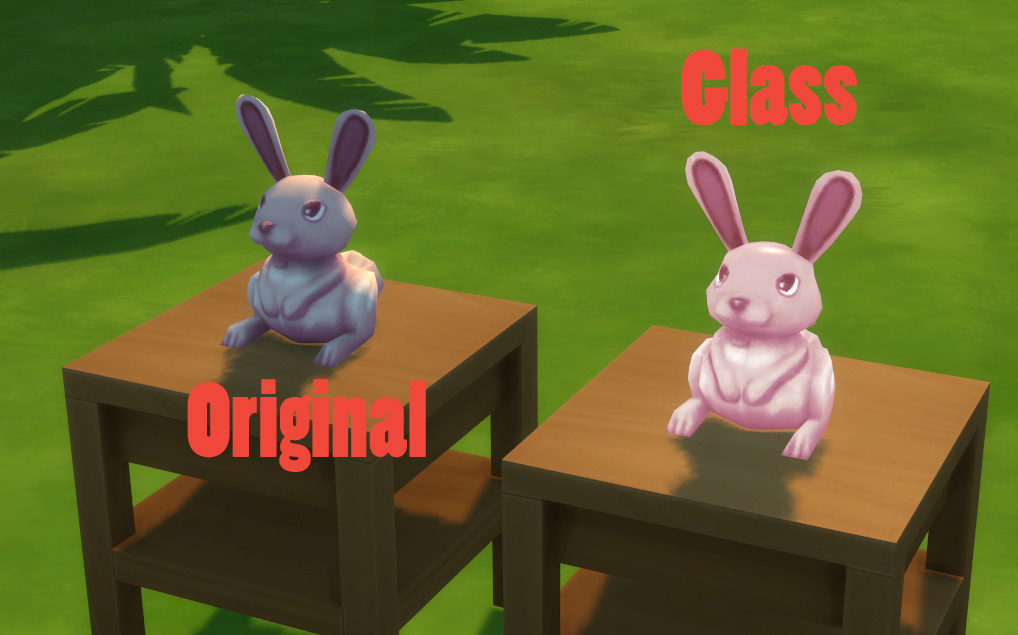
12. Once you're done editing all of the LODs, save your entire project and test it in the game. Your object will now look glassy and slightly glowing.
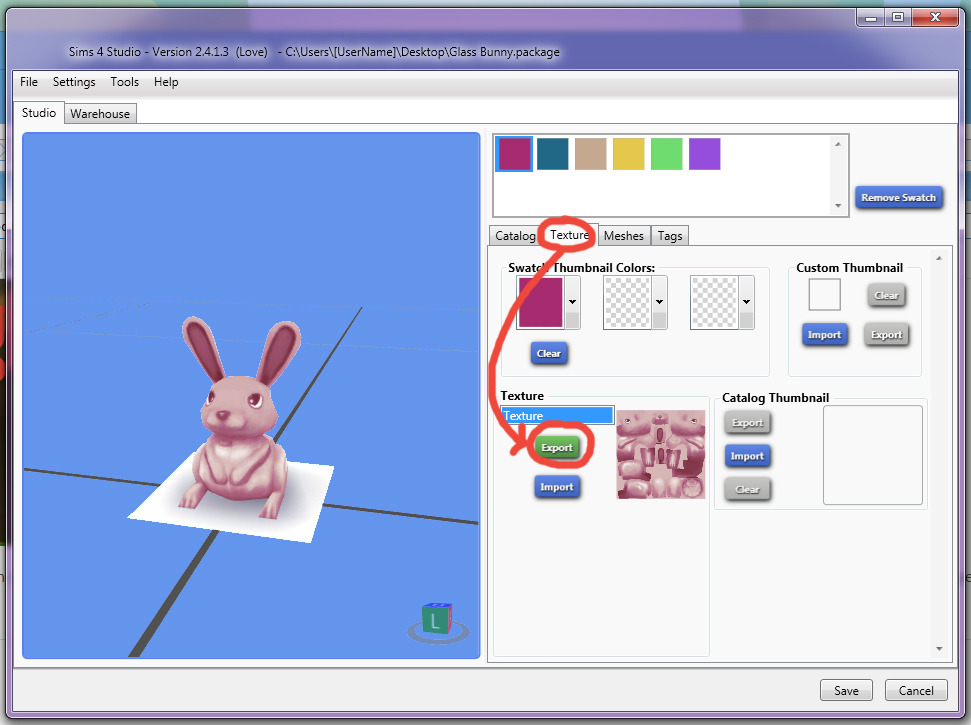
13. If you find it is not see-through enough (or not see-through at all), you can now go ahead and add a slight transparency to the texture. Back in S4S, export the texture and open it in your 2D editor of choice. I'm using Photoshop. My texture does not have an alpha channel, so I will need to add one.
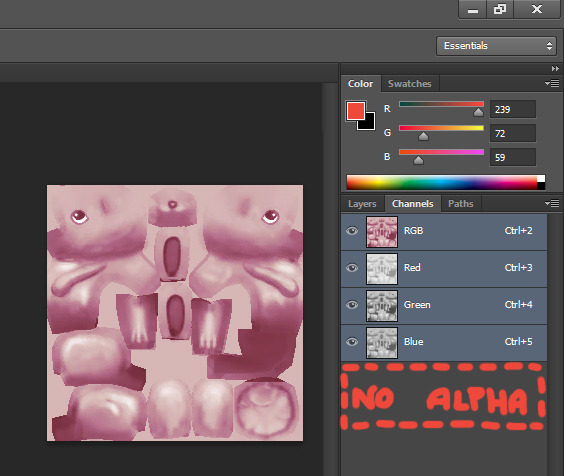
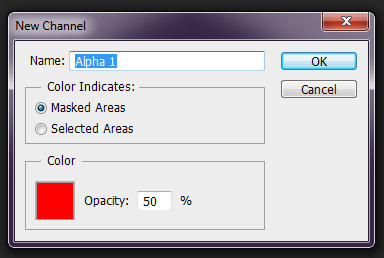
14. Within the Channels tab, click the options button and choose "New Channel". No need to change the name, or the colour, click "OK".

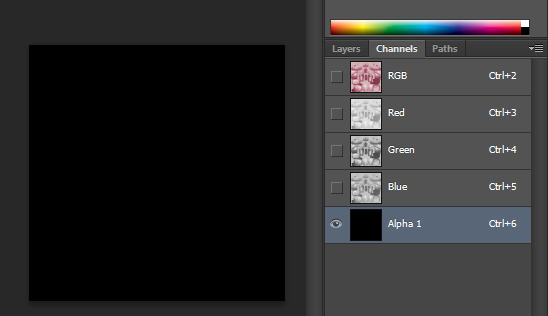
15. If you've not worked with alpha channels before, alpha channel is what dictates what is seen and what is invisible on the mesh. There is no colour on alpha channel, you can only paint in greyscale. Black means the texture will be 100% see-through. White means the texture will be 100% visible. If you just added an alpha channel manually, it will likely be fully black (when all RGB channels are hidden).
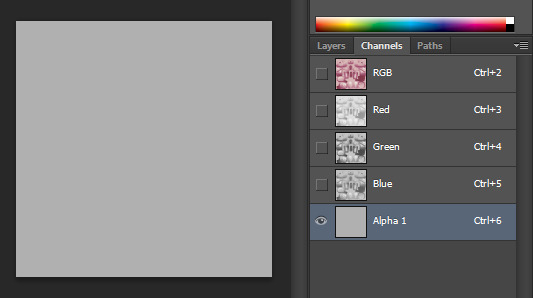
Choose a shade of grey to paint the whole alpha channel. The lighter it is (closer to white), the weaker the see-through effect will be. The darker it is (closer to black), the stronger the see-through effect. Once you've painted your alpha channel, save the texture and import it into S4S. You should note instant transparency in the 3D preview.
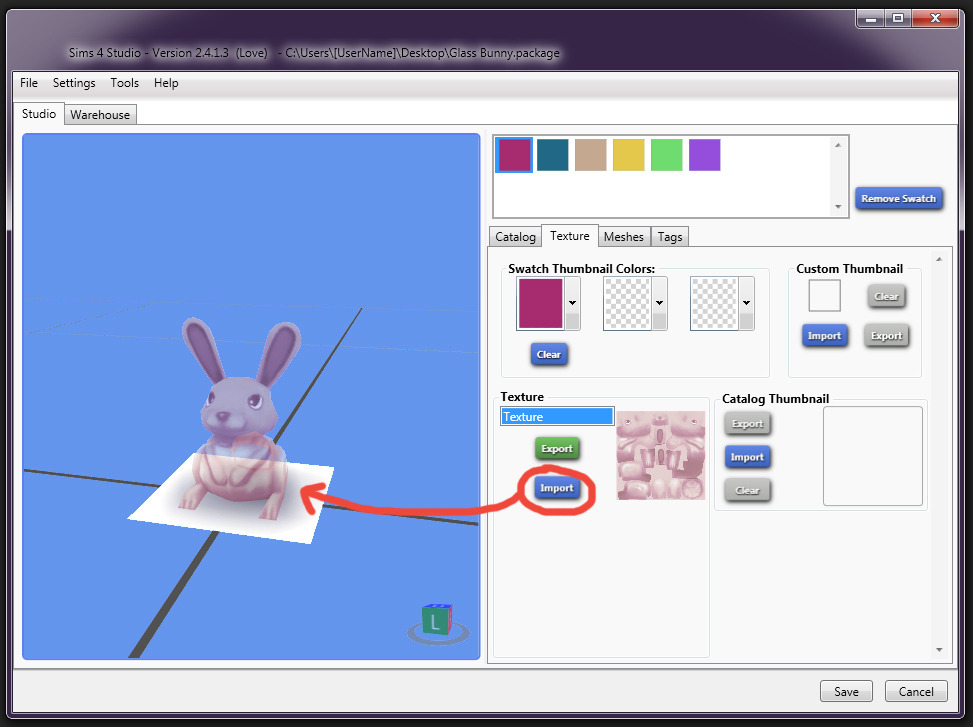
16. S4S preview is helpful, but it's not 100% reliable when it comes to reading transparency correctly. I find that it tends to exaggerated the strength of transparency, and the object isn't actually that much see-through in the game. Best way to test your object is to Save the project and once again test it in the game.
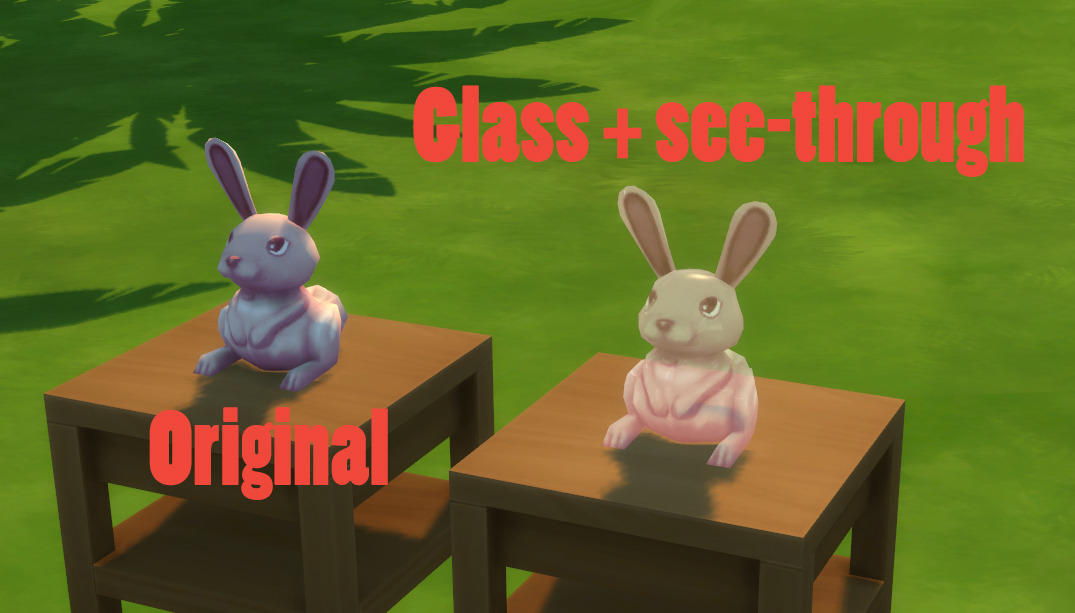
17. If you're not happy with the object because the transparency is too strong/not strong enough, play around with the alpha channel by making it lighter/darker, until you're happy with the results.

~
I hope this was useful.
! This method is not good for objects that have transparent parts (such as leaves on a plant), because the glass shader will emphasize the whole mesh, and will highlight parts that should otherwise be completely invisible.

~
1. Open S4S and choose your object. For the sake of this tutorial, I shall be working with one of the bunny sculptures.

2. Click "Warehouse", find an item called "Model LOD" with all zeros, click it and then click "Data".


3. By "Meshes", there will be an "Edit Items..." button. Click it and a new window will open, with two or more items called "ModelMesh".

4. You need the one that has "Entries" instead of "Items", normally it's the 2nd on the list. Once you found it, click "Edit Items..." next to "Entries".

5. A third window will open, this time with a number of "MaterialSetEntry" items on the left. Select the top one and scroll down until you find "Shader". It will likely be set to "Phong".

6. Click on the Shader field and press "G". 2nd option for "G" will be "GlassForObjectsTranslucent". Set it as the new shader.

7. You will need to do the same thing for every "MaterialSetEntry" on the list. My bunny object has 14 "MaterialSetEntry"s, so I need to do it 14 times. After you are done, click "Save" on the bottom right corner. You will then find yourself on the old window with two or more "ModelMesh" items on the left. Click "Save" there also.
8. Now you should only have your main S4S window left. While still in the "Warehouse" tab, find the item "Model", and on the right, "Lods". Click "Edit Items..." next to "Lods".

9. A new window will open with a bunch of items called "ModelLODEntry". If the the top one's ID is "HighDetail", you do not need to touch it, because you've already changed the shader for your highest detail mesh in the previous steps. Click the 2nd "ModelLODEntry" on the list, its ID should be "MediumDetail". Scroll down until you find "Meshes", click "Edit Items..." next to it.

10. A new window will open with two or more "ModelMesh" items on the list. Now you will need to repeat everything you've done in steps 4 to 7. That is find the correct "ModelMesh" with "Entries" instead of "Items", and change every single shader of every single "MaterialSetEntry" to "GlassForObjectsTranslucent". After you're done, click "Save". Click "Save" again on the "ModelMesh" window.
11. Back in the "ModelLODEntry" window, click the 3rd "ModelLODEntry" on the list. If it says "LowDetail" in its ID, you will need to do the exact same you've just done to "MediumDetail". If it says "ShadowHighDetail", that is the shadow mesh and you do not need to touch it. Once done, click "Save".
12. Once you're done editing all of the LODs, save your entire project and test it in the game. Your object will now look glassy and slightly glowing.

13. If you find it is not see-through enough (or not see-through at all), you can now go ahead and add a slight transparency to the texture. Back in S4S, export the texture and open it in your 2D editor of choice. I'm using Photoshop. My texture does not have an alpha channel, so I will need to add one.


14. Within the Channels tab, click the options button and choose "New Channel". No need to change the name, or the colour, click "OK".


15. If you've not worked with alpha channels before, alpha channel is what dictates what is seen and what is invisible on the mesh. There is no colour on alpha channel, you can only paint in greyscale. Black means the texture will be 100% see-through. White means the texture will be 100% visible. If you just added an alpha channel manually, it will likely be fully black (when all RGB channels are hidden).

Choose a shade of grey to paint the whole alpha channel. The lighter it is (closer to white), the weaker the see-through effect will be. The darker it is (closer to black), the stronger the see-through effect. Once you've painted your alpha channel, save the texture and import it into S4S. You should note instant transparency in the 3D preview.


16. S4S preview is helpful, but it's not 100% reliable when it comes to reading transparency correctly. I find that it tends to exaggerated the strength of transparency, and the object isn't actually that much see-through in the game. Best way to test your object is to Save the project and once again test it in the game.

17. If you're not happy with the object because the transparency is too strong/not strong enough, play around with the alpha channel by making it lighter/darker, until you're happy with the results.

~
I hope this was useful.


