|
|
Post by mauvemorn on Feb 11, 2024 19:32:11 GMT -5
You need to mark seams before unwrapping the mesh. It is best to watch a non-ts4 specific tutorial on uv unwrapping to understand this
|
|
|
|
Post by willowtea on Feb 11, 2024 20:16:46 GMT -5
So I've found some tutorials on how to add seams and I get how it works I'm just having a hard time figuring out how I'd mark seams with a complex mesh like this. Any tips? Or should I just roll up my sleeves and wing it?  |
|
|
|
Post by simmerish20 on Feb 11, 2024 21:55:58 GMT -5
Small tip for the next time you're making a lot of small identical items - make one, unwrap it, then copy it around to where you want it to be. Saves you a whole lot of work (and if you keep them overlaid on top of each other, they take up less UV space and you only need to texture one - it likely doesn't work for rendering ambient occlusion or similar, but other texturing methods work fine)
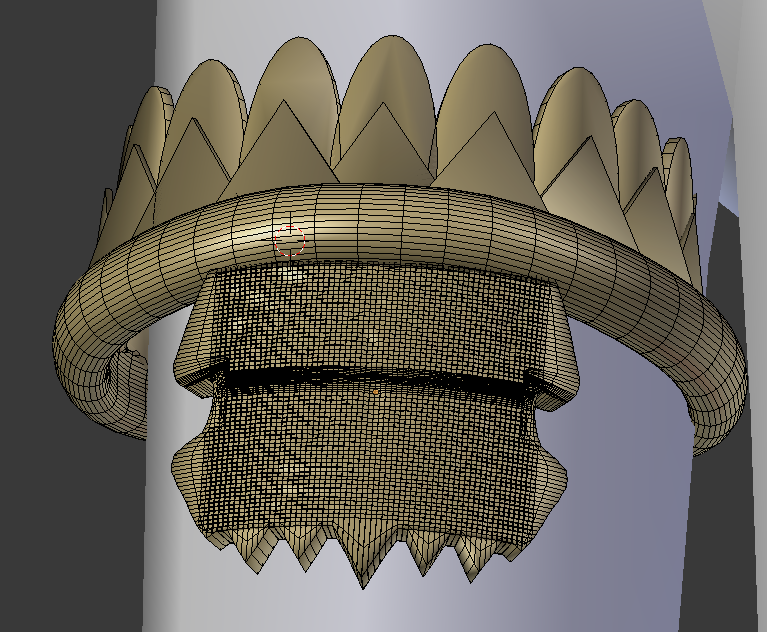
Also, you'll want to cut down on the polycount in the middle section - that's a whole lot of unnecessary polys for just a big, slightly curved square, and there are a lot of ways you can add the same details. Same with the ring - it can have the polycount cut to 1/4 and you wouldn't even notice it ingame (remove every 2nd edge loop, both ways - and even more on the inside, since it won't be too visible).
For the UVmapping, cut around natural edges/seams, or wherever you can easily hide them, and keep them neat. If there's a clear break between different textures and there's also an angle break in the mesh, that would be a natural place to put a seam. The goal is few enough UV islands with as few distortions as possible. Anything approaching spherical/tubular or if it has multiple shapes in one is likely going to be a bit difficult, so sometimes you'll have to try a few times.
|
|
|
|
Post by willowtea on Feb 11, 2024 22:07:36 GMT -5
simmerish20 Yeah, it came with sculpting, which pretty much disappeared when I shrunk it.... What's the fastest way to reduce the number of polys? (still new to blender)
|
|
|
|
Post by willowtea on Feb 11, 2024 23:14:37 GMT -5
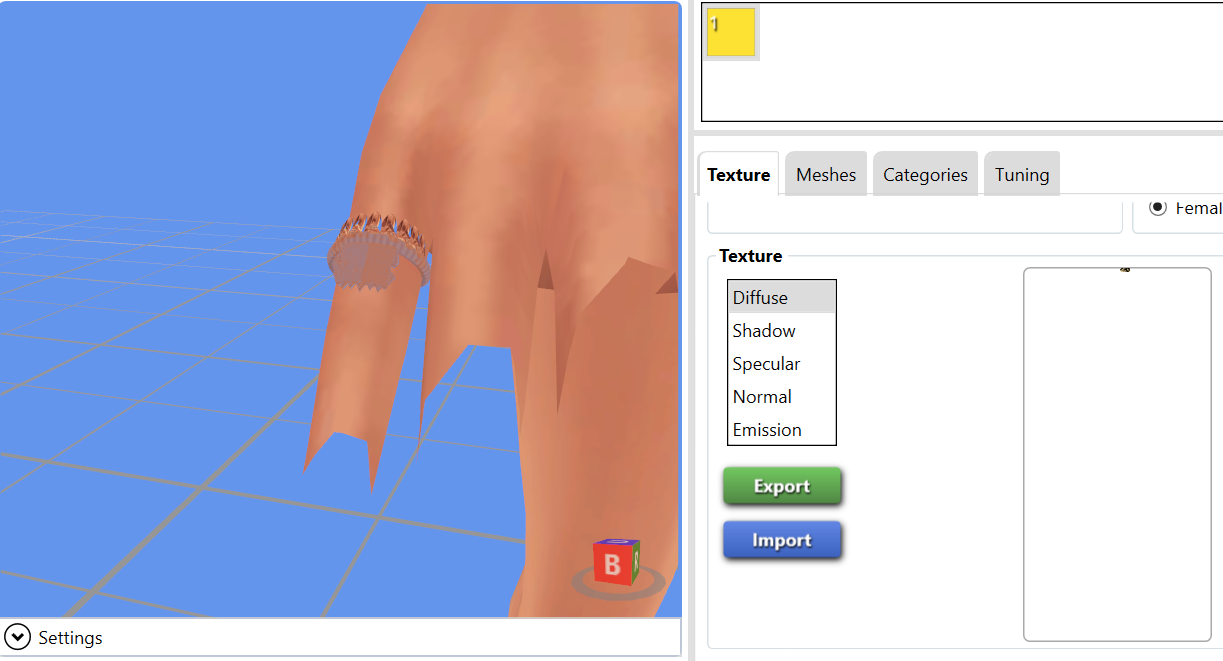
For all those helping me: I am so close. I got it unwrapped, got the texture made and baked and everything. But when I import it into s4s, it doesn't apply to the preview. (it's supposed to be shiny gold)  |
|
|
|
Post by simmerish20 on Feb 12, 2024 2:21:41 GMT -5
Syb has a tutorial on reducing polys here (which is my personal favorite method, too), but this method works best before you import it into the game, or as long as you still have a good mesh flow (which you currently seem to have). Something as small as a ring really shouldn't have a ton of polys, and really doesn't need it. You barely see the details anyway when it's that small. |
|
|
|
Post by willowtea on Feb 12, 2024 17:04:04 GMT -5
Thanks, that definitely helps make it readable. Now I think my only issue is the texture not previewing in s4s.
|
|
|
|
Post by mauvemorn on Feb 12, 2024 17:19:42 GMT -5
You need to import your texture in s4s manually, it is not imported with the mesh
|
|
|
|
Post by willowtea on Feb 12, 2024 17:23:17 GMT -5
I did that, I made sure it was placed properly, too.
|
|
|
|
Post by mauvemorn on Feb 12, 2024 17:27:17 GMT -5
The first uv map in the list defines how textures are projected. Make sure uvs in it align with textures
|
|
|
|
Post by willowtea on Feb 12, 2024 17:35:20 GMT -5
I've tried doing it with only one UV on the list and that doesn't fix it either.
|
|
|
|
Post by mauvemorn on Feb 12, 2024 19:21:31 GMT -5
Share the blend and package files please
|
|
|
|
Post by willowtea on Feb 12, 2024 19:27:32 GMT -5
|
|
|
|
Post by mauvemorn on Feb 13, 2024 16:56:09 GMT -5
The first map is not the right one, look at uvs, not the name - delete uv_0; - rename uv_1 to uv_0; - theres no proper uv_1, you need to transfer it
One part of this object overlaps with another one. It is also unnecessary high poly. You should retopologize it, its not difficult:
- center the camera by clicking on the ring and pressing NUM. ( View - View selected ). In the future, never rotate, move or scale objects in Object mode, this can cause problems with s4s; - switch to edit mode, hover over this element, press L to select it. Hover over the other half, press L as well. Press P, choose Selection to separate it for the convenience. Hide the rest of the ring; - select the separated mesh, switch to Edit mode, select one vertex on one side, then Shift-select 3 vertices on other sides. Press F to create a face, then Mesh - Normals - Flip normals, then P-selection; - select the separated mesh, add Shrinkwrap, choose the previous mesh as a target, enable Adjust edit cage to modifier result; - enable snapping to face and those other two buttons; - select the top and the bottom edges, subdivide them with 4, move vertices to match the mesh better; - press Ctrl Rm add horizontal edges to match the mesh, you can select unwanted ones in the middle and collapse them ( Alt M - collapse); - select one edge at the bottom, press E to extrude, then move vertices tp match the mesh. Repeat on all sides; - once done, apply Shrinkwrap; - add Solidify, choose Only rim, set thickness to 0.01, apply;  - mark seams, unwrap; - join the retopologized mesh with the ring, transfer weight and uv_1 from the top, vertex paint everything with 007F00 |
|
|
|
Post by willowtea on Feb 13, 2024 17:35:34 GMT -5
I've gotten started on this, thank you for the input.
Am I adding the shrinkwrap to the larger mesh or the smaller one? If the larger one, it starts to look weird and I'm not sure which "top and bottom edges" to select. If the smaller one, it looks fine but what are the edges I'm supposed to select?
|
|