|
|
Post by brybee on Sept 24, 2016 13:47:07 GMT -5
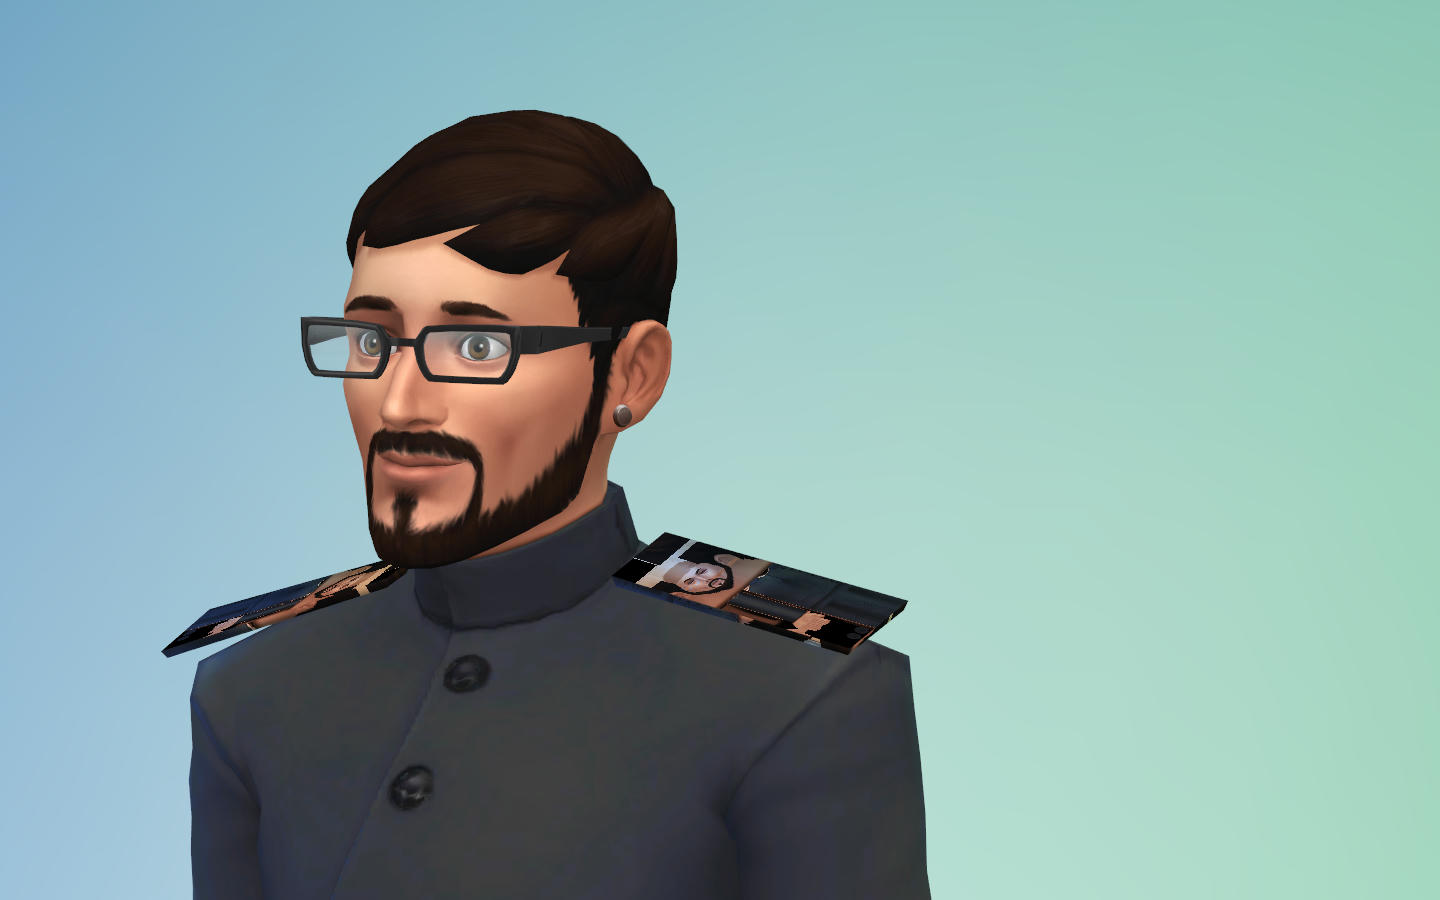
why does this happen? in blender i get the textures on the shoudler how i want it then in sims 4 studio and CAS it displays the entire characters texture there.  |
|
|
|
Post by Mathcope on Sept 24, 2016 14:02:06 GMT -5
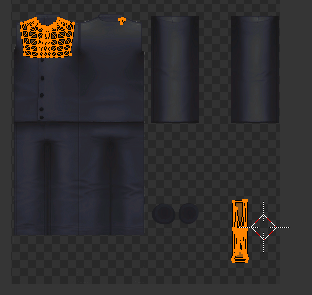
That's probably because the UV map for the new meshes you added is overlaping the part of the suit uv. You need to find a place in the uv map that doesn't conflict with others. As EA made all in one composition uv everything the sim uses has a special part. Brujah made a template where you can take a look at the parts. There are some spaces called extras, there's for bottoms and tops. Find more info HERE |
|
|
|
Post by brybee on Sept 24, 2016 14:05:58 GMT -5
That's probably because the UV map for the new meshes you added is overlaping the part of the suit uv. You need to find a place in the uv map that doesn't conflict with others. As EA made all in one composition uv everything the sim uses has a special part. Brujah made a template where you can take a look at the parts. There are some spaces called extras, there's for bottoms and tops. Find more info HEREdo i make a new uvmap and have the textures on it so its seperate then the body? |
|
|
|
Post by Mathcope on Sept 24, 2016 14:11:54 GMT -5
No, everything must be in the SAME uv. What you need to do is scale down and fit the uv from the mesh you added. You need to place it somewhere where it doesn't conflic with anything. For that you can use the template I linked you. The uvs need to be in an sigle image, that's just how EA did it for Sims 4.
|
|
|
|
Post by brybee on Sept 24, 2016 14:27:48 GMT -5
No, everything must be in the SAME uv. What you need to do is scale down and fit the uv from the mesh you added. You need to place it somewhere where it doesn't conflic with anything. For that you can use the template I linked you. The uvs need to be in an sigle image, that's just how EA did it for Sims 4. i dont understand. Can i export the uv map into a 2d editor and make a texture there and add it to the main texture so it wraps the whole thing? |
|
|
|
Post by Feyona on Sept 24, 2016 16:55:29 GMT -5
Hi brybee. The thing is that you can't add another custom uv. Imagine that you have one piece of paper 1024x2048 pixels and everything that is on your sim has to be placed on that paper in specific places. You can't do it in another way since it's the way EA programmed the game. Every single item that it on sim uses specific place on the map. Even earrings and bracelets have dedicated space on the map so if you place your texture in that place, it will appear on earrings. There are free spots on that 1024x2048 map that can be used for extra parts. Since epaulettes relatively small, you can scale down the uv and place it between uv of the hands). Take a look at this post. |
|
|
|
Post by brybee on Sept 24, 2016 18:33:37 GMT -5
Hi brybee . The thing is that you can't add another custom uv. Imagine that you have one piece of paper 1024x2048 pixels and everything that is on your sim has to be placed on that paper in specific places. You can't do it in another way since it's the way EA programmed the game. Every single item that it on sim uses specific place on the map. Even earrings and bracelets have dedicated space on the map so if you place your texture in that place, it will appear on earrings. There are free spots on that 1024x2048 map that can be used for extra parts. Since epaulettes relatively small, you can scale down the uv and place it between uv of the hands). Take a look at this post. yes i see what you mean. I am really trying and cant get it. |
|
|
|
Post by Kiara on Sept 24, 2016 19:26:24 GMT -5
Make sure that under the uv map section there are only two uv maps and they should be UV_0 and UV_1. UV_0 is going to be your regular map while uv_1 will be the mapping that makes the mesh work with sliders. Always remember, before joining new meshes to ea meshes, that you make sure that new mesh already has it's uv mapping named properly.
|
|
|
|
Post by brybee on Sept 24, 2016 19:58:20 GMT -5
Make sure that under the uv map section there are only two uv maps and they should be UV_0 and UV_1. UV_0 is going to be your regular map while uv_1 will be the mapping that makes the mesh work with sliders. Always remember, before joining new meshes to ea meshes, that you make sure that new mesh already has it's uv mapping named properly. yes. I have organized my uv so the textures are in the right place and wont have unwanted textures wrapping over top. But the problem is now its all black... |
|
|
|
Post by Mathcope on Sept 24, 2016 20:16:33 GMT -5
Post your files. (again) The recent one.
|
|
|
|
Post by brybee on Sept 24, 2016 22:43:22 GMT -5
i have done everything right. And they still show up pure black and textureless. Is it a nodes problem?
|
|
|
|
Post by Feyona on Sept 24, 2016 22:47:51 GMT -5
brybee without seeing the package it's difficult to tell. Can you post your .package and .blend file so somebody can take a look?
|
|
|
|
Post by brybee on Sept 24, 2016 23:09:10 GMT -5
|
|
|
|
Post by Mathcope on Sept 25, 2016 1:30:25 GMT -5
The problem is that you didn't texture the diffuse image. You need to edit it in a 2d Editor and put whatever texture you want. Make sure that's in the place you moved the uv map. It has to match. Then import that diffuse to Studio.  |
|
|
|
Post by brybee on Sept 25, 2016 7:22:22 GMT -5
yes i did this and still comes out black
|
|