|
|
Post by j on Aug 9, 2016 16:17:43 GMT -5
If anyone figures out a good way to successfully duplicate effects, do let me know, I cannot seem to get it right on my own.
Nevermind, we figured it out.  |
|
|
|
Post by j on Aug 9, 2016 16:14:45 GMT -5
To be honest, with a VERY good texture you could achieve your desired look with minimal or no edits to the mesh, and just rely on your diffuse/good specular/good bump map.
I'm guessing you have the t-shirt fully meshed underneath the tank top?
TS4 is a low-poly game so there is no need for perfectly rounded meshes.
|
|
|
|
Post by j on Aug 9, 2016 15:16:51 GMT -5
Yes, it looks like that's far too much geometry. Can you not just remap the decimated mesh?
What are you trying to make? If it's a top, I'm sure there are similar tops already in existance in the game so you're probably better off cloning them and editing those meshes since you won't need to worry about too many verts.
|
|
|
|
Post by j on Aug 9, 2016 14:36:59 GMT -5
Try to remove doubles before decimating.
|
|
|
|
Post by j on Aug 8, 2016 14:34:27 GMT -5
Yes, we also need to learn how to calculate Cartesian values for rotation because so far my brain cannot comprehend, Peacey did all the work for me.  |
|
|
|
Post by j on Aug 8, 2016 13:08:46 GMT -5
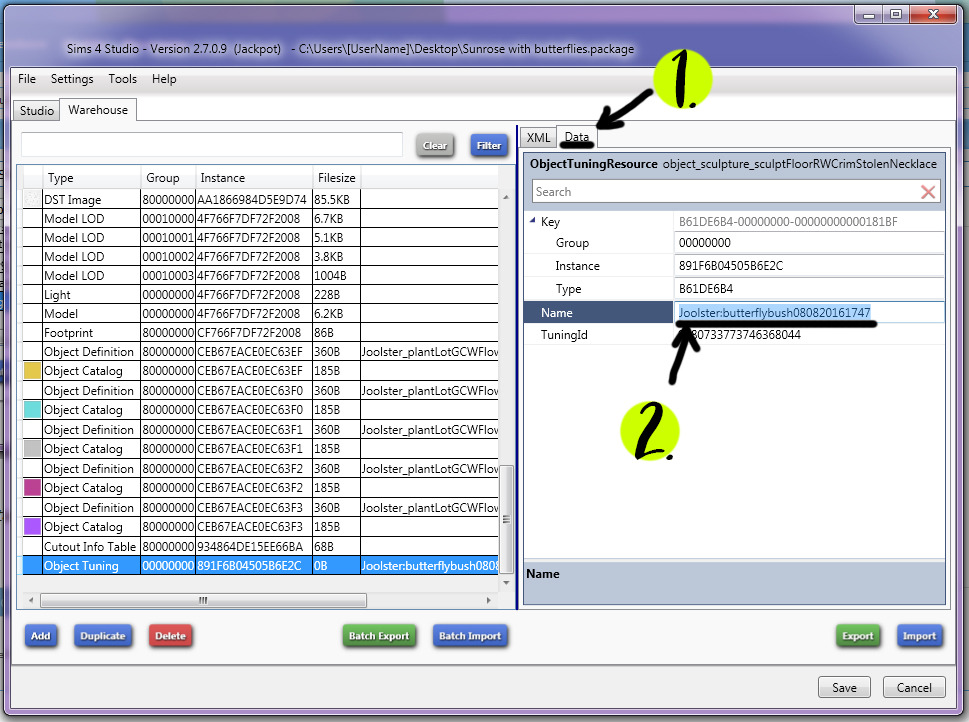
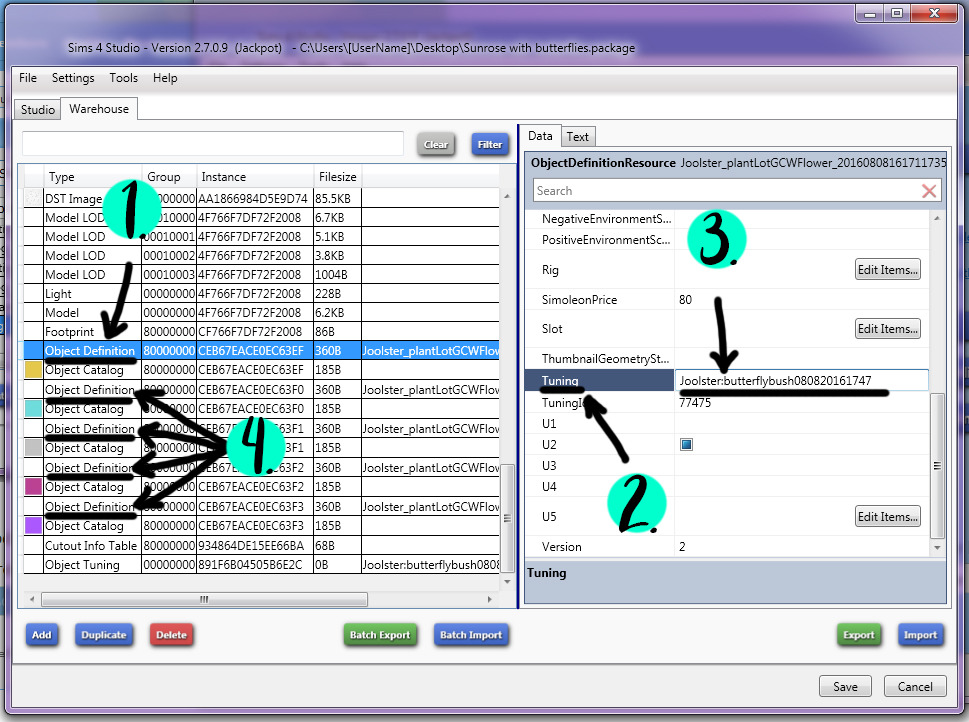
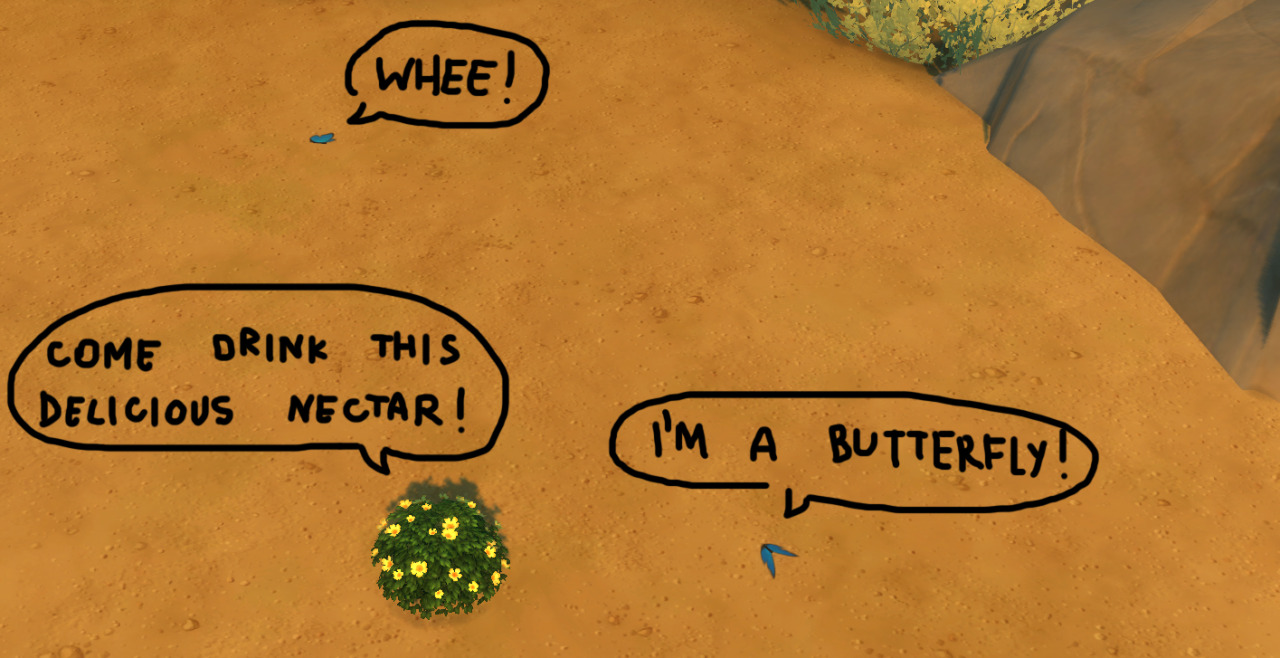
Huge thanks to peacemaker who essentially taught me to do this so I could bring you this tutorial! For the sake of this tutorial I'll be adding a butterfly effect to a flower bush.First of all, clone your bush. I'll be working with Sunrose Bush from basegame. I am cloning it via the Selective Clone option so I can have all of the swatches. 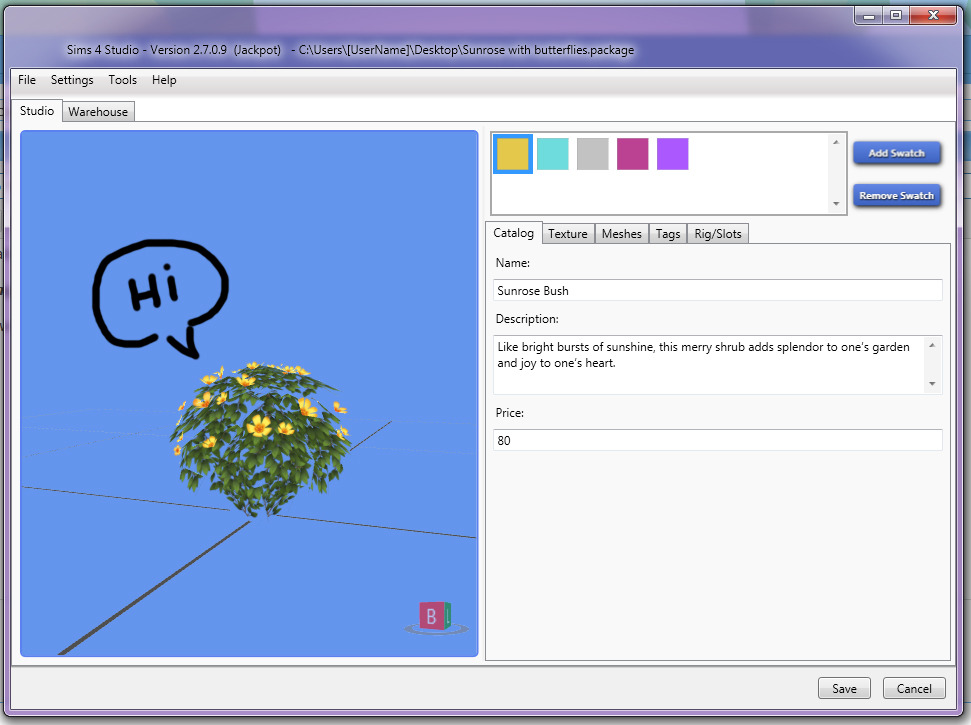 Now we need to clone an object with an effect so we can use its tuning. It does not matter what EFFECT the object you clone has, but it does matter how that effect IS PLAYED. So if you're working on a light that plays an effect (such as a candle) which needs an on and off switch, you would clone a candle. What I need for this project is an item that plays the effect non-stop without any trigger options, so I'll be cloning Stolen Necklace of the Late Duchess Pinky (which plays the laser effect non-stop). 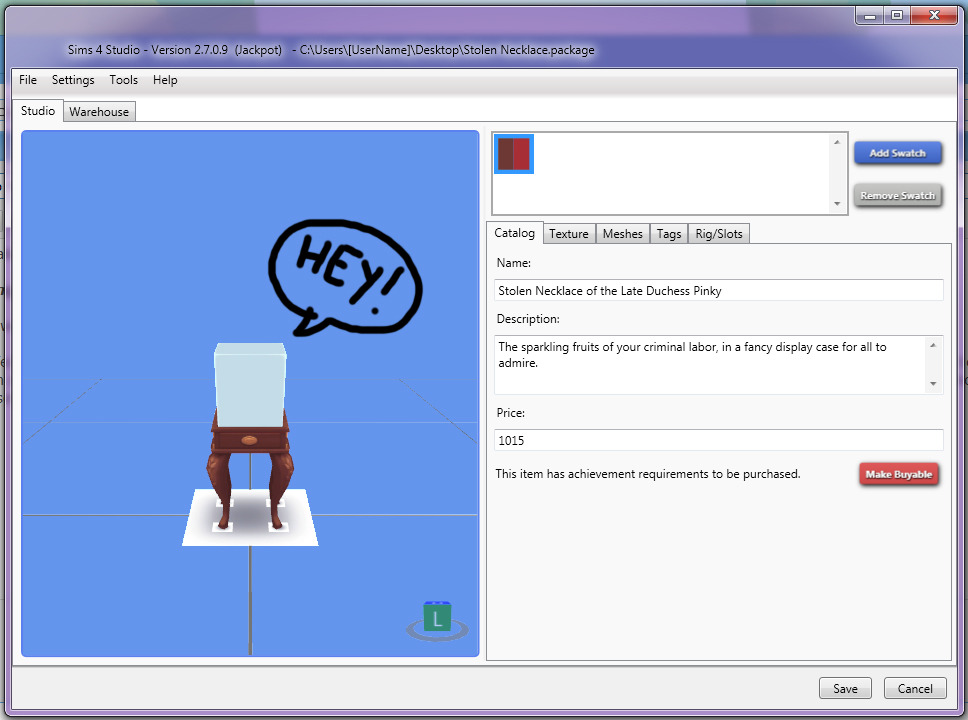 Next up, we need to grab its tuning. In the Warehouse tab of your Necklace (1.) click Object Definition (2.), scroll down until you find Tuning and copy the code (3.). 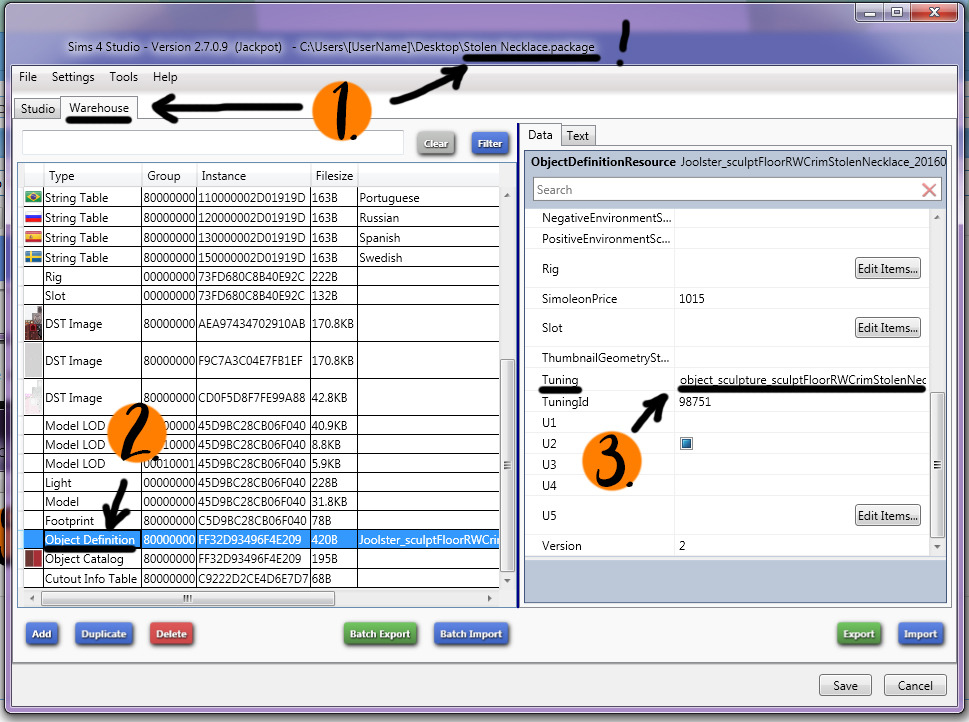 Now while in your Bush, click Tools (1.) and Extract Tuning (2.).
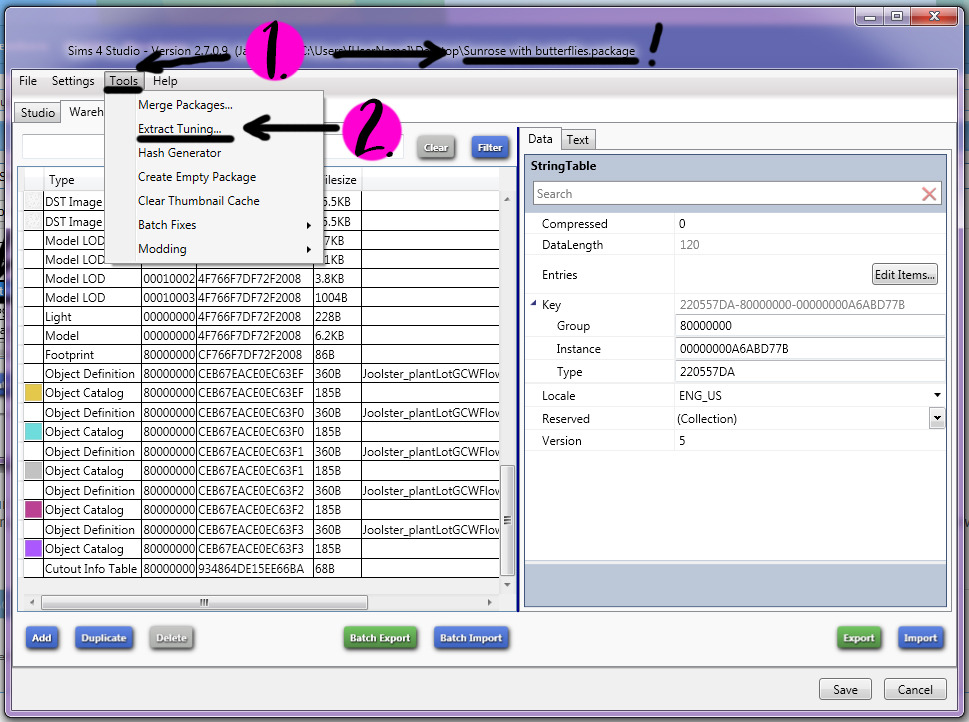
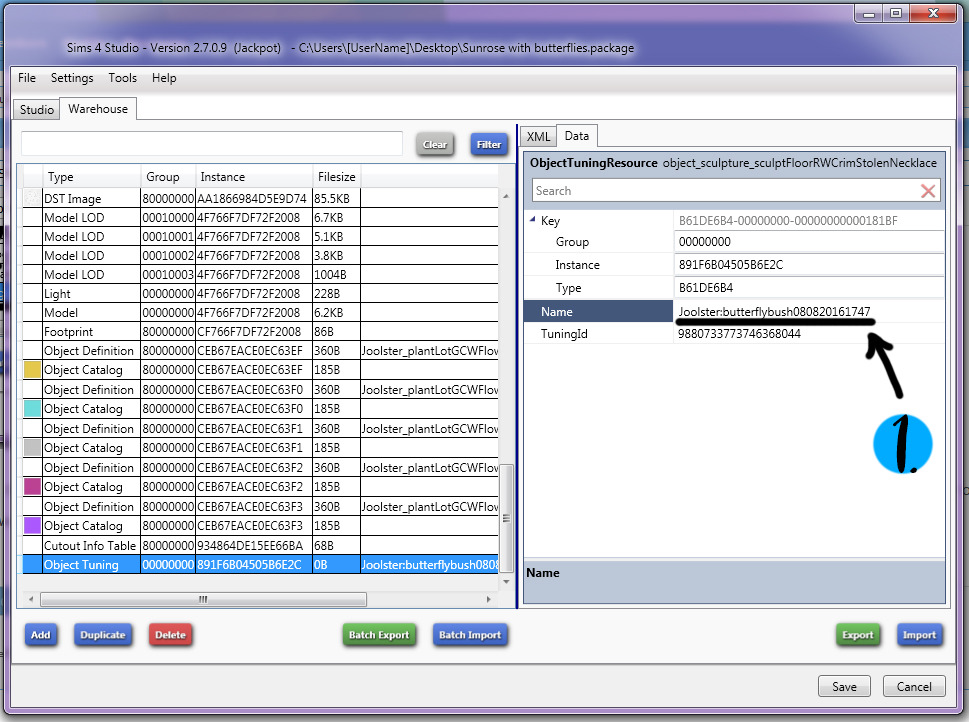
Paste your Tuning code into the search bar (1.), and select the one it finds (2.). Click Add to current package (3.). Close the Tuning window afterwards (4.) 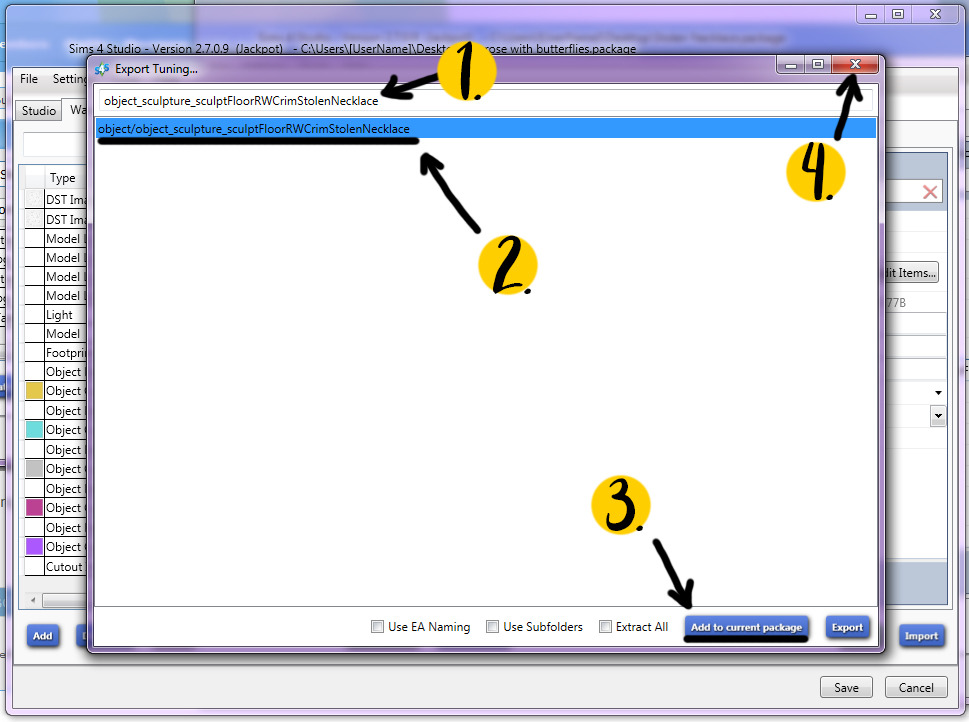 You should find a new resource on the bottom of the Warehouse tab of your Bush, called Object Tuning. Click it (1.), then click Data (2.) and find the Name line (3.). We will need to change it. 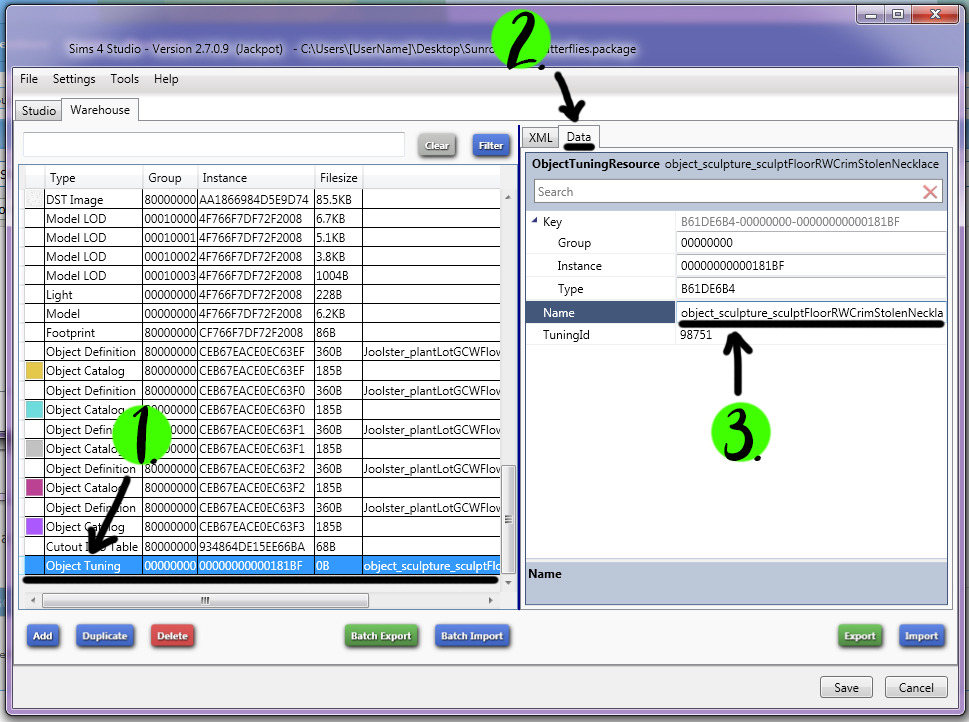 You need to use the format EA has requested tuning modders use. This format is creatorname:objectname. As orangemittens mentioned in her own tutorial, you can also add the date (and time) to the tuning name as well. So my new tuning name would be Joolster:butterflybush080820161747. Edit the tuning name appropriately (1.), you should notice some values in the tab (such as the Instance and Tuning ID) will change also.
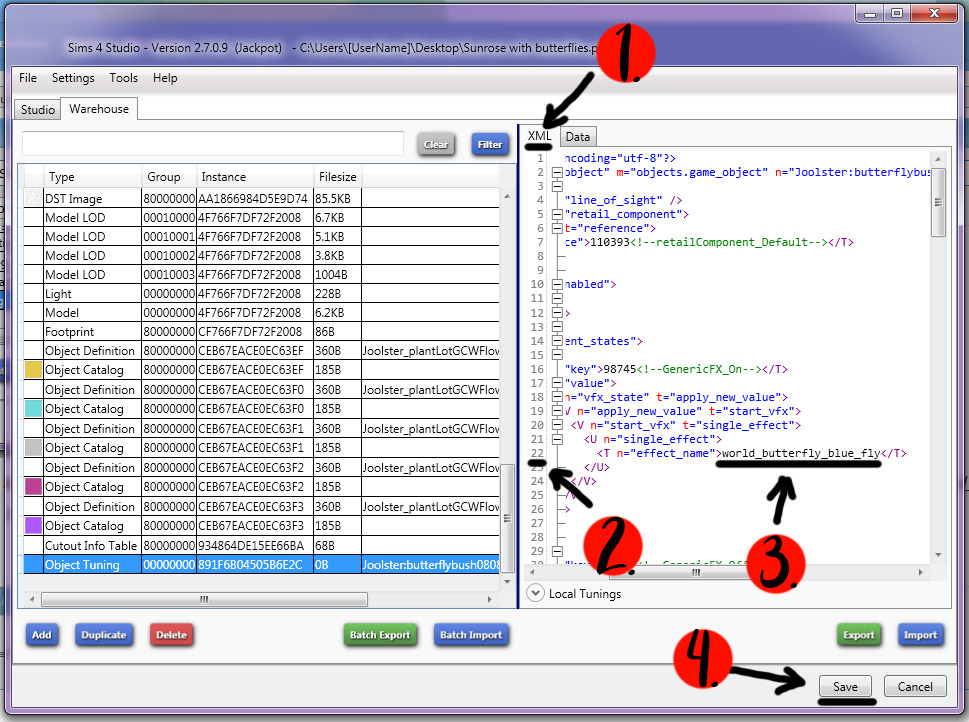
Click the XML tab (1.) and find the line with the effect (2.). In this case, line number 22. Change the default effect (s40_obj_criminal_lasers) to world_butterfly_blue_fly (3.). Click Save (4.).
This is just one of several butterfly effects in existence. You can find a better suited effect for your taste using andrew 's Studio Effect Player.
Back in Data tab (1.), copy your custom tuning name (2.).
We need to update the tuning with our custom name. Click Object Definition (1.), scroll down until you find Tuning (2.), replace the default code with your custom code (3.). This bush has 5 swatches, therefore there are 5 Object Definitions, so you need to do this 5 times (4.).
You have successfully added an effect to your bush! Click Save and test your object in-game!
~~~~~~~~~~~~~~~~~~~~~~~~~~~~~~~~~~~~~~~~~~~~~~~~~~~~~~~~~~~~~~~~~
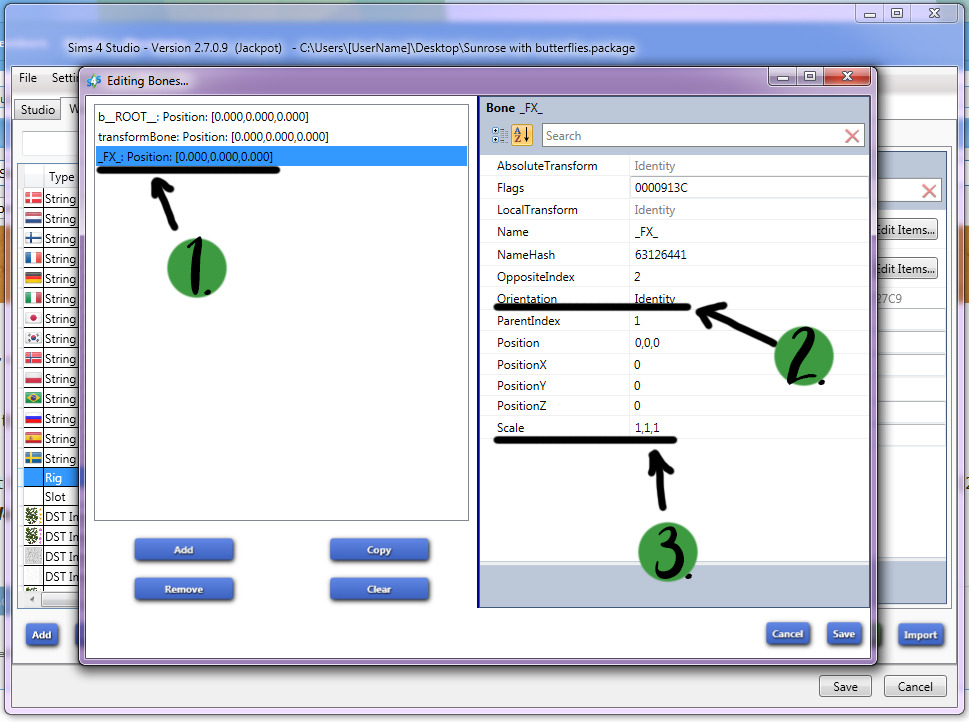
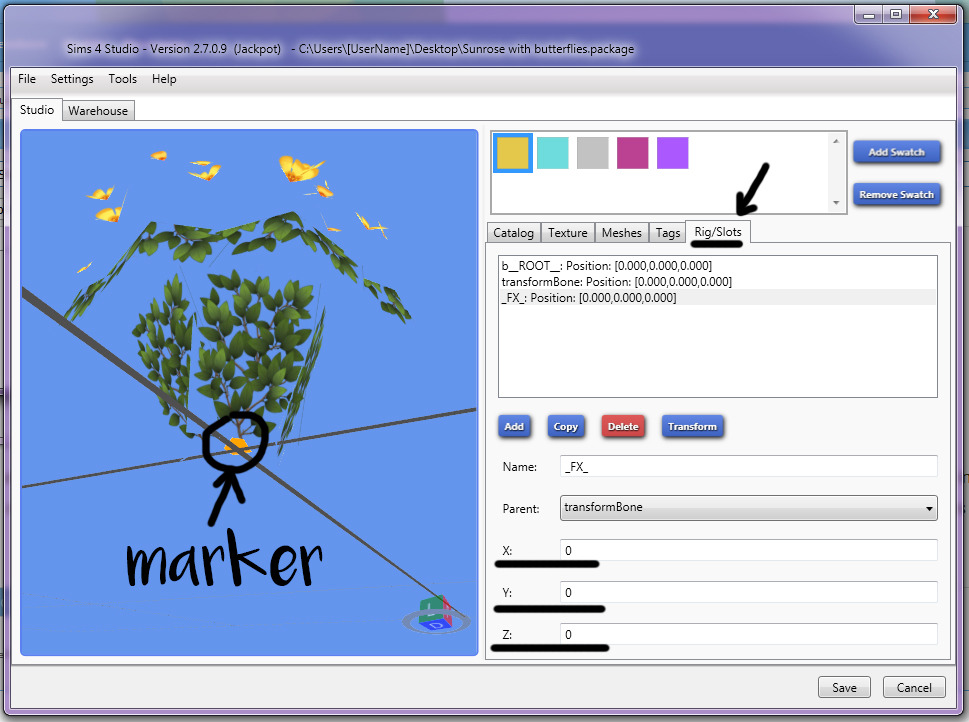
Depending on the effect you've gone with, you may need to edit the size, rotation and coordinates.
You would edit the size and rotation in the Warehouse tab, via the Rig -> Bones window. Select _FX_Position (1.). Orientation (2.) for rotation (uses Cartesian coordinates. Ex: 0.707,0,-0.707,0). Scale (3.) for size (XYZ/XYZ values, 1 for 100%, 0.5 for 50%, 2 for 200%, etc).
Scaling an effect significantly up or down in size may not yield perfect results. From personal experience I found that effects tend to get smooshed in length when decreased in size significantly.
To change the effect positioning in relation to the object, you'd need to edit XYZ coordinates of the slot. This may require significant in-game testing to achieve perfect positioning. Some effects are off-center, meaning they will appear shifting to the side or higher/lower than intended even though the slot marker appears to be at the right position.
~~~~~~~~~~~~~~~~~~~~~~~~~~~~~~~~~~~~~~~~~~~~~~~~~~~~~~~~~~~~~~~~~
Happy creating! 
|
|
|
|
Post by j on Aug 6, 2016 15:10:17 GMT -5
I don't know if there are any tutorials out there specifically on this, but it's the same principle as making any accessory that doesn't fit a default category: You would clone an accessory, possibly a ring. You would separate the coat from the outfit, import it into your ring mesh and replace the ring with it. You would move the UV map of the coat off of the body (since that is where proper clothing is mapped), probably into the "extra parts" slot. That's the gist of it. There are a number of things you need to keep in mind though. First of all, you need to be selective in what you're cloning off of. Obviously if you want your sim to wear necklaces and earrings with your coat, you wouldn't want to clone off of them, since then your coat would override whatever it is you cloned off of. So most people clone rings. However, since most people clone rings, it means many non-default accessories share the slot, meaning one will override the other, so your coat may not be compatible with someone else's purse, or scarf and so on. If you plan to have a long-sleeved coat, perhaps you could clone a bracelet instead. Same with the UV map space. Not only is it often occupied by existing clothing (many sleeves, ruffles and other elaborate parts are mapped there), it is also where other people map their own non-default accessories, so once again your coat may not be compatible with a lot of custom stuff since you'd end up with one item's texture bleeding onto the other. |
|
|
|
Post by j on Aug 6, 2016 15:00:07 GMT -5
The pile of clothes doesn't have the best footprint - it will still block the routing path to many objects behind/near it. My sims can't even use a wardrobe with that pile next to it.
Try exporting a footprint of a rug, and importing that into your object.
|
|
|
|
Post by j on Aug 6, 2016 10:19:48 GMT -5
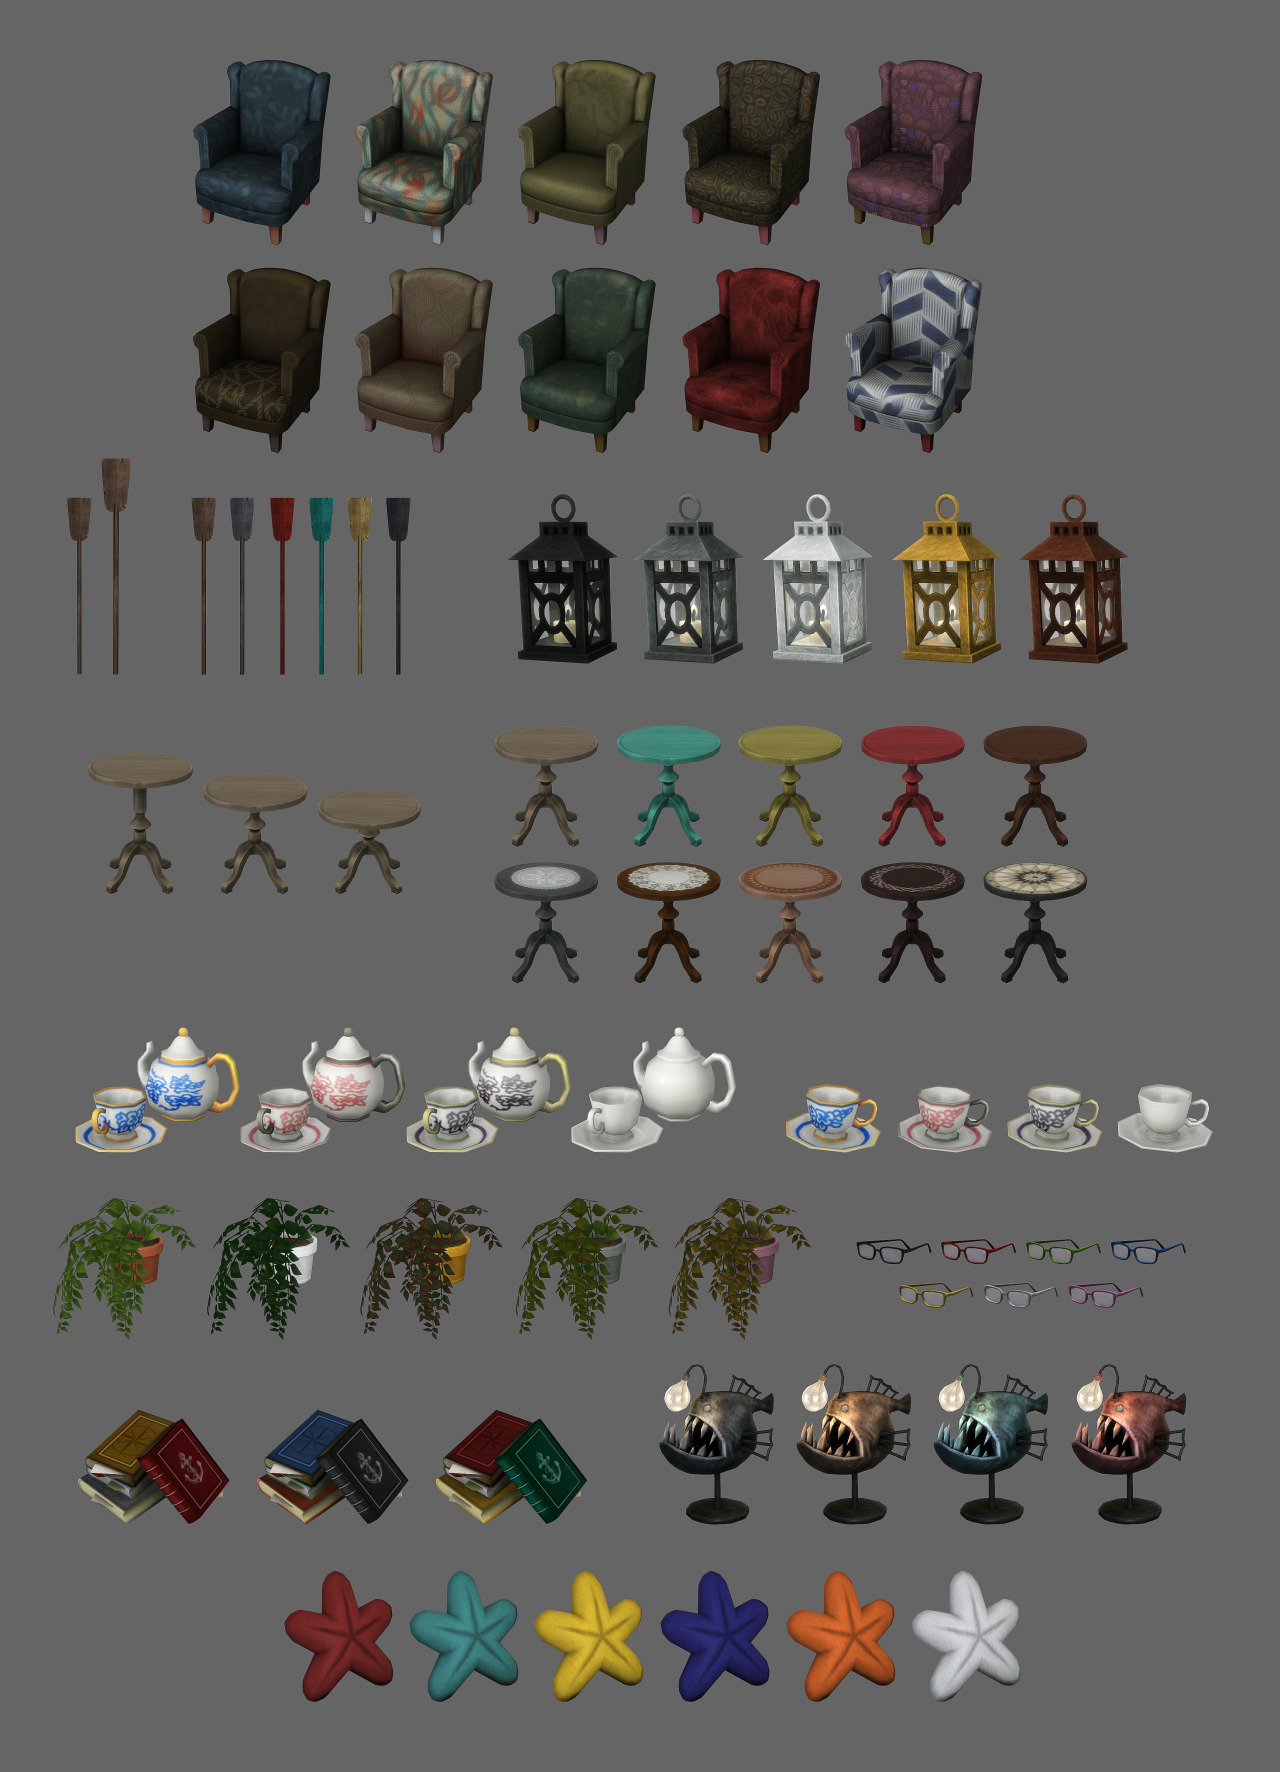 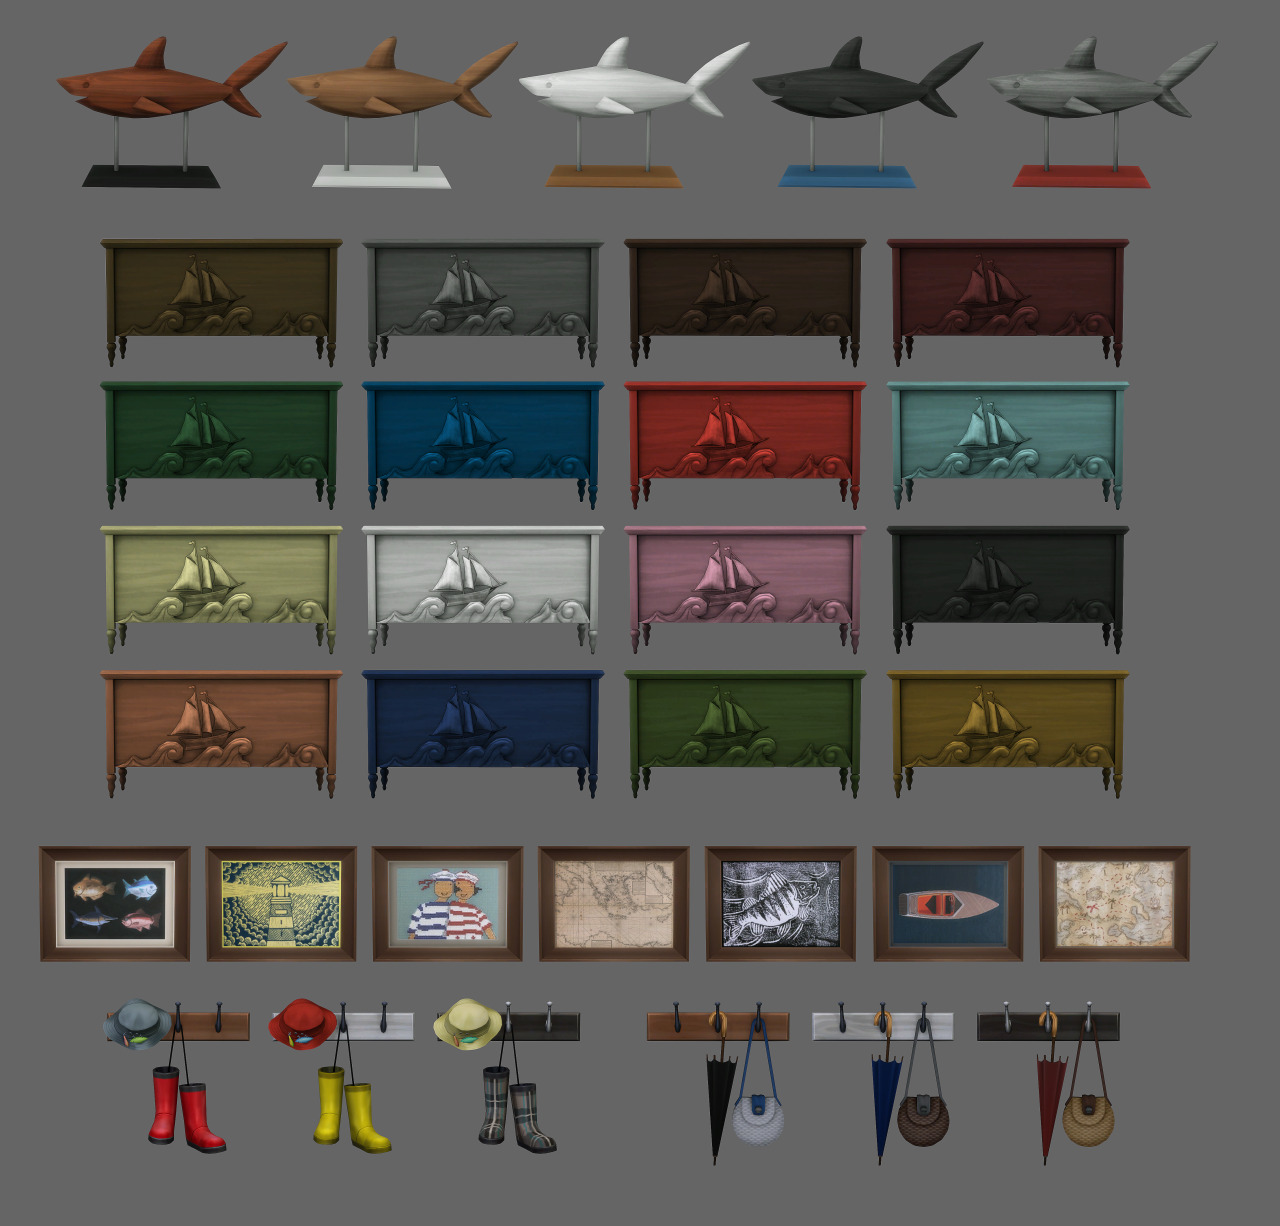 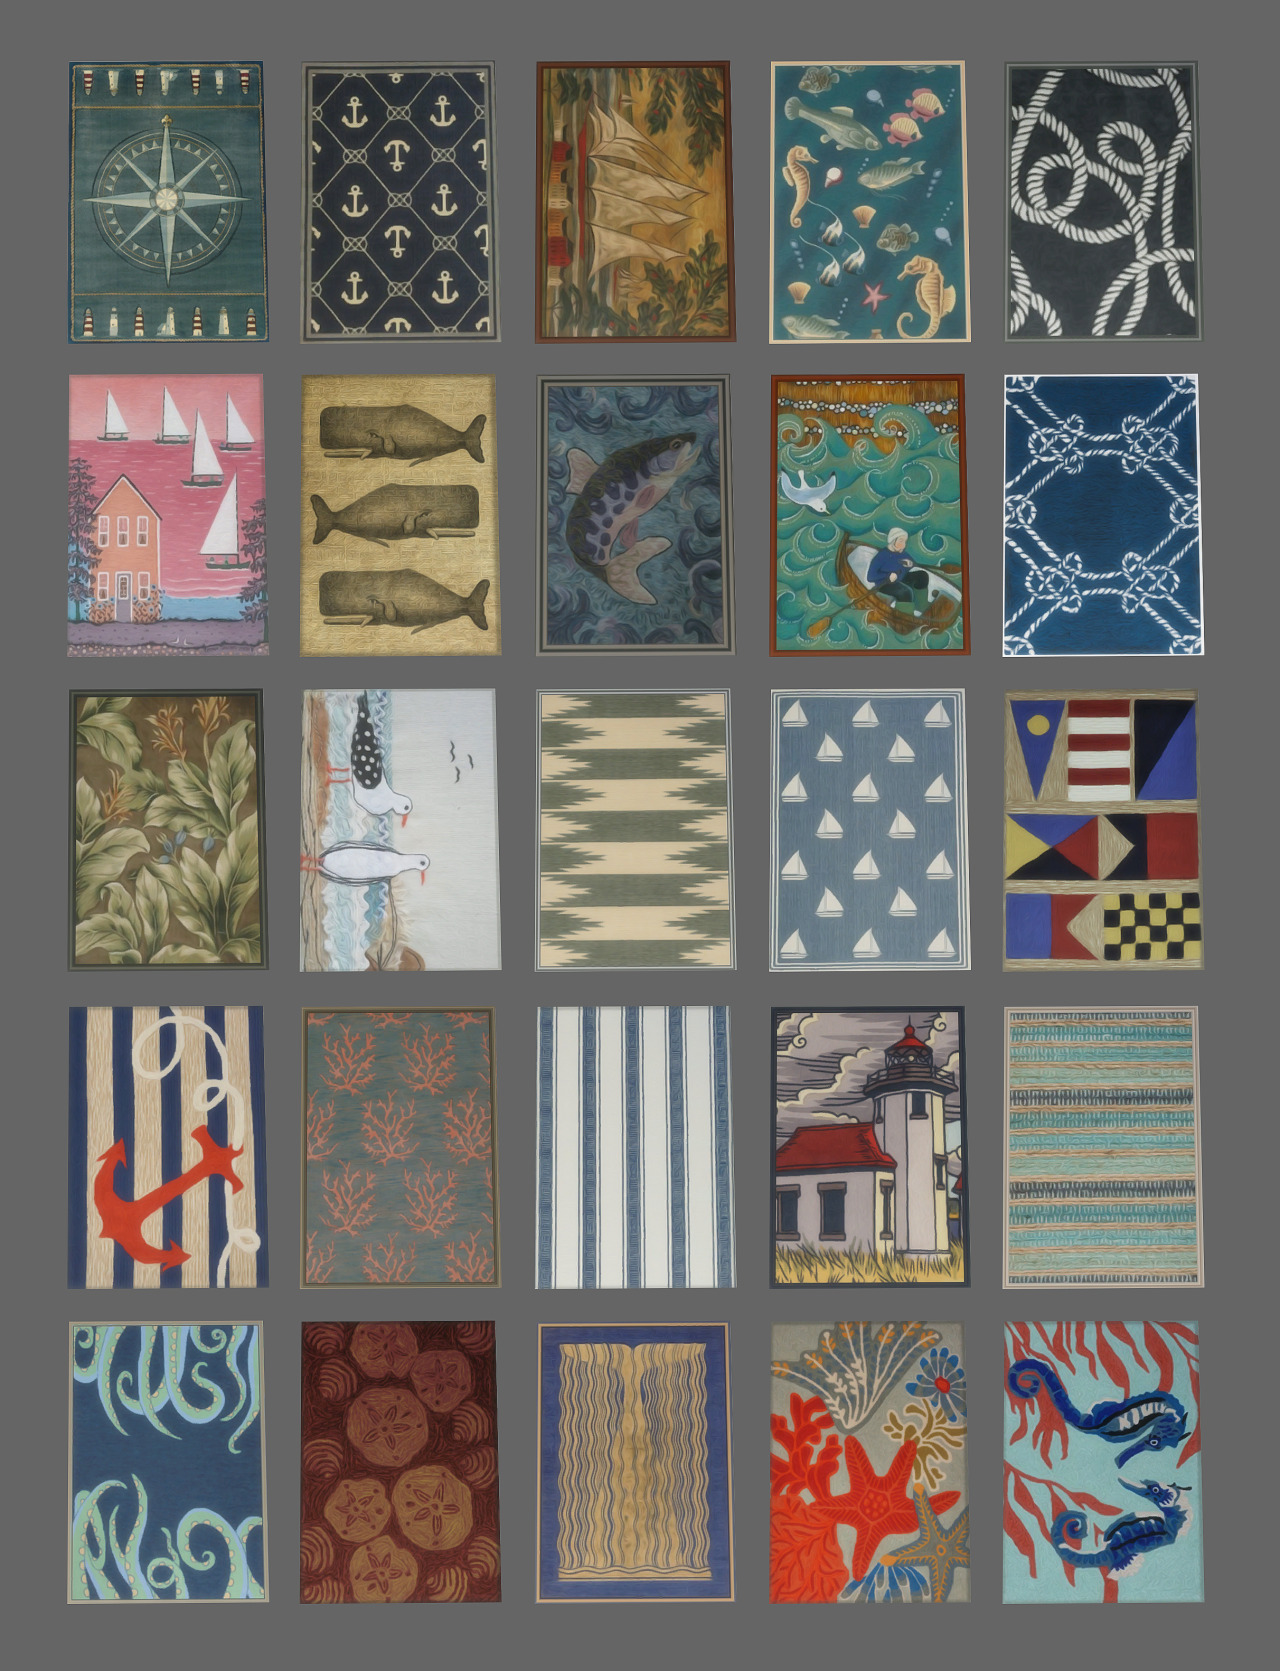 Fisherman's Nook Fisherman's NookFollower gift for my tumblr friends. 20 objects in various amount of swatches. Custom thumbnails. The cushion sits on the floor but it’s a small decoration, which means it will go on any surface, so you could place it on a shelf, then move the shelf to a specific height to achieve perfect placement of the cushion on any bed, chair and so on. The book pile has 1 small slot on top. You can also watch me make the Angler Lamp!#Buy #Object #Set |
|
|
|
Post by j on Aug 6, 2016 7:17:38 GMT -5
All hats and hairs that are made properly work in-sync - the hat causes the hair to switch to the hat chop variation. There are 2 types of hats (the difference is how they sit on the head), which is why all hairs have 2 hat chop meshes, to accommodate 2 types of hats. So if you made your hat in a way that does not adhere to the way it removes the part of the scalp, it won't look right. Same if you don't do a hair chop properly. I had a look at your mesh, I can see you cloned off of the animal hat, which is type 1, whereas your shape is closer to type 2. Because you cloned off of type 1 hat, it makes the hair switch to type 1 hat chop, while you need type 2. So I suggest you reclone it, and also your hat is a bit low on the back. 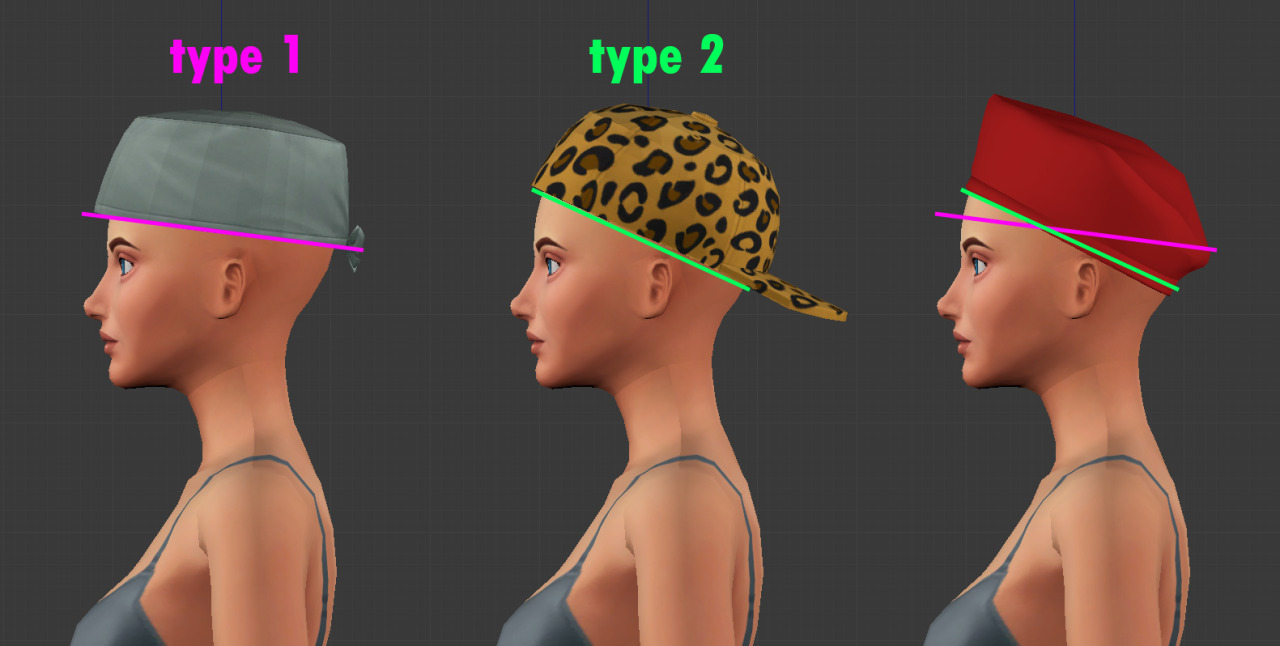 |
|
|
|
Post by j on Aug 5, 2016 4:19:01 GMT -5
j , Sorry to answer late. This happened because you are using the automatic design tool feature in Studio. When you use that Studio calculates the design tool height based on the vertices of the mesh. It updates fields in the footprint resource using those numbers. If they're hanging below zero this sets them in the floor. When you imported the decal footprint you removed those numbers and that fixed the issue. The alternative would be not using the automatic design tool feature and manually setting the design tool height in the footprint resource yourself. Ah, I see. Well, the decal footprint workaround sounds much more simple. |
|
|
|
Post by j on Aug 4, 2016 17:10:39 GMT -5
Hmm, I see. Maybe you could try export the original image, then add an alpha channel that is 100% black (which should make the image 100% see-through), then import that in the other one's place?
|
|
|
|
Post by j on Aug 4, 2016 16:42:07 GMT -5
Surprisingly enough, that worked! Thanks sweetpea <3 |
|
|
|
Post by j on Aug 4, 2016 14:00:28 GMT -5
As some of you probably know, a floor mesh that's below a certain point in Blender will not be placeable in-game without MOO, because the "Object is intersecting the floor or the ceiling" error will pop up. Is there a way around that? I'm trying to create a table plant where the leaves cascade downwards quite a bit, way below the pot bottom. Right now I need to use MOO in order to place it on the floor, but it works fine on surfaces. This is the object in question: 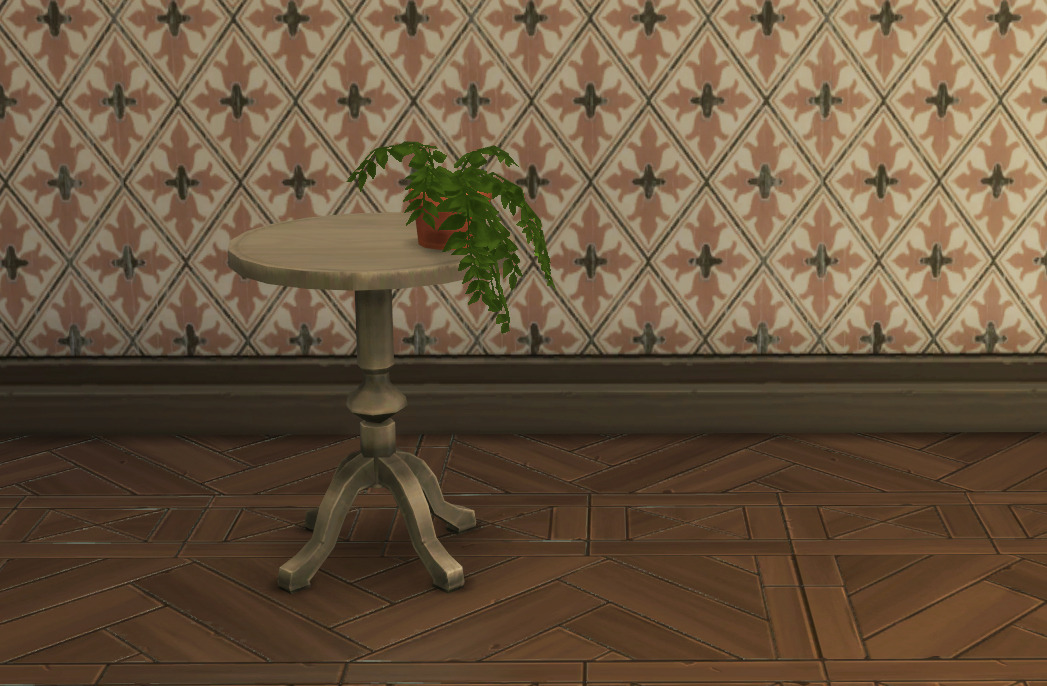 |
|
|
|
Post by j on Aug 4, 2016 13:52:41 GMT -5
You didn't supply your .package/.blend file, but from first glance I'd guess you forgot to weight the hair.
|
|


