|
|
Post by kitkat on Mar 28, 2015 20:56:41 GMT -5
Thanks, OM & MsTeaQueen  And the link is fixed! |
|
|
|
Post by kitkat on Mar 28, 2015 20:29:28 GMT -5
Thanks for this tutorial, OM! Using this as a starting point, I was able to clone an end table and make one of the swatches transparent for my OMSP project. In the process, I found out some information about non-rug items that might be helpful for other people: - Step 8: For the end table (and possibly other objects as well), the 3rd modelmesh entry is the one that has "entries" under "Materials"
- Step 10: There was no "AlphaShaded" ShaderData entry for any of the non-rug items I looked at. For my end table, I selected the first ShaderData entry (Normal Map Scale) and clicked the "copy" button. That made a new ShaderData entry show up at the BOTTOM of the list which I was able to edit as indicated in Step 10. (Also change "NormalMapScale" in the "Field" to "AlphaShaded"
- NOTE: I'm not sure if this is required, but I also changed "Phong" to "PhongAlpha" in the "Shader" box for each MaterialSetEntry I wanted to give transparency to.
- I did this for ModelLOD 00000000 AND 00000001. Otherwise, I found that zooming out to LOD1 and LOD2 caused my transparent object to reappear.
- NOTE: Although the end table had a LOD2, no ModelLOD 00000002 appeared in the Warehouse. I was able to edit LOD2 to have the same settings as 0 & 1 through "Model"/"Lods"/"Edit Items" in Warehouse and choosing the ModelLodEntry with the Id "LowDetail" then follow the basic steps starting from step 8.
|
|
|
|
Post by kitkat on Mar 28, 2015 20:06:10 GMT -5
Thank you, bakie & molliesdollies :D I have made some Sims 2/3-style OMSPs for designers. I found bb.moveobjects fiddly and awkward to work with in general, but especially on surfaces that already have container slots. I hope some of you will find them useful DOWNLOAD  |
|
|
|
Post by kitkat on Mar 26, 2015 21:48:36 GMT -5
This is one tutorial I'm having a really hard time following. Maybe it's because I'm trying to make an object see-through that isn't a curtain or the fact some options have different names in newer versions of S4S? Step 8 - my object has 2 ModelMesh items. Which one do I click? Step 10 - my object also doesn't have an existing "AlphaBlended" Shader, does that mean I need to make one myself? Step 11 - don't understand at all. So do I need to do anything or can I just leave it as it is? Does changing or not changing the burn/dirty states impact on the object, and if yes, then in what way? If I choose to skip, does it mean I can ignore steps 12-15? Step 16 - my object has 26 MaterialSetEntries. Do I really need to do something 26 times? I was having problems with this as well. I tried a couple of different objects from sculpture and clutter. from poking around, I think the 2nd ModelMesh is the correct one to select, but I never did find an object that had an "AlphaBlended" entry on any of the objects I looked at. I did see that OM mentioned somewhere that plants already have an alpha layer in them, so I tried using one of those as the base for my project. It is working nicely, except that I need one that is floor-only. And then to edit the object footprint (there is a tut for that). Getting there! |
|
|
|
Post by kitkat on Mar 22, 2015 9:02:05 GMT -5
LOVE these! Thank you <3  |
|
|
|
Post by kitkat on Mar 20, 2015 16:10:50 GMT -5
Just starting a bed conversion, and I am so glad this is available! Is there a single version as well?
|
|
|
|
Post by kitkat on Mar 16, 2015 13:14:04 GMT -5
LOVE it, OM! Thank you for sharing That was my question, too ajoya. From what I read elsewhere on the site, you will have to re-clone the object in the new version of S4S and import the textures/meshes. That's what I did, and the Designer Tool worked for me. |
|
|
|
Post by kitkat on Mar 16, 2015 12:53:44 GMT -5
For MySims4Blog it's the "Updates Here" tab - mysims4blog.blogspot.com/p/updates-here.html For Sims4Updates it's "Contact" - sims4updates.net/contact/ (you can send an email or put it in the comments on that page) You upload your items somewhere with pictures and a link - your own site, tumblr, etc. Then contact each to let them know you have something new available. The site owners create the entry for you. They also privately host the pictures they end up using on their site, so it doesn't eat up bandwidth wherever you have them hosted. |
|
|
|
Post by kitkat on Mar 16, 2015 11:35:55 GMT -5
I use a variety of places. Many sites I'm on have a "share" area like here and LivingSims. I also have my own site. It's pretty easy to make something that looks decent with things like Webs and Weebly that have drag and drop capability. You may not be able to do everything you want, but if you're not a web designer, it's a fairly low-stress option. You can mess around with their free options to get your feet wet and see if it's for you.
For visibility, you can post your updates to MySims4Blog and Sims4Updates. They have both have a wider viewership and having your work shared there will drive people to your site. Same thing with tumblr. Posting there with the tags #sims4cc and #ccfinds will often get your posts shared by people who are aggregating finds on their tumblrs. Each time I share something, I get several hundred visitors at my site from the sources I listed. Not the thousands of DLs you'd get at TSR, but I think it's a good tradeoff for the freedom and autonomy over your stuff.
I stopped using MediaFire after what happened to Sarah @ Awesims and others. I upgraded my webs site so that I have more storage and upload my files there. I might try Dropbox and others if I run out of room there.
|
|
|
|
Post by kitkat on Mar 16, 2015 11:09:47 GMT -5
Hi! I've been posting here and enjoying S4S ever since "Alice" was introduced, but I never introduced myself. I started playing Sims 2, but I didn't start creating until Sims 3. I've only done conversions and recolors so far, but I hope to try my hand at meshing at some point. Meshing in Milkshape flummoxed me, but I've been watching some Blender tutorials, and it seems a little easier to understand so far - we'll see. In the meantime, there are so many lovely objects created by others that are much more talented than I that we need for Sims 4 :D (with their permission, of course!) When not on my computer, I teach middle school science. I love reading - currently mostly sci-fi and fantasy - working in my yard, and hanging out the husband our our dog, Hershey. I am also head of writing and proofreading for LivingSims magazine. Cheers! Kathy/kitkat |
|
|
|
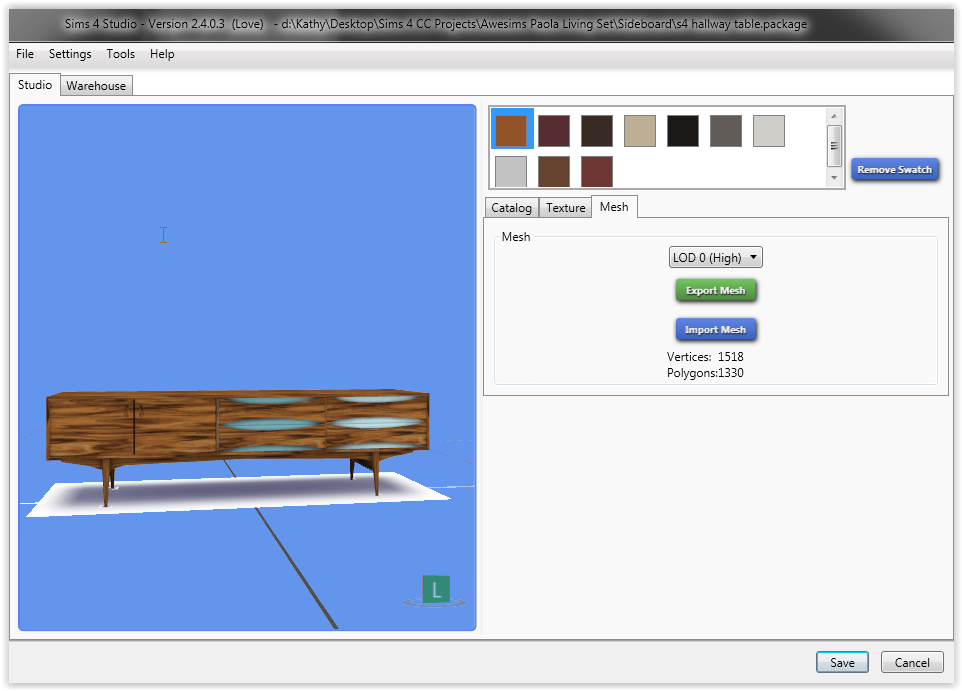
Post by kitkat on Mar 15, 2015 19:37:53 GMT -5
Awesome! I was watching a video tutorial that said you need to put the vertex paint on a material or it won't show up when rendered. Does that apply in this instance as well? That is what I (think) I did for this lamp, but I'm not sure if it worked out correctly. Still trying to get the hand of the controls  |
|
|
|
Post by kitkat on Mar 15, 2015 18:35:52 GMT -5
I read in Orangemittens' tutorial for mesh cloning/creation for S4S that there will eventually be a tutorial on this... but I got impatient and started poking around in Blender What I found is that the vertex paint on the Sims 4 lamp basically started with black the farthest away from the bulb and faded out moving closer to the bulb. I'm assuming the vertex paint will make the light from the lamp less intense on the object the farther you move away from the bulb? I painted the mesh I'm converting in what I hope is a similar way (although the EA mesh looks darker and the bottom and not as bright at the top). Am I on the right track? EA MESH MY CONVERSION MESH 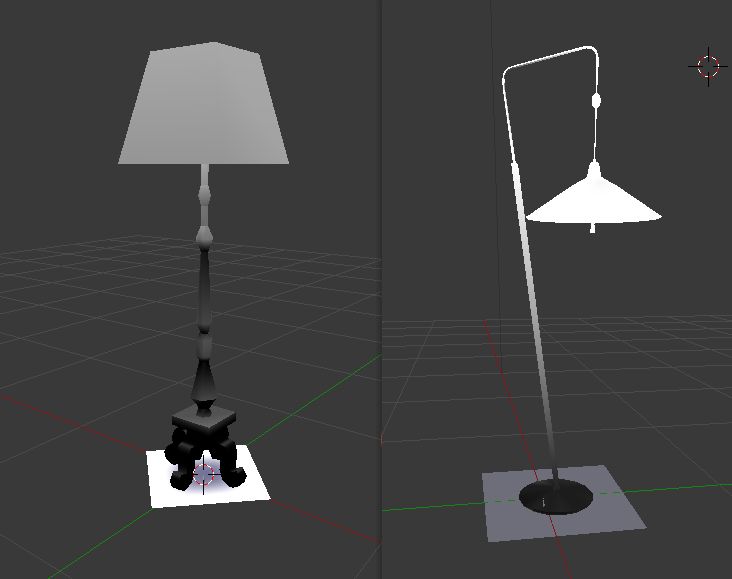 |
|
|
|
Post by kitkat on Mar 14, 2015 22:11:08 GMT -5
Agreed, girlfromverona! S4S has taken into account how creation will be done for Sims4. Creators will not just be creating one version that downloaders can CASt to their heart's content. We will necessarily be providing MANY recolors with each mesh. S4S accommodates that and makes it a BREEZE. I cannot tell you how much I appreciate the ability to recolor Sims 4's already included swatches instead of having to create a new one for every recolor I want to provide. AND how wonderful it is that the texture import screen and the swatch adjustment menus are IN THE SAME PLACE. You guys really thought this out, and it is sooooo appreciated :D Not to mention I have not had a single "memory exception failure" (I think that's the term, I should have it memorized after how many times I encountered it over the past project) tonight. I am one happy simmer right now!  EDIT TO ADD - that is supposed to be a happy dance gif! Imagine it dancing  |
|
|
|
Post by kitkat on Mar 14, 2015 20:14:09 GMT -5
|
|
|
|
Post by kitkat on Mar 14, 2015 18:22:33 GMT -5
Thanks! I got it to work by installing Blender on my C Drive instead of the D and redoing the Blender path. Not sure what fixed it - changing drives (Sims 4 and S4S were both on C) or if I just had the path mapped wrong all along. Thank you for your replies :D
|
|


 And the link is fixed!