|
|
Post by Mathcope on Feb 5, 2017 9:13:44 GMT -5
Can you post the .package of this item so we can see what's wrong?
|
|
|
|
Post by Mathcope on Feb 5, 2017 8:06:08 GMT -5
This is a bug with Studio, and will be fixed in the upcoming version.  |
|
|
|
Post by Mathcope on Feb 5, 2017 8:04:37 GMT -5
You forgot to delete the reference of the shadow lods in the "Model" Resource. Can you try if that fixes it? 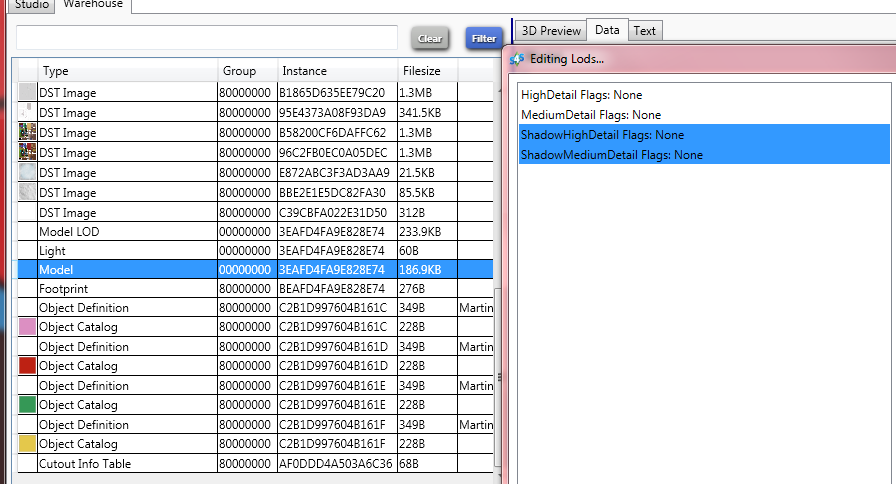 edit: That didn't seem to have fixed it. But still is a thing to do. :( |
|
|
|
Post by Mathcope on Feb 4, 2017 19:40:29 GMT -5
simtress You need to check if that mod is updated to the new version of the game. Where did you download it? What I can say is that the cheat itself have not changed. The cas.fulleditmode still works as normal if you type it. So it should be working if the mod is updated
|
|
|
|
Post by Mathcope on Feb 4, 2017 13:49:45 GMT -5
jorjae Each project is different. There are a lot of things that could be wrong in yours. Without the .package AND the .blend file it's not possible to help you out the best way possible. HERE is a tutorial about weight transfer, that as you said, it might be the issue.
|
|
|
|
Post by Mathcope on Feb 4, 2017 11:44:38 GMT -5
This was from the beginning of Studio as far as I know...
|
|
|
|
Post by Mathcope on Feb 4, 2017 2:43:08 GMT -5
Hi, I see no problem in the package. What do you mean with wrong shadow outside? Can you post a pic?
|
|
|
|
Post by Mathcope on Feb 4, 2017 1:55:42 GMT -5
You're welcome. I can take a look at the new .package if you need, but unfortunately that link is not working, it links me to this threads instead to the package.
|
|
|
|
Post by Mathcope on Feb 3, 2017 19:42:57 GMT -5
Ok. So I looked into the object and I was able to fix the issues. 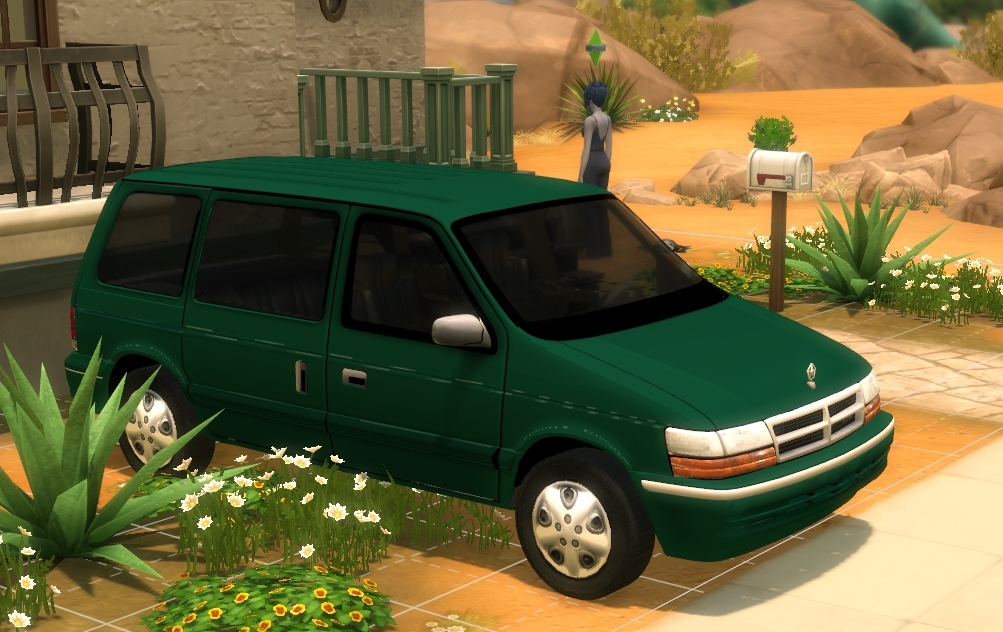 This the result that you'll get in game if you follow these steps: 1. I did a traceback on your images at the warehouse and apparently you imported the wrong texture for the bump map and the specular. These are different maps that need different textures. Your blank bump won't work as a black specular and neither the other way around.  The first The first DST image starting from top is the specular of the "Phong" group, let's say the Car mesh without the glasses. Your specular was wrong. I just imported a blank spec. You can look in the forum tutorials for it but I made my own. Making sure the RGB and the ALPHA was fully black. I will link them to you anyways at the end of the tutorial. The second is the diffuse of the Car WITHOUT the glass. So if the glass is textured or colored in this diffuse, it won't show up in game because they are in another diffuse. The third is the bump map for the Car, just to make sure, I made my own bump map to replace.
The fourth DST image is the specular for the GLASS group. You can play with it to be shiny or whatever you'd like, I just imported the blank specular. The fifth is the DIFFUSE of the glass group. If you want to colour the glasses , you need to import a texture to it. Also, if you'd like it to be transparent, you need to set opacity low if using .png, or making an alpha and playing with greyscale if you're using .dds. I made a quick transparent black texture for it to test. The sixth and final DST image is the bump map of the glass. I imported a blank one too. This will fix the shiny problems in game and the remains of the clone's textures. 2. The shadow lod mesh. This is a mesh that's used to cast the sun shadow in the game. You need to create your own. What I did, is open your Car mesh and delete the SHADOW plane and the GLASS group. You must remain with only one group. The car mesh. Then check that the CUT number in the right is set to 0. Save the .blend with another name than the original. 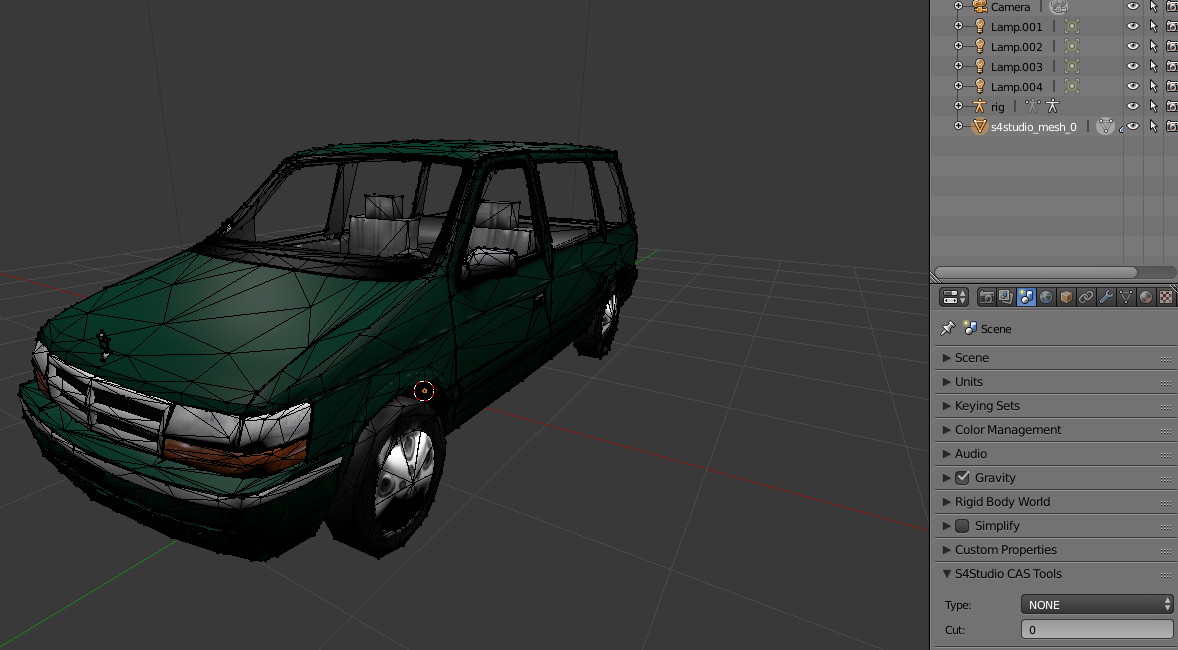 Once in Studio, you need to go to the MESH tab and chose from the list menu the SHADOW LOD 0. Then import the blend you just created.  3. Removing Occluders. Sometimes, occluders might get some weird shadows in the mesh and we need to fix it by removing them. To do that, go to the LIGHT resource in the warehouse. You will see Occluders in the right menu. Click edit.  You will see a popup and click the clear button. Then save and save again the .package. Put in game and test. It should now display correctly. HERE is a .RAR with everything I used to fix it. I case you get stuck or what to see closer. Good luck! |
|
|
|
Post by Mathcope on Feb 3, 2017 18:32:09 GMT -5
Ok. As far as I know the MAC version also has that function, so you should be fine. Don't worry, when you update the .package I can take a look |
|
|
|
Post by Mathcope on Feb 3, 2017 16:40:37 GMT -5
So I looked at it and I can't find other issue than a texture of the body overlaping the top`.  I don't know why it is exploding. Did it get fixed when you cloned another garment? Maybe someone more experienced in CAS could tell you the reason. |
|
|
|
Post by Mathcope on Feb 3, 2017 16:25:23 GMT -5
I think this could be caused because you're applying the filter to one layer and not to all (if there are more than one). If there are many layers I think it would be better if you merge them before doing the filter.
Also, try not to push the motion blur numbers to the limit. It will start to look unrealistic because the lines will be too straight.
|
|
|
|
Post by Mathcope on Feb 3, 2017 16:22:46 GMT -5
Hi! The shine issue could be caused most like it by the Specular. You need to make a new one for TS4 since it works different that it did for TS3. The shadow is wrong because you need to import a shadow mesh. This mesh is the responsable of casting the sun shadows. If you did not import this in Studio it won't be generated automatically. Also, if you post the .package I can guide you through the project easily |
|
|
|
Post by Mathcope on Feb 3, 2017 16:11:06 GMT -5
It happened once to me, but when I recloned the issue was gone. However they will fix this in a upcoming version of Studio, so don't worry. The vampire eyes came out wonderfully! I really like the finished result. EA should have included ones with this effect. Good work @wj Where are you going to share them? |
|
|
|
Post by Mathcope on Feb 3, 2017 16:09:21 GMT -5
Can you post the .package updated? The emission is added into the geometry resource. However, with Harmony this should be done automatically when you import a emission map in the Studio tab. If it's a bug it will be fixed for sure. But you might also be doing something wrong. Have you seen THIS tutorial? It explains there how the emission works and how you need to set up the image to import into Studio. I think the easiest way is to use .dds in this case. Have you added an alpha? |
|


