|
|
Post by ikarisims on Jan 21, 2022 15:57:24 GMT -5
Hello  long time I don't post something on here. So let's get to the point. I'm trying to create a fishnet dress that works as an accessory using the simglass shader, everything went well till I add the gems on top of the fishnet. The fishnet itself looks clean, just as the texture looks on photoshop.  But when I add the gems and the sparkles for some reason it makes the texture look dirty creating black spots around them. It looks like this on s4 studio, on blender and in game. I tried all sort of things, I tried exporting the file as .dds instead of .png and the black spots are less noticiable but they're still there. I tried making the gems into a separate package that goes on top of the fisnhet dress and no black spots but it makes the fisnhet look darker and didn't like the result. 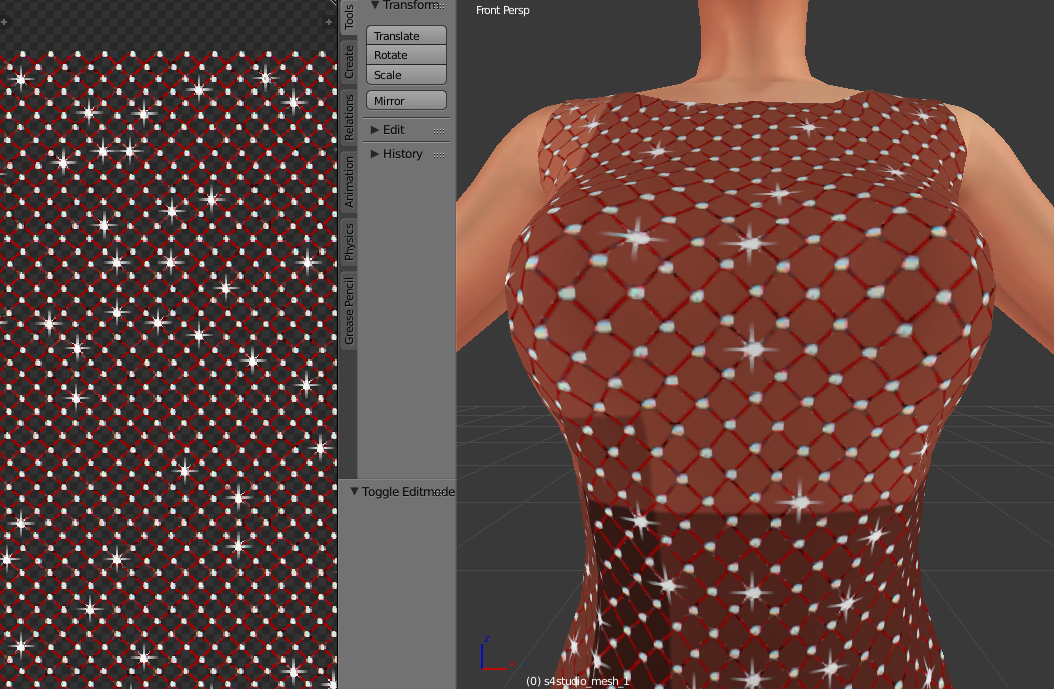 ![]() So any ideas how can I optimize the texture to look just as I intended? I appreaciate any ideas I can try cause I'm out of them :upset |
|
|
|
Post by ikarisims on Aug 8, 2018 20:00:56 GMT -5
Ah that sucks! :( I was trying to avoid that, cause the geometry of the mesh doesn't fit the sheer texture and the mesh will still look shiny in that part. Anyway thanks, I'll have to do it that way
|
|
|
|
Post by ikarisims on Aug 8, 2018 18:41:19 GMT -5
Hey there  , I come once more for some help. So I'm working on a top that has a sheer part and a solid part combined, this was made using the alpha channel (pic 1), so I'm using the glass shader. The thing is that I already did this on another top and worked just fine (pic 2), but in this case I have no idea where is the issue. I even cloned the one that worked fine to make the new top but still the same issue. The specular map is made identically, correct size and everything but still shiny. I tried cloning different tops and the problem is still there. Then I figured out that when I set the shader to simskin the mesh doesn't look shiny anymore (pic 3), so I'm guessing there's some conflict with the shader, but still don't know how to solve it. Hope you can help me, thanks in advance! I drop here the links for the .blend file and the .package so you can take a look at them  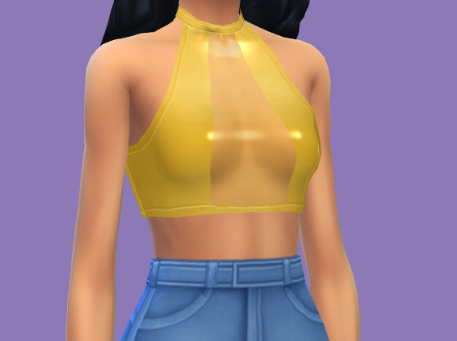 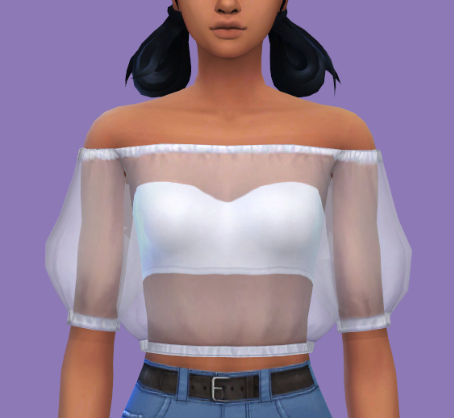 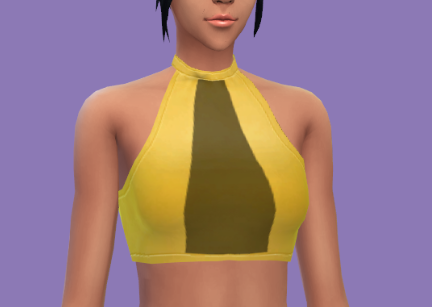 |
|
|
|
Post by ikarisims on May 27, 2018 0:38:53 GMT -5
Thank you so much, I'll keep this in mind next time cause I love doing frankenmeshes  Sii, volví hace poco después de mil años sin postear nada y también te busqué pero vi que no posteabas nada hace unos meses :'( gracias <3 |
|
|
|
Post by ikarisims on May 26, 2018 23:37:59 GMT -5
Hola ikari! I'm looking at the blend and i can suggest two things: I'm not seeing any issues with uv_1 you transferred at first glance. But i noticed that in vertex paint mode the edges of the frills are yellow. I would paint the whole mesh with hex 00FF00 to remove one possible cause. As for the weights, that particular part has vertices with more than 4 bones at once. One has even 6, i suggest setting them all to 4 that is the limit the game reads per vertex. You do this by going into weight paint mode, from the side bar you press "limit total" and it will automatically fix them all for you at once. You can try the first fix and test it in game, and then the weights if that didn't fix it. Or simply all at once, your call :D Let us know how it goes! Hola!! tanto tiempo Well I checked the first thing before posting but to my eyes everything was green lol, but now that you mention I see that the frills are a slightly ligther green than the rest, anyway I fixed that but nothing changed really. But I had no idea about the second solution, it solved my problem! Thank you a lot :D  now it looks how I wanted! 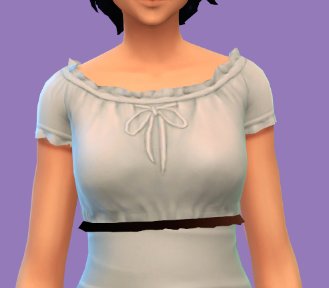 Btw can I ask how can I tell which vertices are attached to which bones? And what causes that? I guess cause that part of the mesh was originally in another part of the body but I'm not sure. |
|
|
|
Post by ikarisims on May 26, 2018 19:48:35 GMT -5
Hello! It's been a while since I came here for help lol but I honestly don't know what I'm doing wrong. So I'm working in a top that's kinda a frakenmesh of this base game blouse 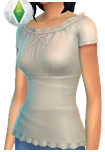 I chopped it and took the frilly thing in the bottom and merged the vertices to make it look like this (don't mind the texture looking weird cause I didn't touch it yet) 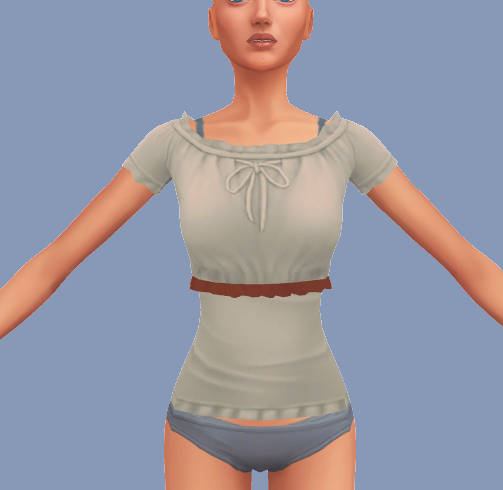 And I already did something similar with another mesh and it looked fine. Buut in this case the frills are looking weird in CAS, they look broken 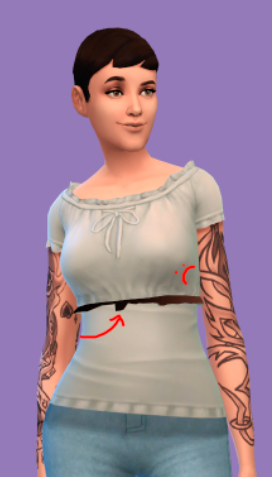 And I tried re doing the uv_1 over and over and also copying the weights from different meshes but the result is always the same, I'm clueless here. I let you a link here for the .package and .blend files so maybe someone can take a look at it and spot where is the flaw. Thank you in advance! |
|
|
|
Post by ikarisims on Sept 23, 2016 16:06:04 GMT -5
Oh! I didn't realize the cc had to go in a S4S-specific folder and not just the normal mods one. Thank you so much for clearing that up! Don't worry! Glad you find the solution |
|
|
|
Post by ikarisims on Sept 22, 2016 20:04:25 GMT -5
Be sure that you are putting the mods you want to appear in sims 4 studio in the correct folder. It is located in my documents > Sims 4 studio > Mods. Hope that helps to solve your problem |
|
|
|
Post by ikarisims on Sept 21, 2016 14:30:36 GMT -5
|
|
|
|
Post by ikarisims on Sept 21, 2016 10:47:46 GMT -5
i really wish i knew this too. It would help me a ton, sorry i am not a huge help but the community here seems very quiet i hope you get your awnser soon. |
|
|
|
Post by ikarisims on Sept 21, 2016 10:46:28 GMT -5
If it doesnt work with sliders the most posible reason is that the uv 1 is not correct. Post your file so someone can take a look. Edit. I juust realize you did post the file. Sorry. I will look into it if anyone hasnt by the evening. Im at my phone right now. |
|
|
|
Post by ikarisims on Sept 21, 2016 10:43:58 GMT -5
I checked your package and see that uv_1 is not edited properly. It should be placed over specific areas on the legs. Right now uv_1 is placed somewhere on sim's face so the game doesn't know that it suppose to work with leg sliders. Check this tutorial for more information. I used a layout for uv_1, you can find similar layout in tutorial that I gave the link to. |
|
|
|
Post by ikarisims on Sept 21, 2016 2:22:42 GMT -5
Why don't you just use the alpha to make it transparent where you want it. cas objects don't have an alpha shader.. instead you have to use the glass shader. (which might cause transparency issues) Yes, I'm afraid you can't do that. If you modify the alpha of the texture only it will end up looking black, not transparent. As inabadromance said cas objects don't have an alpha shader, you need to change the shader to glass shader to get the transparent look. That's why I need separated meshes. Thanks anyway! |
|
|
|
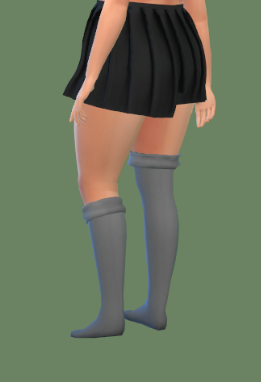
Post by ikarisims on Sept 21, 2016 2:00:43 GMT -5
Hello there! I'm in need of some help here. So, I meshed a pair of socks from scratch (actually only the top part, as the rest of them will be painted on the body) It doesn't have any texture yet as I can't make the mesh work correctly >w< 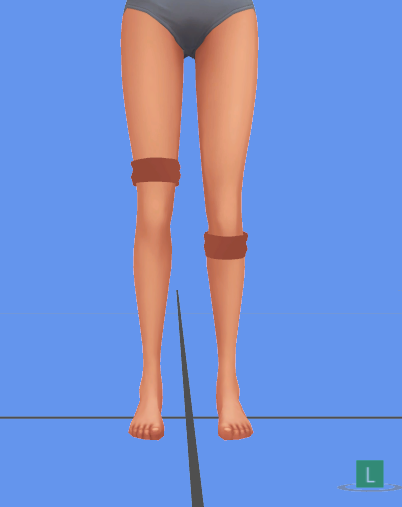 The thing is that they don't work with sliders in game. The just don't move at all. 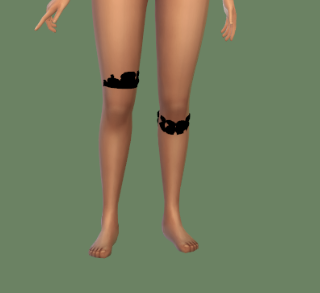 I cloned a bracelet from base game. I unwrapped uv_0 and uv_1 (I didn't finished the uv_1 but I guess if its unwrapped they should be working with the sliders, not good, but moving at least), did the vertex paint and copied the weights too. Changed the sort layer number, if it has something to do with it and still nothing. So I ran out of ideas, don't know where it went wrong. I let you the package file here so you can give it a look and help me! Download
Thanks in advance, I hope somebody can help me out here!  |
|
|
|
Post by ikarisims on Aug 7, 2016 15:22:19 GMT -5
Thanks for your reply :D, I saw this tutorial but it's not very clear in the part of adding geometry, or at least, I couldn't understand it. Guess I have to keep trying :(
|
|


 long time I don't post something on here. So let's get to the point. I'm trying to create a fishnet dress that works as an accessory using the simglass shader, everything went well till I add the gems on top of the fishnet. The fishnet itself looks clean, just as the texture looks on photoshop.
 , I come once more for some help.


 now it looks how I wanted!